
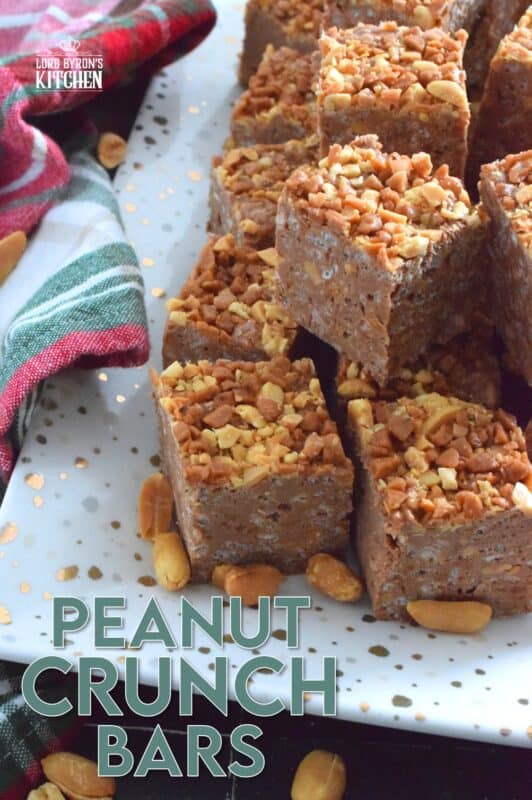
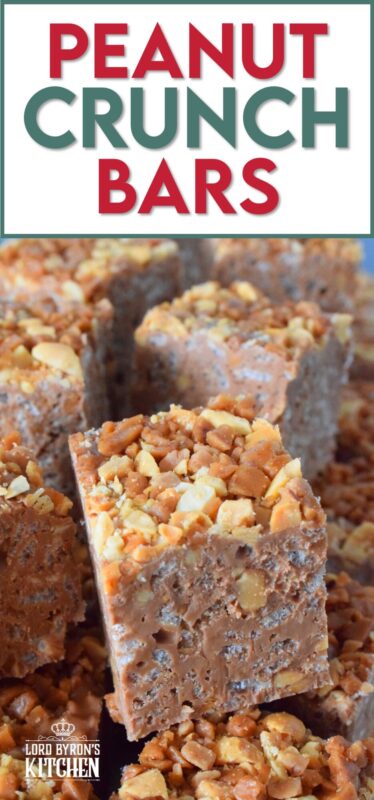
These no-bake bars are super delicious! Prepared with both milk chocolate chips and peanut butter chips, these Peanut Crunch Bars are loaded with crispy rice cereal, toffee bits, and chopped, salted peanuts too! Who needs store-bought treats when you can whip up a batch of these in mere minutes!?

Even a dieter needs a treat once in a blue moon. It seems I’m always on a diet. But, at Christmas time, I throw caution to the wind and adopt the common belief that calories don’t count at this time of year. I made these Peanut Crunch Bars to have a bite or two without feeling guilty, but I ate the whole bar without hesitation.
Peanut Crunch Bars are extremely delicious and extremely easy to prepare. They are no bake, which makes them perfect for the holiday season when it seems that time moves even more quickly. And, since the kids are out of school for two weeks, they’re a great option for kitchen time spent with the little ones in your family.
Before we get into the recipe and the ingredients, I want to get this one thing out, because I’m sure I’ll forget if I wait until the end. When you are ready to cut these into bars, let them sit at room temperature for 15-20 minutes. This will give you a cleaner cut. Presentation is just as important as taste, so take your time and let the chocolate mixture come almost back to room temperature before slicing. We eat with our eyes first, after all!
Make your own online recipe box!
Click the in the lower right corner of your screen
& follow the quick and easy instructions!
LORD BYRON’S 12 BARS AND SQUARES OF CHRISTMAS
Peanut Crunch Bars are the third holiday confection in my new series! Yes, that’s right, Dear Reader! I’m kicking off another holiday baking series, just like I have for the past few Christmases! Welcome to Lord Byron’s 12 Bars and Squares of Christmas!!!
If you have been reading my blog for while – well, at least anytime around Christmas for the past few years – you must have run into at least one of my Christmas baking countdowns. This particular countdown is all about bars and squares. For 12 consecutive days, I will share a holiday-based bar or square recipe with you. That means on Saturday and Sunday too! I usually publish new recipes three times a week, so I hope you’re up for this!
You really don’t want to miss one of these recipes, so if you have not yet subscribed to Lord Byron’s Kitchen, I encourage you to do so. That way, a new recipe will be emailed to you every day. You won’t have to bother to come looking for it! Like in previous holiday baking countdowns, I like to mix up the recipes in the series so that there is something for everyone. There will be bars and squares with chocolate, some with candy, and some with nuts too. Are you ready for day 3!!??
Looking For More Christmas Confections?
Lord Byron’s Kitchen has more than enough to satisfy your sweet tooth! Click on the links below to see a countdown series of holiday recipes from that category!
NO-BAKE RECIPES
I used to think that the term no-bake meant that a recipe was more of an assembly-type recipe. Something like a salad, for example. It sounds simple enough, right? Toss the lettuce and any other veggies you want into a bowl. Top it with cheese, croutons, avocado, hard-boiled egg, etc. Add some dressing and you’re all done! But, no-bake actually just means no baking. There still might be some stove-top cooking needed – or even a microwave, for that matter.
To prepare these Peanut Crunch Bars, you will need to use your microwave. So, even though they’re no-bake and kid-friendly, you will still need some way to melt the chocolate.
Some other no-bake-type holiday recipes you might enjoy are these Rudolph’s Red Nose Cookies. Hairy Moose Droppings are delicious and always quite the conversation starter! Just like these Caramel Peanut Slices were a favourite of my mom’s so were these Marshmallow Coconut Balls and so were these Christmas Crunch Cookies. You can find many more no-bake cookie recipes here at Lord Byron’s Kitchen by using the search field at the top of this page.

INGREDIENTS NEEDED TO PREPARE THIS RECIPE
The following is a list of the ingredients needed to prepare this recipe. For exact amounts and measurements, refer to the printable recipe card located near the bottom of this post.
- Chocolate Chips – I use chocolate chips a lot in my recipes, and I change up the type depending on how I feel. Unless the recipe states otherwise, you can use milk, semi-sweet, or dark chips. In this particular case, milk chocolate just seems to work better.
- Peanut Butter Baking Chips – They can be found in almost all grocery stores. I know for a fact that you can find them at Walmart and Target. You can also order them online.
- Peanut Butter – A paste or spread made from ground, dry-roasted peanuts, along with sugar and other additives. I always use regular peanut butter, not the expensive natural peanut butter or nut butter when baking.
- Rice Krispies Cereal – Just about everyone is familiar with this. Wasn’t it, after all, the breakfast of champions in the 80s? Or was that Frosted Flakes? Ha!
- Toffee Bits – Toffee is made by cooking butter and brown sugar together until caramelized. Once cooled, the toffee is broken into small bits.
- Peanuts – Roasted peanuts have the best flavour. If you need chopped peanuts, buy whole peanuts and chop them yourself. You’ll get a better consistency and a fresher peanut flavour. Unless otherwise stated, always use unsalted peanuts in recipes.
LET’S TALK PEANUT BUTTER!
Before you are tempted to send me an email or a comment knocking my choice of peanut butter that is not natural and organic, hear me out! This recipe will not work with natural peanut butter. I repeat, this recipe will not work with natural peanut butter. There, I said it. Now, if you go ahead and make this recipe using natural peanut butter and it comes out a big, wet mess, you cannot blame me.
John.e uses only natural peanut butter, but I do not. I do not like it at all. Yes, it’s healthier and better for me, but I’d rather not eat it at all if I have to choose the natural stuff. I grew up on Kraft or Jiffy peanut butter and it’s the only peanut butter I ever use.
For these Peanut Crunch Bars, you will need to use smooth peanut butter. I haven’t tried them with crunchy peanut butter, but I think it would work just fine. In fact, the crunchy peanuts might be quite lovely! Sorry, but you do not have a choice between all-natural and sugar-laden, mass-produced stuff. The bars will not be set up firmly when chilled. Mostly, it certainly will not taste right. If you are completely against using non-natural peanut butter, as harsh as it may sound, this recipe is most certainly not for you.

TOASTING THE PEANUTS
The first thing you should do is toast the nuts. How do you do that? It’s very simple! To be perfectly honest, this applies to any nuts or seeds, not just the nuts in this recipe. If you are not familiar with toasted nuts, then please try it just once. You will probably never revert to using nuts in your cooking or baking again without toasting them first!
I have tried using non-stick frying pans for toasting, but nothing works as well as a stainless steel pan. You could use a cast iron pan, but since they get very hot and retain heat so well, it’s easier to burn the nuts. See the frying pan in this picture? That’s the exact one that I use all the time. I’m not suggesting you run out and buy this same cookware set, but I want you to see the pan – remember, do not use non-stick if possible. You’ll get better results with plain stainless steel.
Do you have a question or comment?
Would you like to leave a review?
Scroll down to the comment section and write me a message.
I will personally respond as soon as possible!
So, unlike most cooking where you’re required to preheat first, you don’t want to apply that same rule to toasting nuts. Add the nuts to a cold pan. Place the pan on the burner and turn the heat on – no higher than medium and probably even less if using a gas burner.
Keep the nuts moving about. I use a rubber spatula. Once you start to smell that warm and toasty aromatic smell, pay close attention. The nuts will take on a darker colour. Don’t let them get too dark. Once you’re satisfied, immediately remove them from the hot pan and transfer them to a dinner plate where they can be spread out to cool.
Lord Byron’s Annual Christmas Cookie Series
Did you know that Lord Byron’s Kitchen has been sharing a 24 Cookies of Christmas Series for the past several years? Click on the links below to see all of the recipes from each series on one page!
HOW TO MAKE PEANUT CRUNCH BARS
This no-bake recipe comes together quickly and easily. The first thing you should do is to prepare a 9 x 9 inch baking pan by lining it well with parchment paper. Fold the parchment paper so that it fits snugly in the pan. I use two sheets – one folded to fit the length of the pan and another folded to fit across the pan. Allow the excess parchment paper to hang out over the side of the pan. Once the confection is firm, use the excess parchment to lift the whole block out of the pan to make it easy to cut into bars.
Next, in a large, microwaveable bowl, melt the chocolate chips, peanut butter chips, and peanut butter on high speed in 30-second intervals, stirring well between each increment, until melted and combined. Add the cereal, 3/4 cup of the toffee bits, and 3/4 cup of the chopped toasted peanuts. Use a sturdy spatula to stir until all of the ingredients are well combined.
Transfer the mixture to the prepared baking dish. Press down with the spatula to flatten slightly. Sprinkle over the remaining toffee bits and chopped peanuts. Set aside to cool for one hour. It’s best to let it sit at room temperature for at least one hour to help temper the chocolate. Slowly cooling will prevent the milk solids from separating. This is not a huge concern with chocolate when mixed with peanut butter, but why risk it? After the hour has passed, transfer it to the fridge for another 60 minutes to chill. Before attempting to cut into bars, remove from the fridge and let set at room temperature for 15-20 minutes.
To cut, use the overhanging parchment paper to lift the entire pan of confection out of the baking dish. Remove and discard the parchment paper. Set the large square onto a cutting board and use a sharp knife to cut into your desired size. Once cut, store the bars in an airtight, food-safe container and keep them refrigerated. Squares will last 7-10 days in the fridge. Squares can be frozen for 2-3 months.
FAQs
- Do I have to use milk chocolate chips? No, you most certainly don’t! Personally, I prefer milk chocolate over semi-sweet or dark, so it’s probably why I think they taste better with milk chocolate. If you don’t have milk chocolate, go ahead and use semi-sweet. I can’t recommend using dark chocolate though, because I’ve never used it in this recipe before. I used chocolate chips to keep the bars more budget-friendly. If you prefer, you can use milk chocolate bars for baking.
- I can’t find Rice Krispies Cereal. No worries! You can use other cereals like Special K or Chex. In fact, you could skip the cereal completely and use crushed pretzels or even more toasted peanuts!
- Want thinner bars? I’m using a 9×9 inch baking pan, however, you can use a 9×13 pan if you prefer a thinner bar.

STORING, PACKAGING, & FREEZING
Most no-bake confections are made without the need to freeze them for long periods of time, but they can be frozen. For this recipe, I have tested whether or not they can be frozen, and they certainly can! Once they are completely firm, pile them into a clean, food-safe container. The container must be freezer friendly! You’ll want to ensure a very tight-fitting lid too. I use these quite often when freezing baked goods. I like to place a sheet of plastic wrap over the top of the container before pushing the lid on. This helps to create a better seal. The goal is to keep all of that freshness locked in! You can freeze these for up to three months.
Do You Like This Recipe?
You should consider trying these other delicious recipes too!


Peanut Crunch Bars
Ingredients
- 2 cups milk chocolate chips
- 2 cups peanut butter baking chips
- 1 cup smooth peanut butter
- 4 cups rice krispies cereal
- 1 cup toffee bits
- 1 cup chopped salted peanuts, toasted
Instructions
- Prepare a 9 x 9 inch baking pan by lining it well with parchment paper. Fold the parchment paper so that it fits snugly in the pan. I use two sheets – one folded to fit the length of the pan and another folded to fit across the pan. Allow the excess parchment paper to hang out over the side of the pan. Once the confection is firm, use the excess parchment to lift the whole block out of the pan to make it easy to cut into bars.
- Next, in a large, microwaveable bowl, melt the chocolate chips, peanut butter chips, and peanut butter on high speed in 30-second intervals, stirring well between each increment, until melted and combined.
- Add the cereal, 3/4 cup of the toffee bits, and 3/4 cup of the chopped toasted peanuts. Use a sturdy spatula to stir until all of the ingredients are well combined.
- Transfer the mixture to the prepared baking dish. Press down with the spatula to flatten slightly.
- Sprinkle over the remaining toffee bits and chopped peanuts. Set aside to cool for one hour.
- After the hour has passed, transfer it to the fridge for another hour to chill.
- Before attempting to cut into bars, remove from the fridge and let set at room temperature for 15-20 minutes.
- To cut, use the overhanging parchment paper to lift the entire pan of confection out of the baking dish. Remove and discard the parchment paper. Set the large square onto a cutting board and use a sharp knife to cut into your desired size.
- Once cut, store the bars in an airtight, food-safe container and keep them refrigerated.
Nutrition
Did you make this recipe?
Upload a photo and tag me so that I can see it!


Leave a Reply