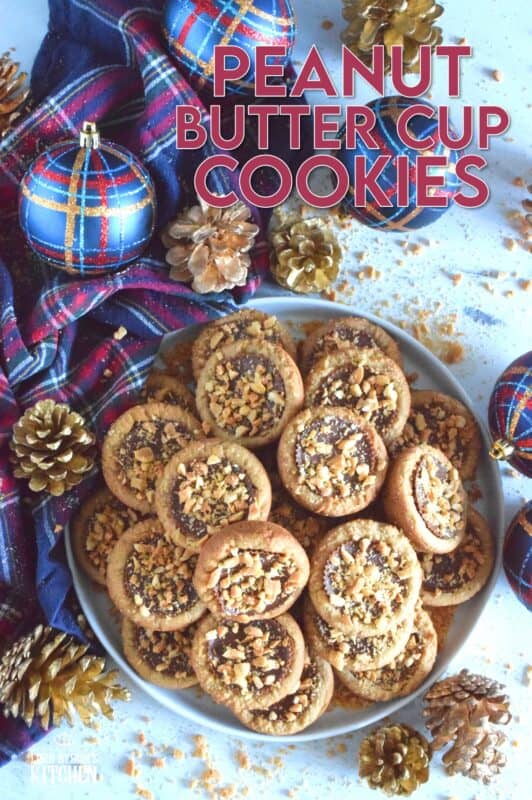
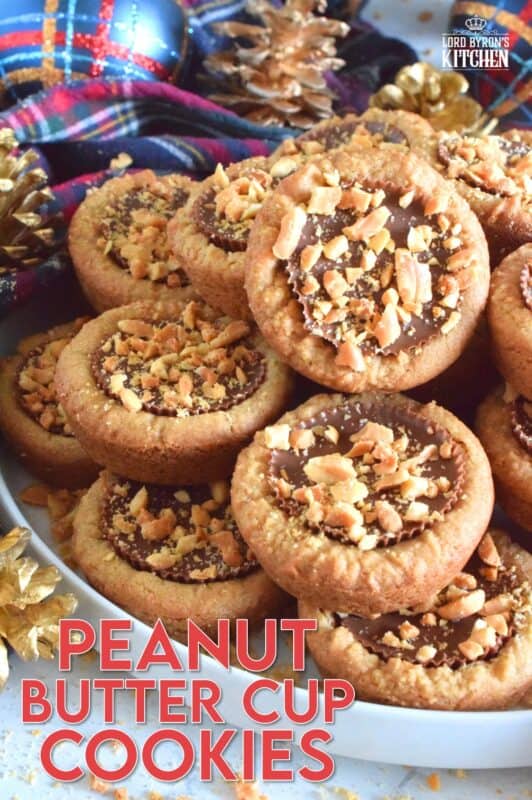
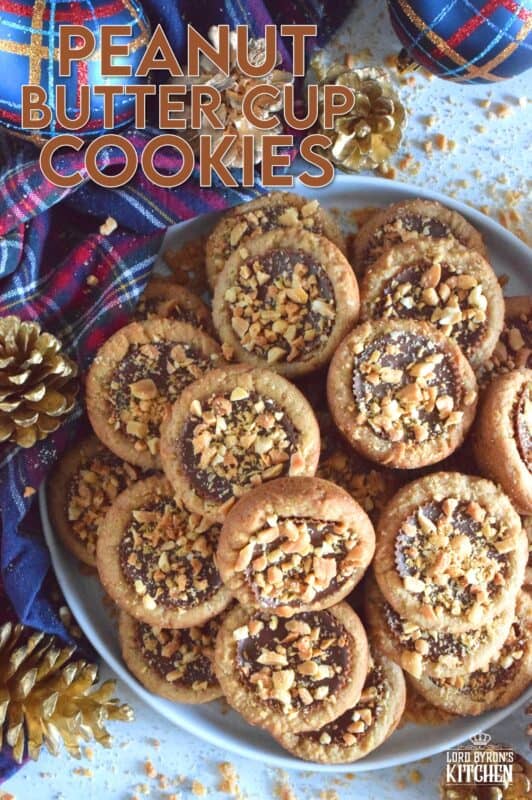
Thumbprint-style cookies are very popular at Christmastime, so why not over-stuff them with a full-sized Peanut Butter Cup? These cookies are so easy to make and are baked in muffin tins! Push in the peanut butter cup and top with chopped peanuts for more texture and flavour!

Peanut Butter Cup Cookies are big, bold, and brazen – aren’t they? They’re totally defying all of the rules of thumbprint cookies, which are usually topped with a Hershey’s Kiss. Sometimes, they’re topped with jam or a ganache. But, not on today! (Extra points if you know who is responsible for that phrase!) Today, I’m stuffing a peanut butter cookie base with a full-sized peanut butter cup. I told you; brazen!
So, we before I get too into this recipe, I must confess that I don’t love Reese’s Peanut Butter Cups that much. Don’t get me wrong, the taste is wonderful! Who wouldn’t love the combination of peanut butter whipped with confectioner’s sugar and coated in milk chocolate? The problem I have with them is that they are just too sweet. Maybe that’s a good thing, because it prevents me from eating too many of them.
Make your own online recipe box!
Click the in the lower right corner of your screen
& follow the quick and easy instructions!
In this cookie, however, which is not overly sweet at all, the overly sweet Peanut Butter Cup is more tolerable to my overly sensitive palate. The cookie subdues the sweetness of them, and in my world, that’s a great thing! I was able to eat these cookies with no problems at all. Not once did my jaws quiver uncontrollably, which is what happens when I taste something super sweet.
Before I settled on this particular version that you see in the photographs, I had tested the cookie with the new thinner Peanut Butter Cups. They were good, but the thinner cups got a little lost in the cookie and even though they tasted great, there was still room for improvement. I also tried them with white chocolate Peanut Butter Cups. Also good, but to me, not as good as the orignal.
Why am I telling you this? Just so you know that you can use thinner or white chocolate Peanut Butter Cups if you prefer. In fact, if you have mini muffin pans at home, you can make these cookies in those instead of a normal-sized muffin tin. Cut back on the amount of dough you put into each muffin tin cavity and use the mini Peanut Butter Cups. You’ll get the same great flavour and more cookies!

LORD BYRON’S 24 COOKIES OF CHRISTMAS – VOLUME 5
I’m so excited about this year’s cookie countdown! This is the fifth consecutive year; can you believe that? Each of the previous years has included 24 cookies and this year will not be any different. I’ll share a new Christmas cookie recipe each and every single day for the next 24 days – even on Saturday and Sunday!
You might be asking yourself, how many Christmas cookie recipes could one possibly have or need? Well, I say you can never have too much of a good thing. And, I love having lots of choices. Who wants to bake the same holiday cookies year after year?
So, welcome, Dear Reader, to Volume 5 of Lord Byron’s 24 Cookies of Christmas! Fresh off of my 12 Edible Wreaths of Christmas and my 12 Bars and Squares of Christmas series, I’m ready to plow through the next 24 days with you!
You really don’t want to miss one of these recipes, so if you have not yet subscribed to Lord Byron’s Kitchen, I encourage you to do so. That way, a new recipe will be emailed to you every day. You won’t have to bother to come looking for it! Like in previous holiday baking countdowns, I like to mix up the recipes in the series so that there is something for everyone. Are you ready!!??
Looking For More Christmas Confections?
Lord Byron’s Kitchen has more than enough to satisfy your sweet tooth! Click on the links below to see a countdown series of holiday recipes from that category!
INGREDIENTS NEEDED TO PREPARE THIS RECIPE
The following is a list of the ingredients needed to prepare this recipe. For exact amounts and measurements, refer to the printable recipe card located near the bottom of this post.
- Butter – Make sure your butter is at room temperature! To be perfectly honest, I have made these with both salted and unsalted butter and there’s no difference in taste or appearance once all is said and done. Use what you have on hand.
- Peanut Butter – Use smooth peanut butter or the chunky kind with pieces of peanuts in it. I have not tested this recipe with natural peanut butter and to be frank, I don’t think natural peanut butter will work without some adjustments.
- Sugar – Sugar will caramelize when baked, which will help to brown cookies and cakes. In cookies, the sugar will help the dough to spread and will create a crispness to the bottom of the cookie.
- Brown Sugar – First of all, it has way more flavour than regular white sugar! And, in this recipe, brown sugar helps to keep the cookie moist and soft.
- Eggs – Whenever you set out to bake, make sure your eggs are at room temperature too – just like your butter!
- Vanilla Extract – Probably the most common extract and the most common flavouring used in cakes and cookies.
- Milk – When a baking recipe requires milk, I always use whole milk, unless otherwise stated.
- Flour – No need for anything special. Just use regular all-purpose flour. I have not tried this recipe with any other type of flour.
- Salt – Do not add the extra salt if you used salted butter!
- Baking Soda – Commonly known as sodium bicarbonate, or just bicarb, it is a baking ingredient that’s activated by a liquid and an acid to help with leavening or rising.
- Peanut Butter Cups
- Peanuts
LET’S TALK PEANUT BUTTER!
Before you are tempted to send me an email or a comment knocking my choice for peanut butter that is not natural and organic, hear me out! This recipe will not work with natural peanut butter. I repeat, this recipe will not work with natural peanut butter. There, I said it. Now, if you go ahead and make this recipe using natural peanut butter and it comes out a big, wet mess, you cannot blame me.
John.e uses only natural peanut butter, but I do not. I do not like it at all. Yes, it’s healthier and better for me, but I’d rather not eat it at all if I have to choose the natural stuff. I grew up on Kraft or Jiffy peanut butter and it’s the only peanut butter I ever use.
For these cookies, you have the choice of smooth peanut butter or crunchy. But, you do not have a choice between all-natural and sugar-laden, mass-produced stuff. The cookies will not hold together properly. Mostly, it certainly will not taste right. If you are completely against using non-natural peanut butter, as harsh as it may sound, this recipe is most certainly not for you.

TOASTING NUTS
The first thing you should do is to toast the nuts. How do you do that? It’s very simple! To be perfectly honest, this applies to any nuts or seeds, not just the nuts in this recipe. If you are not familiar with toasted nuts, then please try it just once. You will probably never revert to using nuts in your cooking or baking again without toasting them first!
I have tried using non-stick frying pans for toasting, but nothing works as well as a stainless steel pan. You could use a cast iron pan, but since they get very hot and retain heat so well, it’s easier to burn the nuts. See the frying pan in this picture? That’s the exact one that I use all the time. I’m not suggesting you run out and buy this same cookware set, but I want you to see the pan – remember, do not use non-stick if possible. You’ll get better results with plain stainless steel.
So, unlike most cooking where you’re required to preheat first, you don’t want to apply that same rule to toasting nuts. Add the nuts to a cold pan. Place the pan on the burner and turn the heat on – no higher than medium and probably even less if using a gas burner.
Keep the nuts moving about. I use a rubber spatula. Once you start to smell that warm and toasty aromatic smell, pay close attention. The nuts will take on a darker colour. Don’t let them get too dark. Once you’re satisfied, immediately remove them from the hot pan and transfer them to a dinner plate where they can be spread out to cool.

HOW TO MAKE PEANUT BUTTER CUP COOKIES
The Peanut Butter Cups are not placed into the cookie until the cookies have been baked and are removed from the oven. To avoid things like fingerprints on the Peanut Butter Cups, or to keep them from melting too quickly when the come in contact with the heat from the cookies, it’s important to chill them first. So, to start, unwrap them and set them in a single layer on a parchment-lined baking sheet. Place in fridge to chill for 20-30 minutes.
Lord Byron’s Notes
I like to do unwrap the Peanut Butter Cups while wearing a pair of latex gloves, because it’s so easy to get fingerprints all over them while removing that pleated paper cup they sit in. Nobody wants to eat cookies with someone else’s fingerprints all over them!
Preheat your oven to 375 degrees F. Lightly grease two twelve-cavity muffin tins with non-stick cooking spray and set aside. If you have only one muffin tin, you can bake these in batches. In a large bowl, beat the butter, peanut butter, sugar, and brown sugar together until well combined.
Add the egg, vanilla extract, and milk. Beat into the butter and sugar mixture. Measure in the flour and baking soda. Beat until just incorporated. Do not over mix.
Measure out 1 1/2 tablespoons of the cookie dough and roll into a ball. Drop balls into prepared muffin tin cavities. Bake for 10 minutes, or just until lightly golden brown.
Remove from the oven and place a chilled peanut butter cup onto the still-warm cookie and gently press down. Immediately sprinkle over the toasted chopped peanuts. Cool for 3 minutes, and then transfer to wire racks to cool completely.
Lord Byron’s Annual Christmas Cookie Series
Did you know that Lord Byron’s Kitchen has been sharing a 24 Cookies of Christmas Series for the past several years? Click on the links below to see all of the recipes from each series on one page!
STORING, PACKAGING, & FREEZING
When it comes to most cookies, they taste best at room temperature, but they don’t hold up well to being left out on your countertop for long periods of time. Cookies will stay fresh in a cookie jar or food-safe container with a lid for 3-5 days if left to sit on your kitchen countertop. You can store them in a food-safe container in your fridge. When you want one, two, or half a dozen, take them out of the container and place them in a single layer on a plate. Let them sit at room temperature for 5 minutes and they’re ready!
If you plan to freeze your Peanut Butter Cup Cookies, you certainly can! Once completely cooled, pile them into a clean, food-safe container. The container must be freezer friendly! You’ll want to ensure a very tight-fitting lid too. I use these quite often when freezing baked goods. I like to place a sheet of plastic wrap over the top of the container before pushing the lid on. This helps to create a better seal. The goal is to keep all of that freshness locked in!
You can freeze these cookies for up to three months. If you plan to give previously frozen cookies as a gift, I would lay them out on a wire cooling rack to thaw completely. If packaging, wait until the condensation has evaporated. Once thawed, pile into cellophane bags and tie with a ribbon, or stack in a cookie tin/box.

QUESTIONS?
If I have not answered all of your questions in the text above, don’t hesitate to reach out to me! You can contact me by sending me a message in the comments section further down the page. I will try my best to answer as soon as possible! You might reach me even faster by following me on Facebook and sending me a private message. Scroll down to follow me and never miss another recipe!
Finally, as I stated previously, every day I will be posting a new recipe. If you miss one, don’t fret. You can find my entire collection of Christmas Recipes right here! There are over 200 Christmas recipes and counting. There’s something for everyone! Cheers
Do You Like This Recipe?
You should consider trying these other delicious recipes too!


Peanut Butter Cup Cookies
Ingredients
- 1/2 cup butter, softened
- 1/2 cup peanut butter, smooth or chunky
- 1/2 cup brown sugar, lightly packed
- 1/2 cup sugar
- 1 large egg
- 1 teaspoon vanilla extract
- 2 tablespoons milk
- 1 3/4 cups all-purpose flour
- 1 teaspoon baking soda
- 1/2 teaspoon salt (do not add the salt if you used salted butter)
- 24 Reese's Peanut Butter Cups (regular size), unwrapped
- Non-Stick Cooking Spray
Instructions
- The Peanut Butter Cups are not placed into the cookie until the cookies have been baked and are removed from the oven. To avoid things like fingerprints on the Peanut Butter Cups, or to keep them from melting too quickly when the come in contact with the heat from the cookies, it’s important to chill them first. So, to start, unwrap them and set them in a single layer on a parchment-lined baking sheet. Place in fridge to chill for 20-30 minutes.
- Preheat your oven to 375 degrees F. Lightly grease two twelve-cavity muffin tins with non-stick cooking spray and set aside. If you have only one muffin tin, you can bake these in batches.
- In a large bowl, beat the butter, peanut butter, sugar, and brown sugar together until well combined.
- Add the egg, vanilla extract, and milk. Beat into the butter and sugar mixture.
- Measure in the flour and baking soda. Beat until just incorporated. Do not over mix.
- Measure out 1 1/2 tablespoons of the cookie dough and roll into a ball. Drop balls into prepared muffin tin cavities.
- Bake for 10 minutes, or just until lightly golden brown.
- Remove from the oven and place a chilled peanut butter cup onto the still-warm cookie and gently press down.
- Immediately sprinkle over the toasted chopped peanuts.
- Cool for 3 minutes, and then transfer to wire racks to cool completely.
Nutrition
Did you make this recipe?
Upload a photo and tag me so that I can see it!


Leave a Reply