
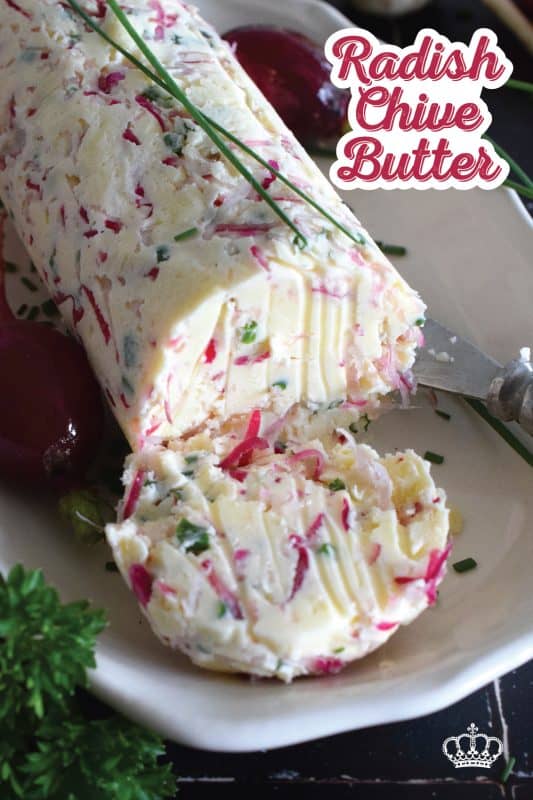
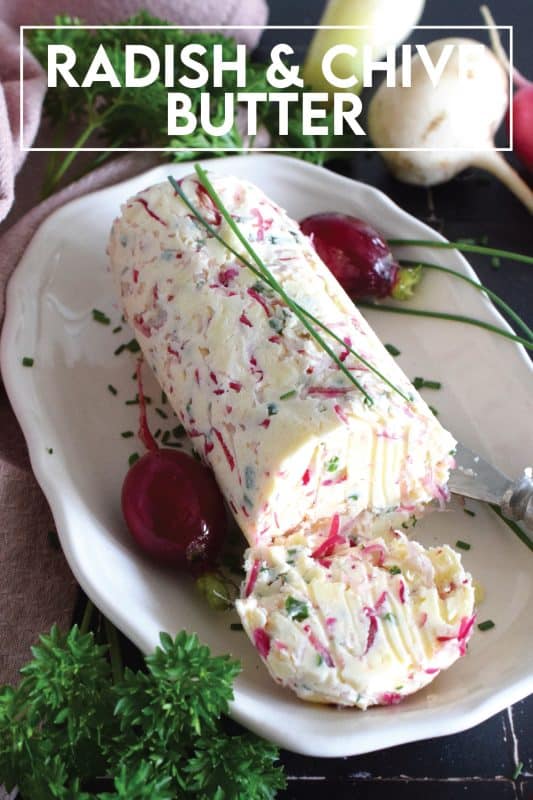
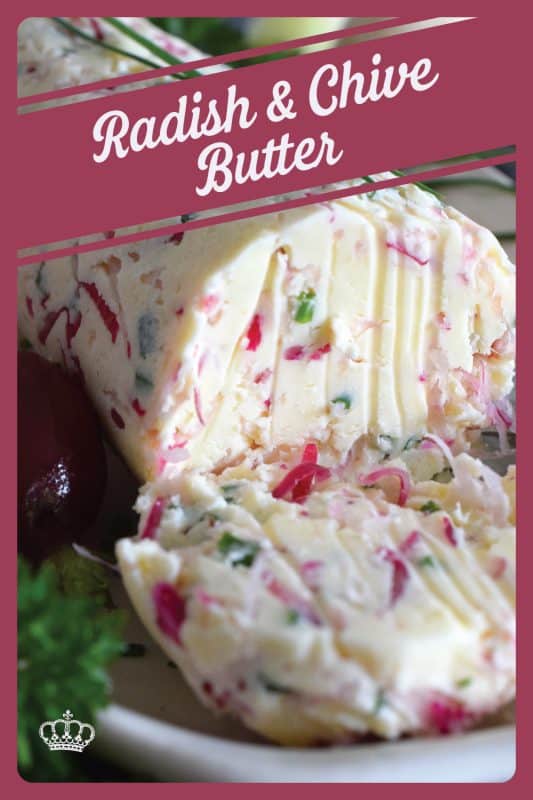
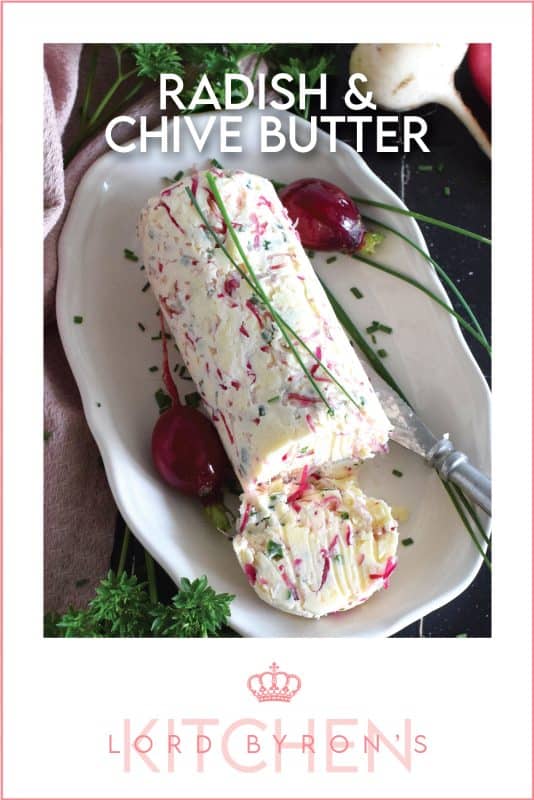
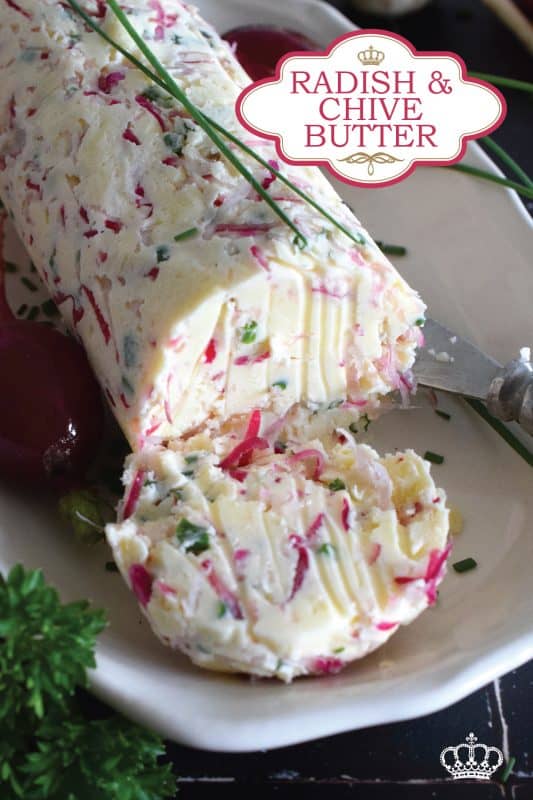
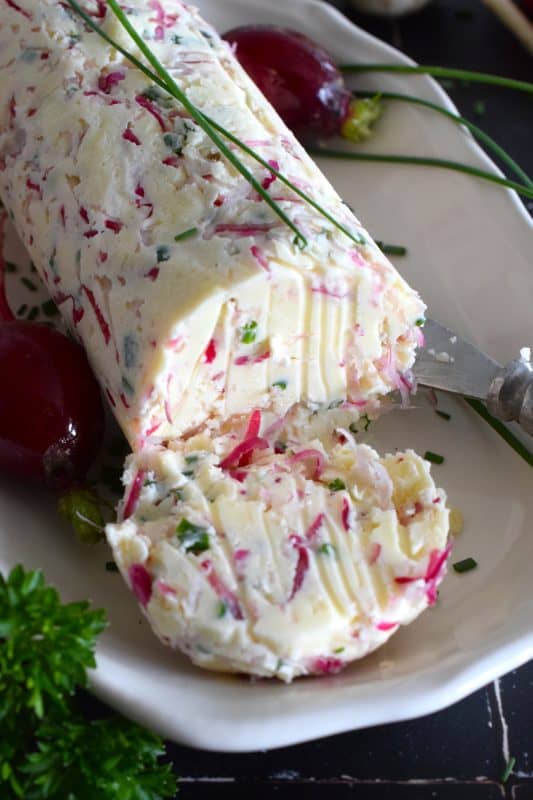
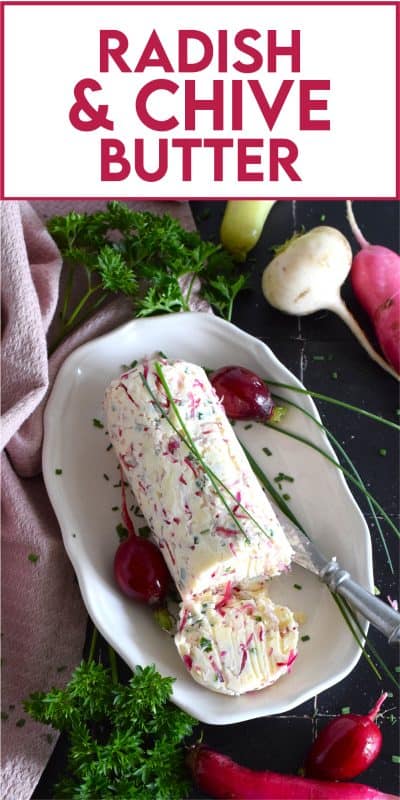
Liberally smear this Radish and Chive Butter onto lightly toasted bread or freshly baked scones. Prepared with fresh ingredients and salted butter, it is an easy to make condiment that is quite delicious! Place a small bowl of it on your next charcuterie board too!
Do you remember the butter board food trend? If not, in essence, it was a layered butter appetizer where softened butter was generously spread on a board or plate and topped with various items to enhance the flavour and texture of the butter. Depending on the flavour profile you prefer, the toppings could include roasted garlic, shaved red onion, chopped toasted nuts, flaked sea salt, cracked black pepper, and a good drizzle of honey. Doesn’t that sound delicious? I tried it and loved it, but I do think I prefer the ease and simplicity of this Radish and Chive Butter.
Make your own online recipe box!
Click the in the lower right corner of your screen
& follow the quick and easy instructions!
Over the past few years, we’ve had cheese boards, charcuterie boards, breakfast boards, and even dessert boards. Now, we have the butter board which is all about aesthetically and visually pleasing spreads that can be shared with family and friends. So, here’s the thing, with all the foods you can put on a board, what’s so exciting about butter?
Well, Dear Reader, I’m a big fan of butter! And, I’m not alone. Butter churning has been practiced for thousands of year with the earliest evidence of it showing up as residue inside a piece of Turkish pottery from 6500 B.C. It tastes so good because of the high fat content paired with the milk solids that create a rich, smooth and creamy, nutty flavour. Now, imagine pairing that was the bright freshness of peppery radishes and chopped chives!
LET’S CHAT ABOUT RADISHES FOR A BIT
Do you buy radishes often? Are they a regular vegetable in your household? I wouldn’t claim that radishes are always in our crisper, but I would be comfortable stating that we purchase a bunch of radishes every few weeks in the winter months. In the summer months, however, we have them more often because I grow them in my garden.
Personally, I love radishes. Most people I know say that radishes are too peppery, but in all of my years on this planet, I have never experienced the pleasure of biting into a peppery radish. Either my taste buds are out of whack, or I can tolerate peppery flavours more than most. John.e, for example, usually has something to say about the peppery taste of most of the radishes we purchase. McKenna doesn’t because she swears she doesn’t like them, although I’ve never seen her try one!
On most occasions – no, all occasions – radishes are consumed raw in our home and only in two different ways. First, we love to slice them super thin or julienne them to toss into a green salad. Secondly, I love to slice them in rounds and dip them into hummus – such a light and tasty snack. Alternatively, I like to roast them in the oven with rosemary. They make a great side dish!
INGREDIENTS NEEDED FOR THIS RECIPE
The following is a list of the ingredients needed to prepare this recipe. For exact amounts and measurements, refer to the printable recipe card located near the bottom of this post.
- Butter – Salted butter works best in this recipe. If you only have unsalted butter, go ahead and add 1/2 teaspoon of salt to the butter.
- Radishes
- Chives – You can also use finely sliced green onions.
- Ground Black Pepper
HOW TO MAKE A WARM RADISH AND PEA SALAD
Add all of the ingredients to a mixing bowl and use a rubber spatula to fold the ingredients together to combine. Serve immediately or transfer the mixture to a piece of parchment paper and roll into a log. Twist the ends of the parchment paper to create a seal and to tighten the log. Refrigerate until ready to use. If refrigerated, allow the Radish and Chive Butter to rest at room temperature for 20 minutes before serving.
HOW TO CLEAN RADISHES
In most cases, the radishes you buy in the produce section of a grocery store will have the leaves attached, but the long tails will be trimmed. When you grow them, you get the choice to remove the tails or leave them on. I think they look more interesting with them on, but I previously learned that they become a little stringy when roasted, so I would suggest you remove the tails.
To clean radishes, I like to treat them like any produce. Wash them under cold running water and use a paring knife to cut away stems and tops. If you are using fresh radishes from your garden, you can use a potato scrubbing brush to lightly clean away the dirt. Normally, store-bought radishes have been washed already and just require a good rinse and some light trimming.
HAVE A LITTLE GARDEN? GROW YOUR OWN RADISHES!
I wouldn’t claim that radishes are always in our crisper, but I would be comfortable stating that we purchase a bunch of radishes often enough. I would assume we used to buy them more regularly in the summer months. However, a few years ago, I bit the bullet and tried growing radishes. We had a plan for a veggie garden, which took two years to put together. In typical Byron fashion, I tend to overestimate how much room I’ll need. After setting up our raised beds and laying out a plan, I had about three feet of empty space. On a whim, I picked up a packet of radish seeds at our favourite gardening supply store and three weeks later, I had enough to make numerous radish recipes.
The great thing about radishes is that they take very little time to grow into a full-sized vegetable. In fact, we are in growing zone five, which gives us about four solid months of growing time. That means I could plant and harvest radishes at least five times throughout the summer!
QUESTIONS?
If I have not answered all of your questions in the text above, don’t hesitate to reach out to me! You can contact me by sending me a message in the comments section further down the page. I will try my best to answer as soon as possible! You might reach me even faster by following me on Facebook and sending me a private message. Scroll down below the recipe card to find my Follow Me on Social Media box and never miss another recipe!
Do You Like This Recipe?
You should consider trying these other delicious recipes too!

Peppery radish, crisp corn, creamy avocado, fresh green onions, sweet carrots, and crunchy cabbage all meet in the middle to create this most delicious Radish and Corn Coleslaw. With its creamy, zesty, and tart dressing, this coleslaw will most definitely please the toughest critic!

This light and refreshing salad is prepared with summer fresh cucumbers and radishes. Tossed in a quick and easy, seasoned homemade oil and vinegar dressing, this Radish and Cucumber Salad is loaded with crunch and texture. Can be prepared a day or two in advance as well!

Combine the peppery crunch of freshly sliced radishes with the acidity of a lemon, the nutty saltiness of parmesan, and the bright, freshness of dill to make a light and refreshing side, salad, or snack!

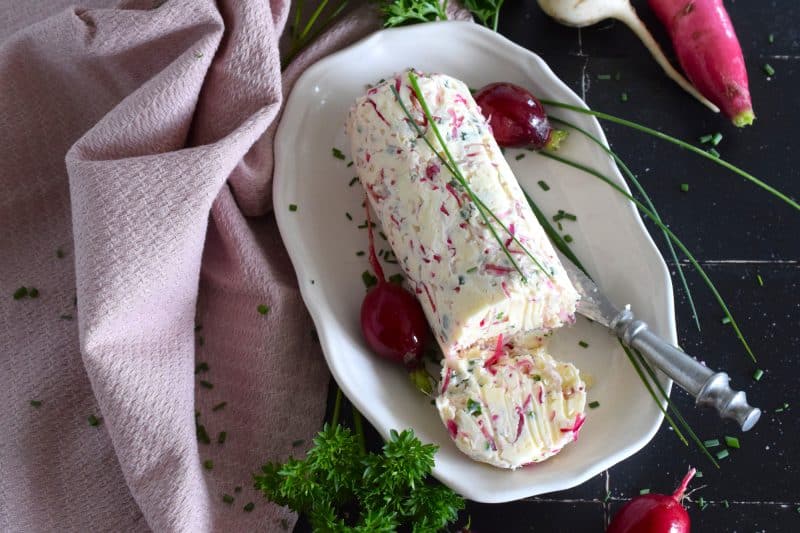

Radish and Chive Butter
Ingredients
- 1/2 cup salted butter, softened
- 1/2 cup shredded radish
- 2 tablespoons chopped chives
- 1/2 teaspoon ground black pepper
Instructions
- Add all of the ingredients to a mixing bowl and use a rubber spatula to fold the ingredients together to combine.
- Serve immediately or transfer the mixture to a piece of parchment paper and roll into a log. Twist the ends of the parchment paper to create a seal and to tighten the log. Refrigerate until ready to use.
- If refrigerated, allow the Radish and Chive Butter to rest at room temperature for 20 minutes before serving.
Nutrition
Did you make this recipe?
Upload a photo and tag me so that I can see it!


Giangi Townsend says
This sounds so fresh and flavorful. I’d love this on warm bread right now 😍🥖