
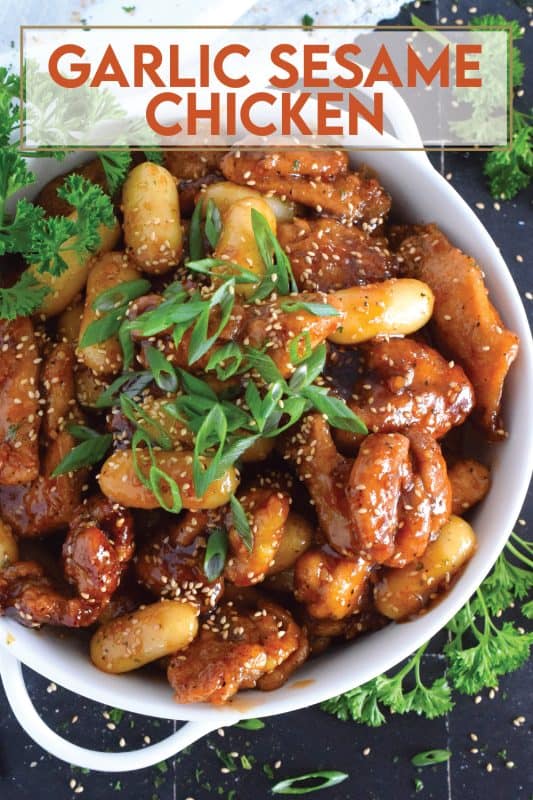
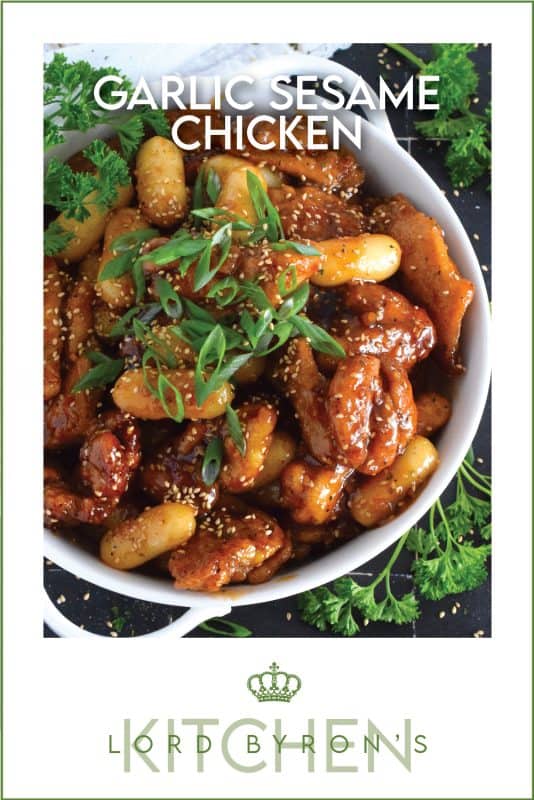
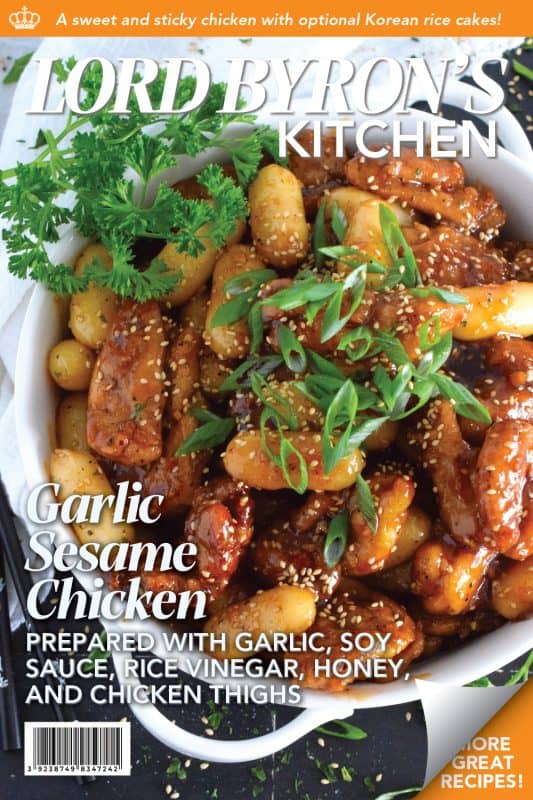
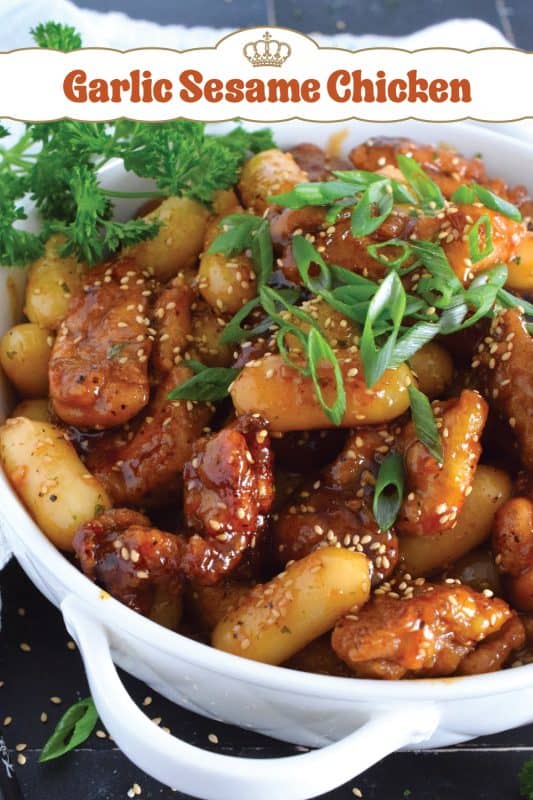
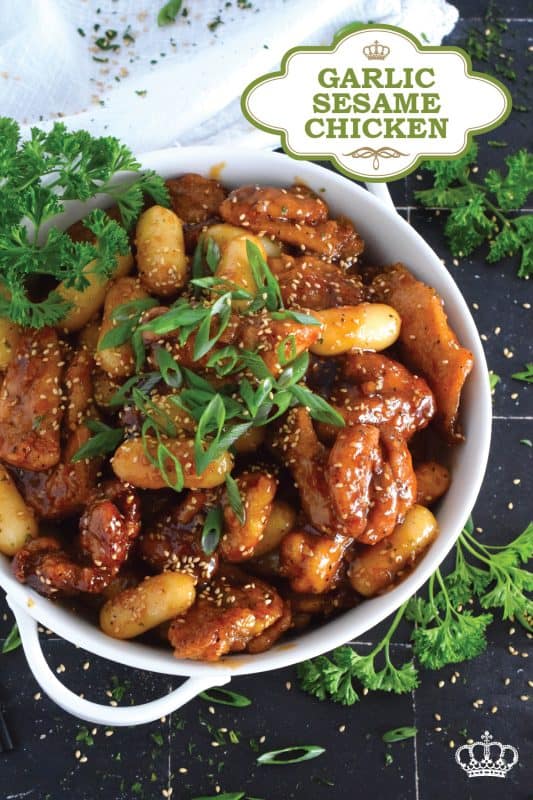
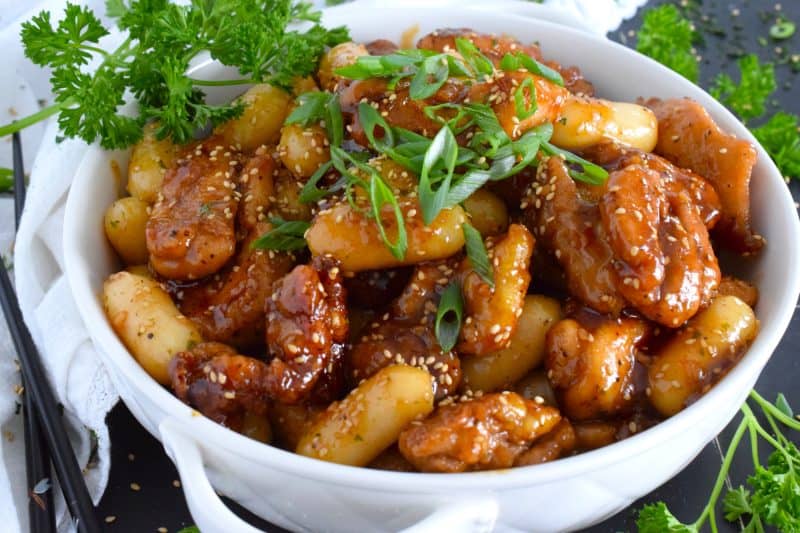
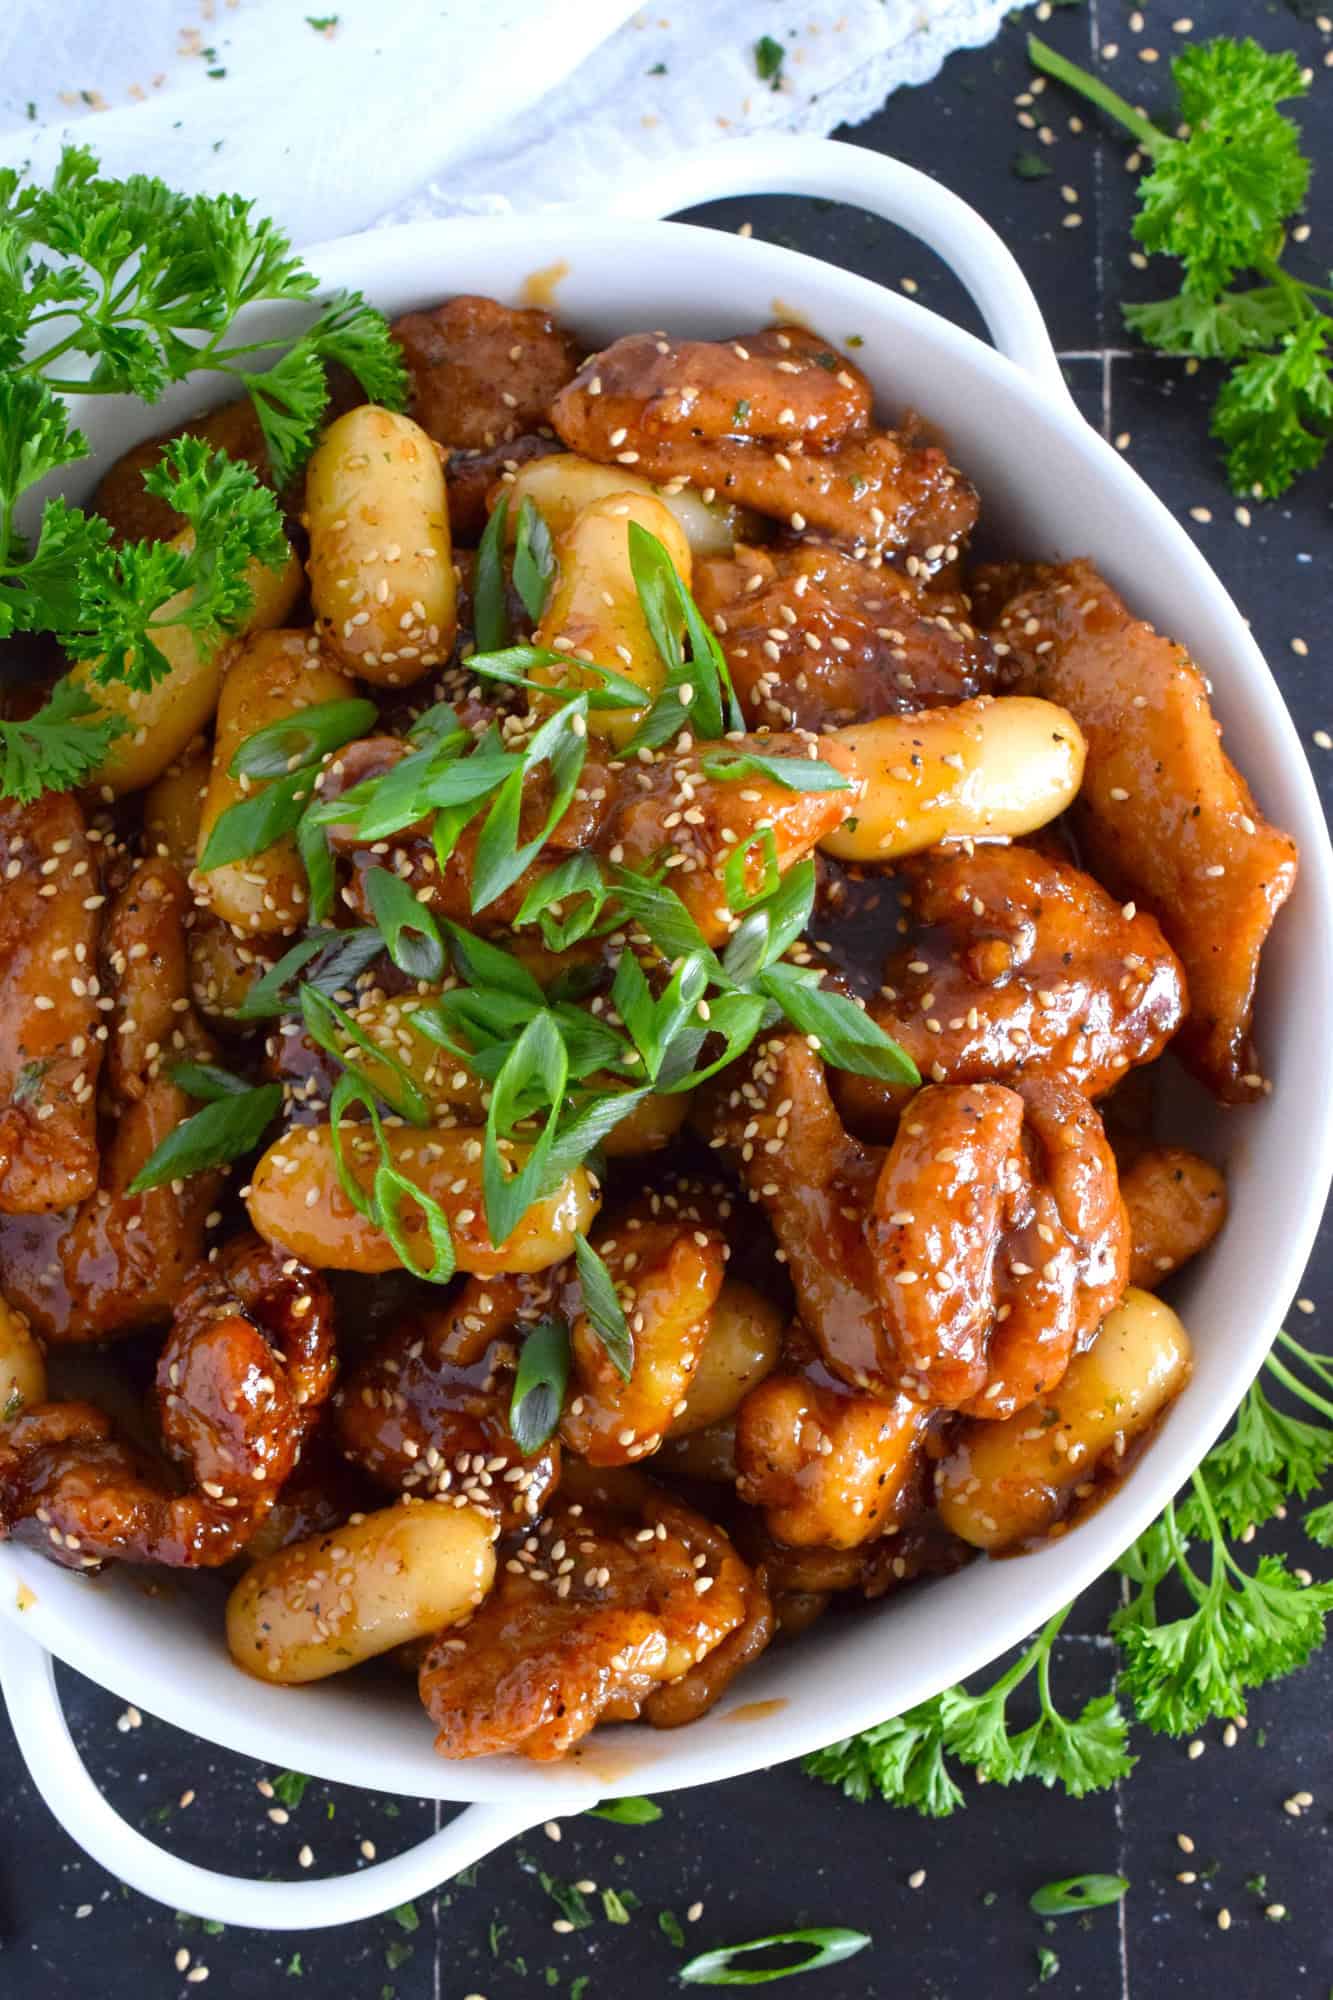
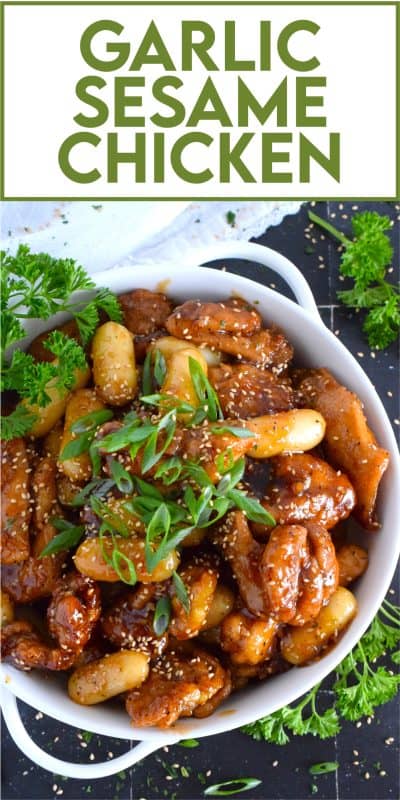
Dredged in a seasoned flour and pan-fried until golden brown, this chicken is tossed with a sweet and sticky garlic sesame sauce until thickened and glossy. Optionally, add Korean rice cakes to make the dish stretch further or to make a heartier meal!

It’s no secret that I love sauce. Any dish prepared with sauce is always going to be a personal favourite of mine. And, I happen to love garlic too, so this Garlic Sesame Chicken was perfect for me! This is one of those recipes that I make just for myself. Whenever I find myself at home alone, especially at mealtime, I’ll make something just like this. My partner, John.e, is a vegetarian, so that’s one reason to prepare this dish when he’s away.
Make your own online recipe box!
Click the in the lower right corner of your screen
& follow the quick and easy instructions!
Six cloves of garlic in a recipe might seem like a lot, but it really isn’t. Garlic can sometimes have that warm, spicy taste, but when garlic is cooked, it mellows out and becomes sweet. Still, garlic is quite prevalent in this recipe, so you must love garlic to try it!
Now, I would be doing you an injustice if I didn’t highlight some of my other chicken recipes. All of these mimic the type you’d find at your favourite Chinese take-out restaurants. You have to try my Sweet Chili Chicken and my Lemon Chicken. And, don’t forget my Sesame Chicken or my Szechuan Popcorn Chicken.
WHICH CHOICE OF CHICKEN WORKS BEST?
For this Garlic Sesame Chicken recipe, I would highly recommend boneless, skinless chicken thighs. I love working with chicken thighs. No matter what cooking method I throw at them, they always come out tender and moist. I’m also a fan of dark meat. I think it’s more flavourful. So, boneless, skinless chicken thighs are the way to go in my opinion.
You can certainly use breast meat for this recipe too. Because breast meat tends to cook faster than dark meat, you’ll want to ensure that the breast meat is cut into one-inch chunks. The breast meat can dry out rather quickly, especially if you’re planning to immerse it in hot oil. Using a larger piece of breast meat will ensure that it doesn’t become overdone and too dry. There’s nothing worse than dry breast meat!
Unlike chicken breast, you can cut the boneless, skinless chicken thighs into smaller pieces. They don’t have to be perfectly even. My rule of thumb is as follows: fry the thigh meat until golden brown. It’s really that simple.
INGREDIENTS NEEDED TO PREPARE THIS RECIPE
The following is a list of the ingredients needed to prepare this recipe. For exact amounts and measurements, refer to the printable recipe card located near the bottom of this post.
- Chicken – For best results, use boneless skinless chicken thighs that have been cut into bite-sized pieces.
- Flour – All-purpose flour.
- Onion Powder
- Salt & Ground Black Pepper
- Hot Pepper Powder – You can use cayenne powder, chili powder, or gochugaru.)
- Honey
- Rice Vinegar – You can substitute with apple cider vinegar or white wine vinegar.
- Soy Sauce – Like I always say, use low-sodium soy sauce to prevent the dish from being too salty.
- Garlic – You will need 6 cloves of garlic. Finely mince them all.
- Sesame Seeds – For best results, use toasted sesame seeds. The flavour is so much better!
- Green Onions – These add freshness and flavour to the dish.
- Rice Cakes – unlike the crispy round snack cake here in North America, Korean rice cakes are prepared with short-grain rice flour and pressed into cylinders. You can also find them sold as small disks a little larger in diameter than a 25-cent coin. Any Asian market will stock them, most likely in the freezer section, but because of their increasing popularity, you can find them at large grocery chains as well.
HOW TO MAKE GARLIC SESAME CHICKEN
Measure the flour, onion powder, ground black pepper, salt, and hot pepper powder (if using) into a large resealable bag. Seal the bag and shake to combine. Add the chicken pieces to the bag of seasoning and shake well to coat each chicken piece. Set aside. Next, combine the honey, rice vinegar, soy sauce, garlic, and sesame seeds in a bowl. Whisk to combine and set aside.
Add an inch of vegetable oil to a large skillet over medium heat. Once the oil is fully heated, cook the chicken in batches until golden brown on both sides. This should take 4-5 minutes on each side. Once the chicken is cooked, transfer it to a paper-towel lined plate. Pour the oil out of the skillet or set that one aside and use a second skillet.
Pour the sauce mixture into the skillet over medium heat. If you are adding Korean rice cakes to your recipe, go ahead and add them to the sauce mixture now. Bring the sauce to a boil. Once boiling, add the chicken and stir well to coat. Continue to boil, stirring the chicken pieces and rice cakes every minute or so until the sauce is reduced and thickened. Turn off the heat. Plate and garnish with green onions and more sesame seeds, if desired.
HOW TO TOAST SESAME SEEDS
If you are not familiar with toasted sesame seeds, then please try it just once. You will probably never revert to using untoasted sesame seeds again! I have tried using non-stick frying pans for toasting, but nothing works as well as a stainless steel pan. You could use a cast iron pan, but since they get very hot and retain heat so well, it’s easier to burn the seeds.
See the frying pan in this picture? That’s the exact one that I use all the time. I’m not suggesting you run out and buy this same cookware set, but I wanted you to see the pan – remember, do not use non-stick if possible. You’ll get better results with plain stainless steel.
So, unlike most cooking where you’re required to preheat first, you don’t want to apply that same rule to toasting seeds. Add the seeds to a cold pan. Place the pan on the burner and turn the heat on – no higher than medium and probably even less if using a gas burner.
Keep the seeds moving about. I use a rubber spatula. Once you start to smell that warm and toasty aromatic smell, pay close attention. The seeds will take on a slightly golden colour. Don’t let them get too dark. Once you’re satisfied, immediately remove them from the hot pan and transfer them to a dinner plate where they can be spread out to cool.
WHAT ARE RICE CAKES?
Tteok is a general term for Korean rice cakes. They are made with steamed flour of various grains or both glutinous and non-glutinous rice. Steamed flour can also be pounded, shaped, or pan-fried to make tteok. In some cases, tteok is pounded from cooked grains.
Tteok is eaten not only as a dessert or seasonal delicacy, but also as a meal. It can range from elaborate versions made of various colorus, fragrances, and shapes using nuts, fruits, flowers, and namul (herbs/wild greens), to plain white rice tteok used in home cooking. (The plain white tteok – rice cakes – is what I am using here.) Some common ingredients for many kinds of tteok are red bean, soybean, pumpkin, chestnut, pine nut, jujube, dried fruits, sesame seeds and oil, and honey.
One of my favourite Asian grocery stores in the Ottawa area is the Green Fresh Supermarket. They always have rice cakes on hand. The last time I visited, I picked up some cheese-filled rice cakes. They were wonderful and would work very well in this recipe.
QUESTIONS?
If I have not answered all of your questions in the text above, don’t hesitate to reach out to me! You can contact me by sending me a message in the comments section further down the page. I will try my best to answer as soon as possible! You might reach me even faster by following me on Facebook and sending me a private message. Scroll down below the recipe card to find my Follow Me on Social Media box and never miss another recipe!

Do You Like This Recipe?
You should consider trying these other delicious recipes too!
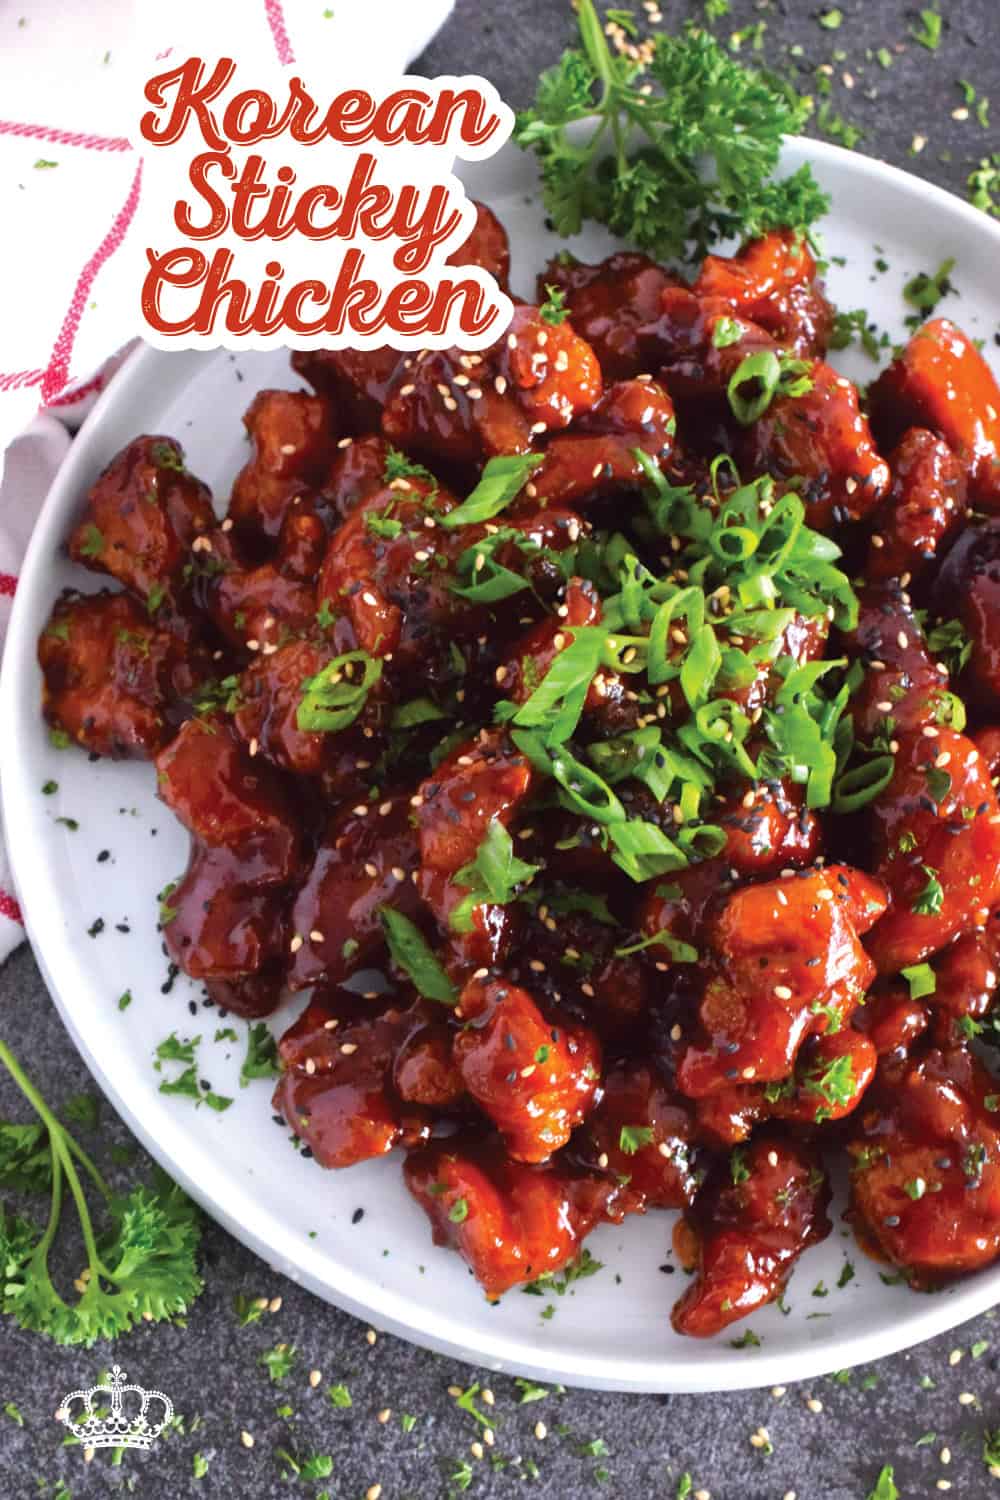
Korean Sticky Chicken is a crispy fried chicken in a thick, sweet, savoury, and spicy sauce; this recipe is most certainly for the sticky and spicy food lover. Prepared with a light and crispy coating and tossed in a quick, homemade sauce, this chicken is super flavourful!
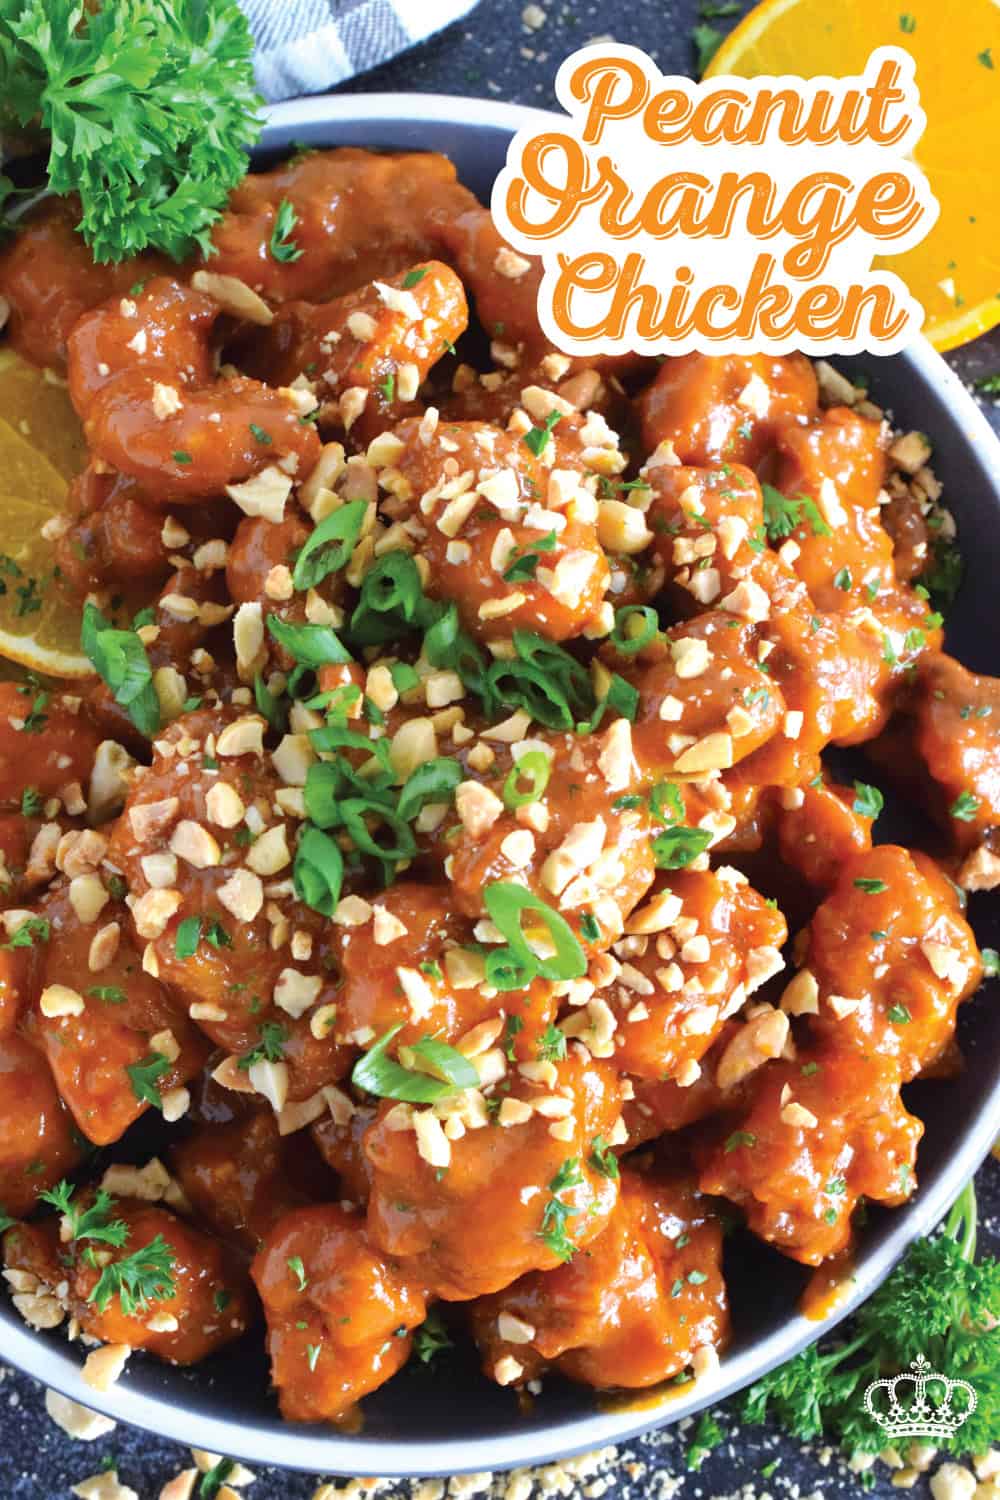
A quick and easy main perfect for a weeknight dinner at in busy household, this sweet and savoury Peanut Orange Chicken is ready to plate and serve in 45 minutes! The bold flavours in this chicken should shine, so serve it with plain cooked rice and steamed broccoli!
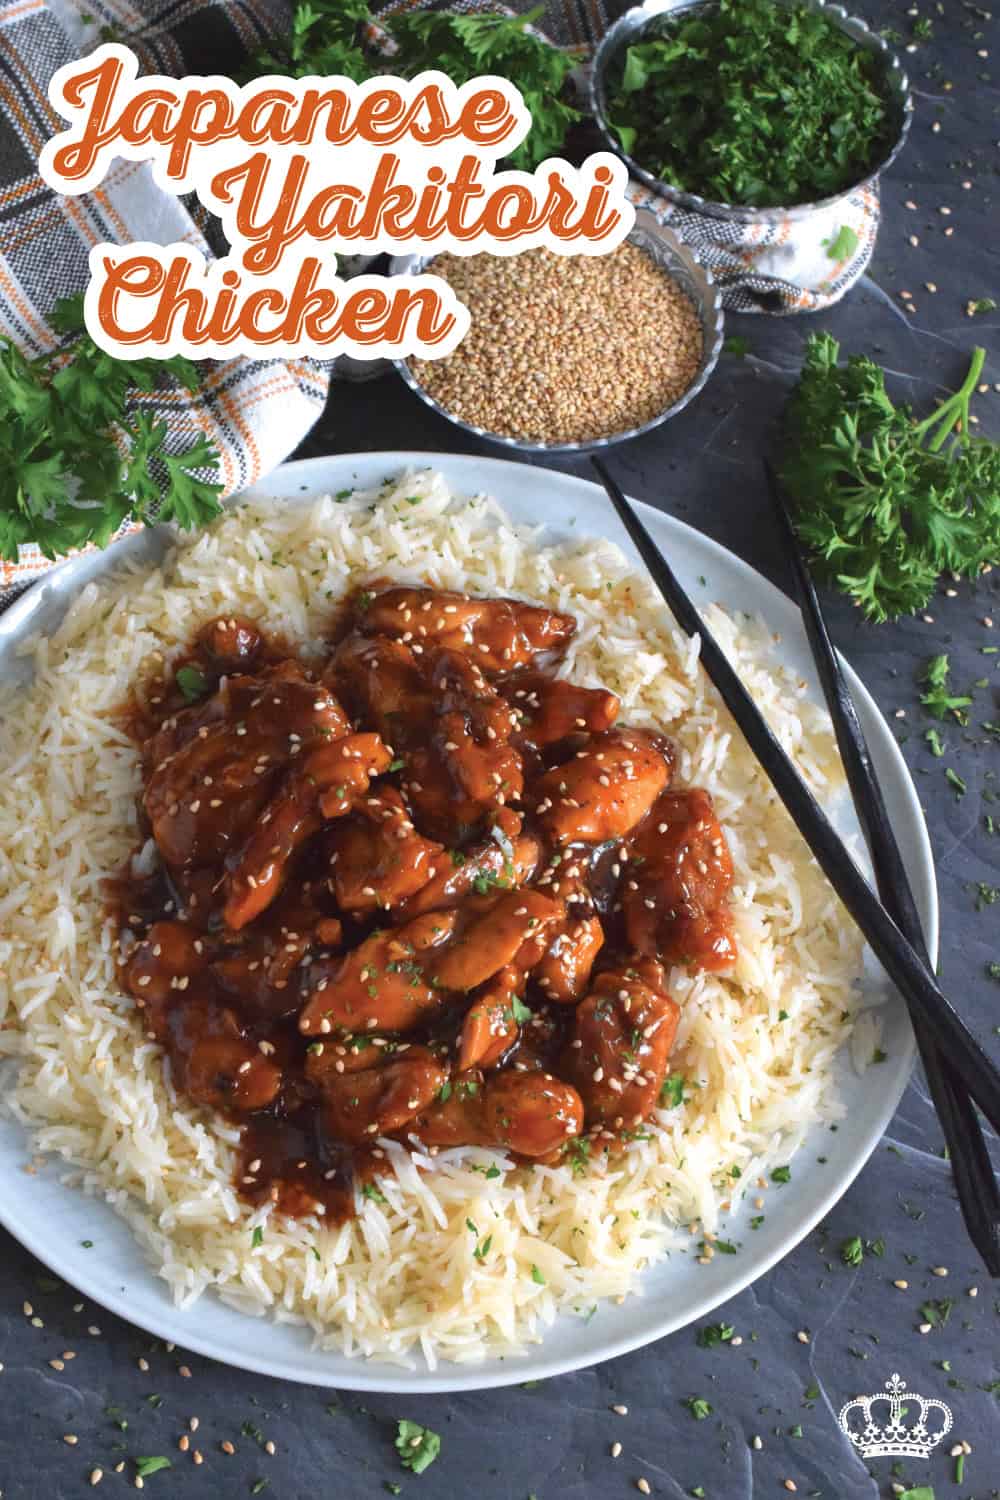
Sweet and sticky, garlicky and gingery, Japanese Yakitori Chicken is first marinated and then pan-fried with the most delicious, savoury sauce. Traditionally prepared on skewers, this version uses only a stovetop. It’s quicker and easier, which makes it a great weeknight dinner option!

Garlic Sesame Chicken
Ingredients
- 8 boneless skinless chicken thighs, cut into 1 inch strips
- 1/2 cup all-purpose flour
- 1 teaspoon onion powder
- 1/2 teapsoon ground black pepper
- 1/2 teaspoon salt
- 1 teaspoon hot pepper powder (optional – you can use cayenne pepper or gochugaru)
- 1/2 cup honey
- 2 teaspoons rice vinegar
- 6 tablespoons light soy sauce
- 6 cloves garlic, minced
- 1 teaspoon sesame seeds
- green onions, thinly sliced for garnish
- 600 grams Korean rice cakes, optional
Instructions
- Measure the flour, onion powder, ground black pepper, salt, and hot pepper powder (if using) into a large resealable bag. Seal the bag and shake to combine.
- Add the chicken pieces to the bag of seasoning and shake well to coat each chicken piece. Set aside.
- Next, combine the honey, rice vinegar, soy sauce, garlic, and sesame seeds in a bowl. Whisk to combine and set aside.
- Add an inch of vegetable oil to a large skillet over medium heat. Once the oil is fully heated, cook the chicken in batches until golden brown on both sides. This should take 4-5 minutes on each side.
- Once the chicken is cooked, transfer it to a paper-towel lined plate.
- Pour the oil out of the skillet or set that one aside and use a second skillet.
- Pour the sauce mixture into the skillet over medium heat.
- If you are adding Korean rice cakes to your recipe, go ahead and add them to the sauce mixture now. Bring the sauce to a boil.
- Once boiling, add the chicken and stir well to coat. Continue to boil, stirring the chicken pieces and rice cakes every minute or so until the sauce is reduced and thickened.
- Turn off the heat. Plate and garnish with green onions and more sesame seeds, if desired.
Notes
Nutrition
Did you make this recipe?
Upload a photo and tag me so that I can see it!


Jen says
I loved this! It’s so hard to replicate that take-out flavor, but this did the trick. It’s a lot of ingredients but well worth the time to get them all. This is my new go-to sesame chicken recipe.
Byron Thomas says
Thank you, Jen. So glad you liked it! Did you add the Korean rice cakes to your version?