
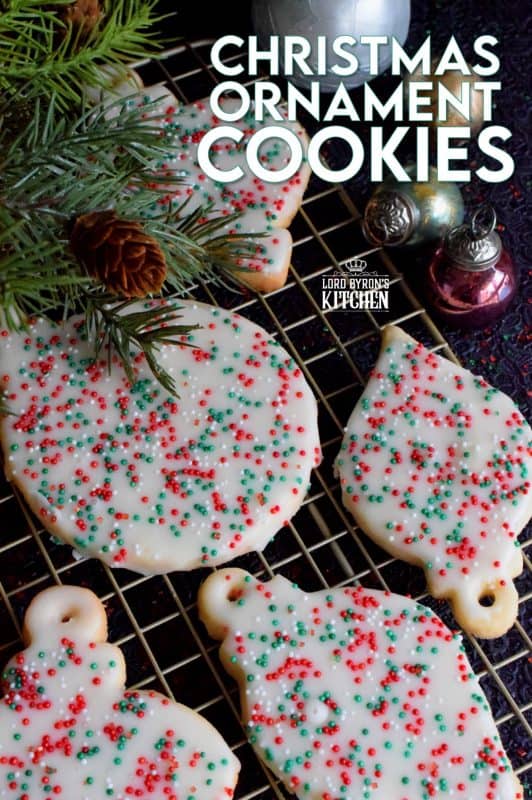
These Christmas Tree Ornament Cookies are adorably cute as a decoration on a tree, but even better packaged for friends and neighbours! Don’t be fooled by how cute these are, they are not complicated at all. Baking these is a great way to spend a snowy afternoon!
A few months ago, a friend got me hooked on Amazon Prime. Where has that been all of my life? Or have I just been living under a rock? It’s addictive, Dear Reader, but I love scrolling through those endless pages of merchandise. Back in August, the cookie cutters I’m using for these Christmas Tree Ornament Cookies caught my attention as I was scrolling, and thanks to the magic of Amazon Prime, there were in my hands the next morning before 9am.
So, needless to say, Christmas Tree Ornament Cookies had to be featured in the 24 Cookies of Christmas – Volume 2 series. If I had time, or if I didn’t already have 1.6 billion Christmas ornaments, I’d make enough of these cookies to cover each of our Christmas trees! They’re so cute!

WILL OTHER COOKIE CUTTER SHAPES WORK?
Absolutely! You can use any cookie cutter shape your little heart desires, Dear Reader! If you don’t have any that are shaped like a Christmas tree ornament, and you’d like to get them, here’s the link for where I got mine.
Otherwise, you can use any other Christmas-themed cookie cutter. Just about anyone that has a cookie cutter container stashed somewhere at the back of a cabinet will have something Christmas-like.
Try gingerbread men, or Christmas trees, reindeer, stars, angels, etc. And if you don’t any of those, just use plain circular cookie cutters. The important thing is to get the hole centered so that the cookie hangs properly!

MORE CHRISTMAS COOKIE RECIPES!
Did you know that I’ve been posting a 24 Cookies of Christmas series for a few years now? There are over 100 Christmas cookie recipes that you can find right here at Lord Byron’s Kitchen! To make it easier to find, I have created a page for each series. Just click on the image below and you’ll find the full series for that volume all one page!


DECORATING CHRISTMAS ORNAMENT COOKIES
I’ve shared it a million times, and I’m going to share it once more – I cannot decorate a cookie or a cake to save my life! So, if I can make something look like this, anyone can do it! In essence, you vertically dip a baked cookie into the prepared icing, allow the excess to drip off and place it icing side up onto a cooling rack. That’s it!
If you want to get extra fancy, you can use a thicker icing and make lines or designs across the cookies. Maybe be a little more careful with the sprinkles, placing them strategically so that they make for a prettier cookie.
Check out my Crispy Chocolate Cookie Cutter Cookies (how’s that for alliteration!?) for a great piping icing recipe that will give you perfect lines!

CAN I REALLY USE THESE COOKIES AS ORNAMENTS?
Yes! They will hang on a tree just perfectly and beautifully. Of course, you must remember that these ornaments are indeed food, so they will eventually grow stale and will need to be discarded. They will last in the open air for 3-4 days.
Once you hang them on the tree, I would not recommend eating them. A Christmas tree – real or artificial – is most likely not food friendly! Also, keep in mind that these cookie ornaments have lots of sugar, so keep them away from your pets who might be tempted to eat them off your tree when you’re not looking!

MORE CHRISTMAS CONFECTIONS!
In some cases, we want more than a cookie. That’s why I have two more Christmas-themed collections you might want to consider. The first, is my 12 Bundt Cakes of Christmas, and the second is my 12 Biscotti of Christmas. Click on the image below to see each collection all on one page with links to each recipe!


STORING, PACKAGING, AND FREEZING
These cookies will stay fresh for about 3-5 days in a covered container and in a cool place. But, if you plan to freeze these cookies, use a food-safe container that can be frozen. You’ll want to ensure a very tight fitting lid too. (I use these quite often when freezing baked goods.) I like to place a sheet of plastic wrap over the top of the container before pushing the lid on. This helps to create a better seal. The goal is to keep all of that cookie freshness locked in!
You can freeze these cookies for up to three months. They will come out of the freezer looking just like they did when you put them in there. Once you thaw them, they will taste just as fresh as the day you first made them. When thawing, place the cookies onto a wire cooling rack in a single layer. Wait about 20 minutes or so and they will be perfectly thawed and ready to devour!
Whenever you freeze cookies that have frosting or icing on them, it is always a good idea to separate the layers with a piece of parchment or waxed paper. This will keep the icing looking neat and clean!

CONCLUSION:
Christmas Tree Ornament Cookies are completely edible, but that’s not really why you should make them. You should make them because they’re fun and festive. Gather some people (young and old!) that you like to spend time with and make an evening out of it.
Make a mess with the icing. Vacuum up the sprinkles after everyone goes to bed or goes home. All the while, play some Christmas carols, drink something festive, and have fun. After all, Christmas lasts just a short time – make every moment count!


Christmas Tree Ornament Cookies
Ingredients
For the Cookie:
- 2 cups butter, softened
- 1 cup confectioner’s sugar
- 2 teaspoons vanilla extract
- 1/2 cup cornstarch
- 3 cups all purpose flour
For the Icing:
- 2 cups confectioner’s sugar
- 3 tablespoons milk
- 3 tablespoons corn syrup
- 1 teaspoon vanilla extract
- 1 cup sprinkles, Christmas themed
Instructions
For the Cookie:
- In the bowl of a stand mixer, cream together the butter and the sugar on medium speed until light and fluffy.
- Add the vanilla and incorporate into the butter and sugar mixture.
- Add the flour and cornstarch. On low speed, mix into the butter and sugar until well incorporated.
- Divide the dough into two portions, wrap each portion completely in plastic wrap and store in the fridge for 2 hours.
- When ready to bake, remove dough from fridge and let sit at room temperature for a few minutes. Preheat oven to 350 degrees. Prepare a baking sheet by lining it with parchment paper or a silicone liner. Set aside.
- Roll one portion of the dough to 1/4 inch thick on a lightly floured surface. Use an ornament shape, or your favourite cookie cutter shape to cut out the cookies. If making ornaments, punch a hole in the top of the cookie with a small straw. Transfer to the prepared baking sheet, leaving 2 inches of space between each cookie.
- Bake for 15 minutes. Remove from oven and let sit for 2 minutes before transferring to a wire cooling rack to finish cooling.
For the Icing:
- Once the cookie is completely cooled, whisk together the icing ingredients and set aside.
- Line the cookies up on the cooling rack so that they are evenly spaced. Place a layer of paper towels under the cooling rack for easy clean up. (This will catch the icing if any drips over the side.)
- At this point, you have two decorating options. A.) Dip each cookie, top side down, into the icing. Do not submerge the cookie. Just dip the surface. Gently shake off the excess and place the cookie, icing side up, back onto the cooling rack. Top with sprinkles. B.) Place the un-iced cookies onto a wire cooling rack. Transfer the icing to a Ziploc bag and cut off a small tip in the lower corner. Drizzle the icing back and forth over the cookie to create a zigzag shape. Top with sprinkles.
- Allow the iced cookies to sit undisturbed for one hour. This will allow the icing to harden.
- Cookies can be stacked. Store in a food-safe container. Can be frozen up to 3 months.
Notes
Nutrition


Sandy Mongeluzi says
These cookies definitely fit the festive theme and I like the way in which you got everyone together to icing them. Thanks.