
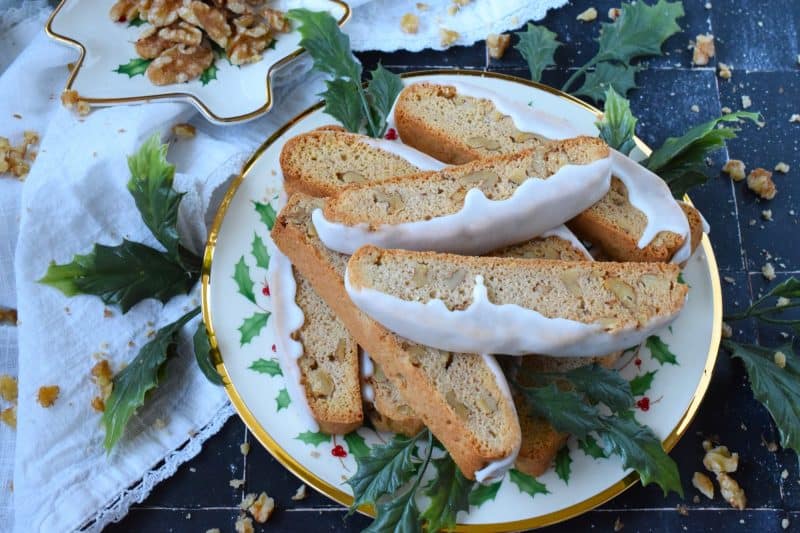
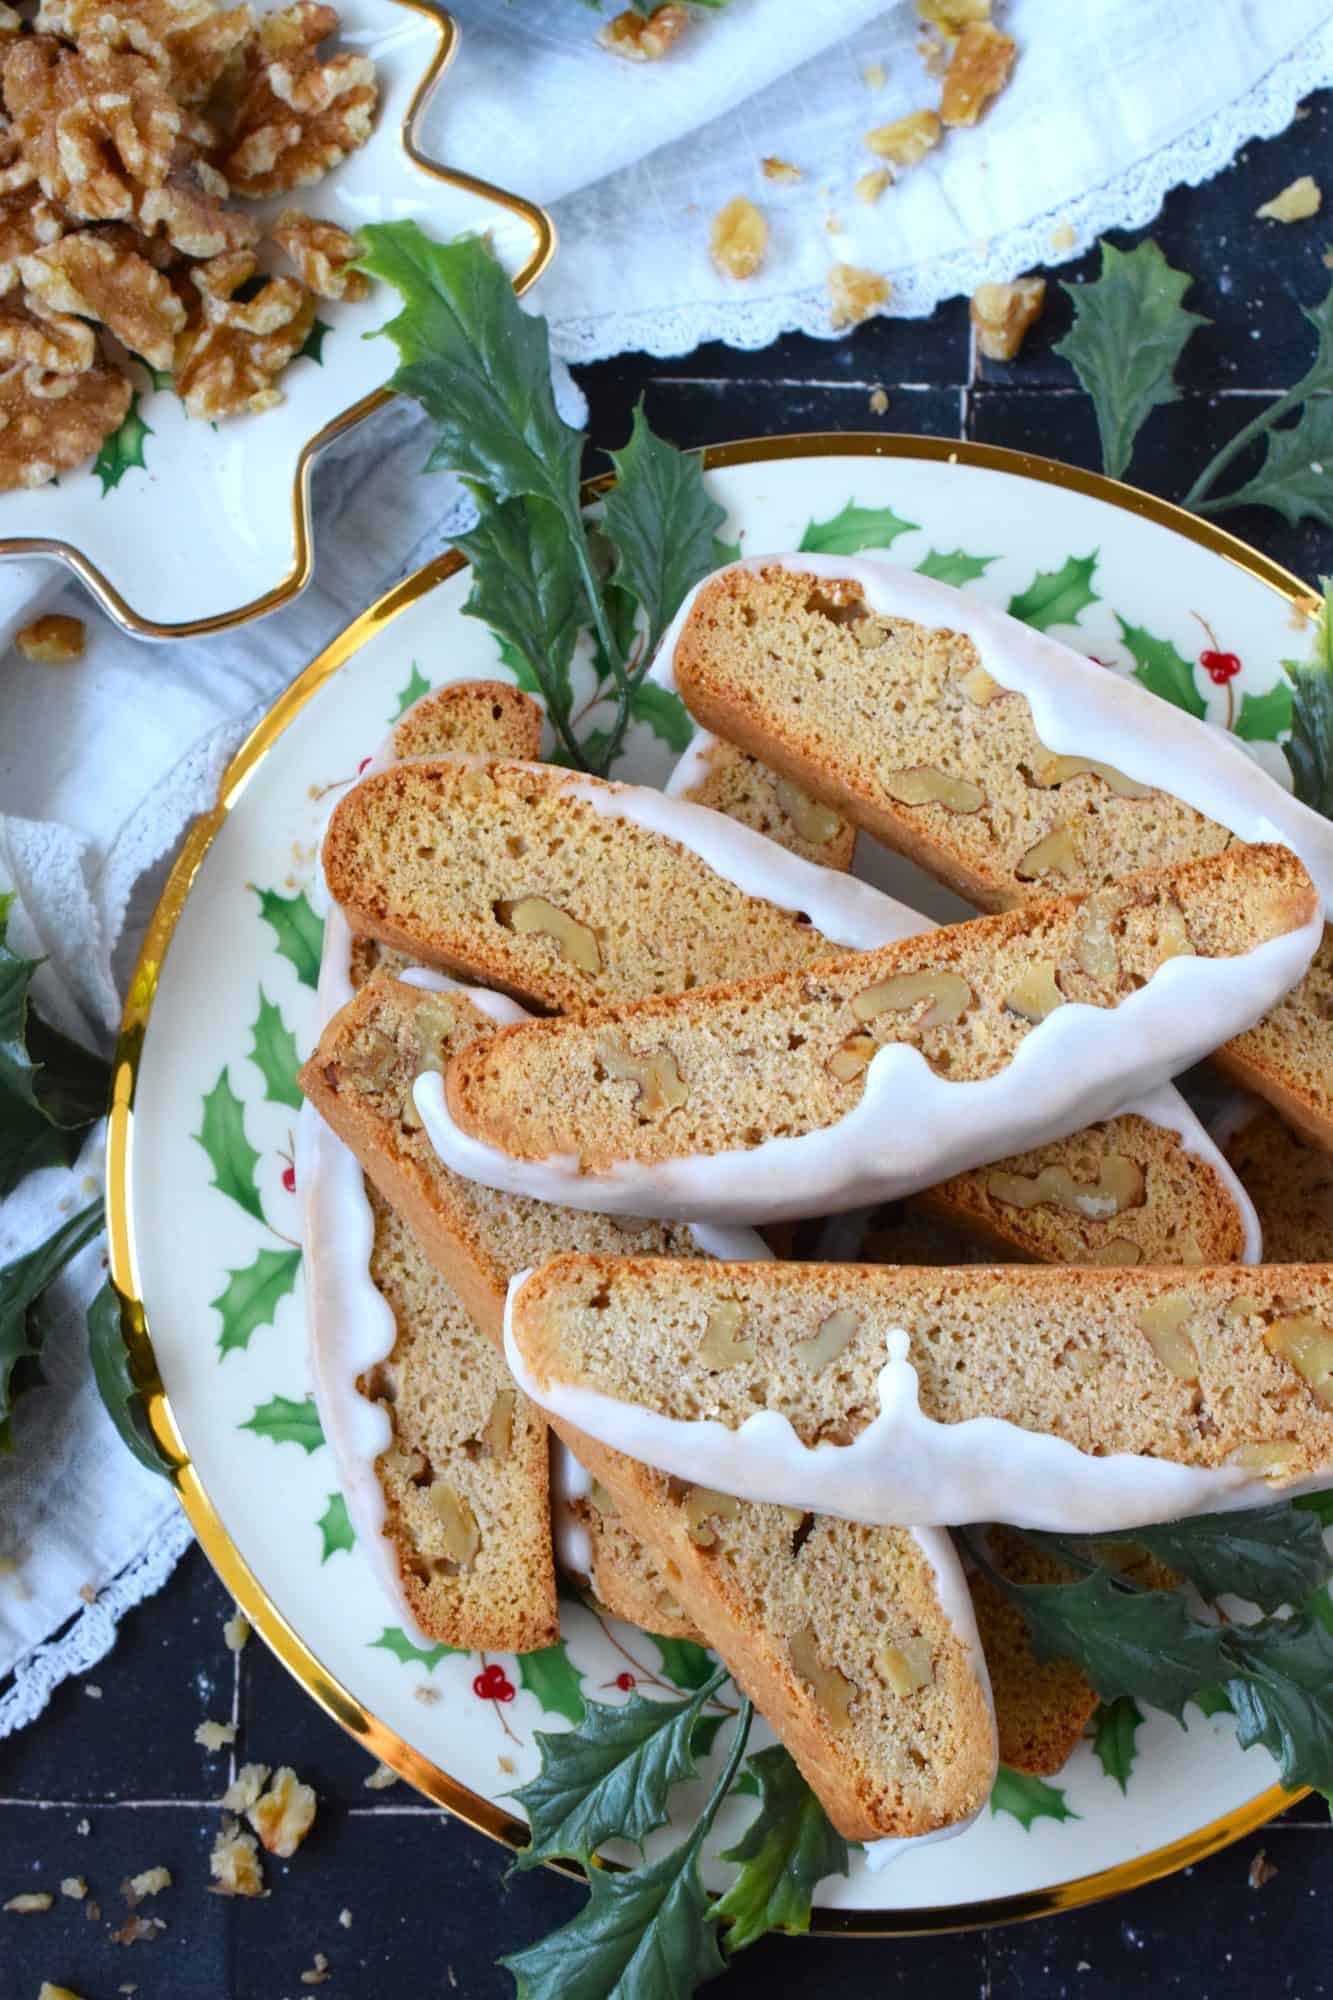
Double the crunch factor with this Walnut Crunch Biscotti! Since biscotti are twice-baked, they’re already crunchy, but add walnuts to the mix and they’re even crunchier! These cookies are full of flavour and might easily become your new favourite sweet treat!

In our home, we love cakes, cookies, and other baked goods with copious amounts of walnuts. They’re even better if the walnuts have been toasted first! Seriously, have you tried my Walnut Fruitcake Fudge or my Candied Cherry Slices? What about these Walnut Cherry Slices which has become a yearly tradition! Because of the popularity of those recipes, it was obvious to me that baked goods with walnuts are well-loved in other homes too. Therefore, this Walnut Crunch Biscotti had to be a part of this year’s holiday baking!
I tend to use a lot of walnuts at Christmastime – partly because we love them, but also, walnuts add so much flavour and texture to cakes and cookies. Here at Lord Byron’s Kitchen, you can find a plethora of holiday recipes that feature walnuts. Try these Walnut Shortbread Balls. They are dipped in melted chocolate and topped with crushed walnuts. One of my favourite holiday treats of all time are my mom’s Walnut Oh Henry Bars. They are loaded with walnuts!
Make your own online recipe box!
Click the in the lower right corner of your screen
& follow the quick and easy instructions!
SUBSCRIBE NOW AND NEVER MISS ANOTHER RECIPE!
So, welcome, Dear Reader, to my annual holiday-themed recipes. Traditionally, every year I share a series of recipes that you might already be familiar with. For example, I’ve previously shared 12 Holiday Trifles, 12 Holiday Bars & Squares, and even these 12 Edible Holiday Wreath recipes! Also, some of my favourite recipe collections from previous years are my 75 Homemade Gifts from Your Kitchen, my 50 Make Ahead Freezer Friendly Christmas Recipes, and my 30 No-Bake Christmas Recipes post.
This year I’m doing it differently. Rather than sharing multiple back to back series, I’m sharing a new holiday-themed recipe almost every day from now until Christmas Eve. For those of you who have followed my annual Lord Byron’s 24 Cookies of Christmas series, don’t worry, you will still get lots of new cookie recipes this year too. I will not, however, be publishing the cookies back to back in a 24-day series. This would have been my 8th year running the series and it becomes very exhausting. Also, we have a vacation booked in what would have been the middle of the series, so this year, I’m spreading the recipes out so that I’m not sharing the same type of recipe every day.
You really don’t want to miss one of these recipes, so if you have not yet subscribed to Lord Byron’s Kitchen, I encourage you to do so. That way, a new recipe will be emailed to you every day. You won’t have to bother to come looking for it! And, just in case you’re curious, you can see previous annual posts for my 24 Cookies of Christmas Series here!

INGREDIENTS NEEDED TO PREPARE THIS RECIPE
The following is a list of the ingredients needed to prepare this recipe. For exact amounts and measurements, refer to the printable recipe card located near the bottom of this post.
- Butter – Make sure your butter is at room temperature!
- Sugar
- Salt
- Extracts – In this recipe, I used vanilla extract. If you want to change up the flavour a bit, other extracts will work well too. I can think of coffee extract, maple extract, almond extract, etc!
- Baking Powder – This is used to increase the volume of the batter and to add texture as well.
- Eggs – Whenever you set out to bake, make sure your eggs are at room temperature too – just like your butter!
- Flour – No need for anything special. Just use regular all-purpose flour. I have not tried this recipe with any other type of flour.
- Walnuts – I’m using walnut halves so that there are big chunks of sliced walnuts in the biscoitt, but you can use chopped walnuts. Toast the walnuts first for even more flavour!
- Confectioner’s Sugar
- Milk
TOASTING WALNUTS
The first thing you should do it to toast your walnuts. How do you do that? It’s very simple! To be perfectly honest, this applies to any nuts or seeds, not just the walnuts for this recipe. If you are not familiar with toasted nuts, then please try it just once. You will probably never revert to using nuts in your cooking or baking again without toasting them first!
I have tried using non-stick frying pans for toasting, but nothing works as well as a stainless steel pan. See the frying pan in this picture? That’s the exact one that I use all the time. I’m not suggesting you buy the same cookware set, but I wanted you to see the pan – remember, do not use non-stick if possible. You’ll get better results will plain stainless steel.
So, unlike most cooking where you’re required to preheat first, you don’t want to apply that same rule to toasting nuts. Add the walnuts to a cold pan. Place the pan on the burner and turn the heat on – no higher than medium and probably even less if using a gas burner.
Keep the nuts moving about. I use a rubber spatula. Once you start to smell that warm and toasty aromatic smell, pay close attention. The nuts will take on a slightly golden colour. Don’t let them get too dark. Once you’re satisfied, immediately remove them from the hot pan and transfer them to a dinner plate where they can be spread out to cool.

HOW TO MAKE WALNUT CRUNCH BISCOTTI
Preheat your oven to 350°F. Line a baking sheet with parchment paper. Set aside. In a mixing bowl, beat together the butter, sugar, salt, vanilla extract, and baking powder until well combined and creamy. Beat in the eggs. Add the flour and beat until just mixed in. Lastly, stir in the walnuts.
Turn the dough out onto a prepared baking sheet and form it into a log. (Dust your hands with cocoa; dough is a bit sticky!) Form the log into a rectangle shape that is roughly 4″ wide and 12″ long. Bake for 30 minutes. Remove from the oven and place the baking sheet on a wire cooling rack so that air can circulate. Allow to cool for 5 minutes.
Using the parchment paper, slide the log onto a large cutting board. Slice into 1/2″ slices across the width of the log. Place slices back onto a parchment-lined baking sheet, cut side down. Bake for 10 minutes. Flip the biscotti over and bake for 10 minutes more. Remove from the oven and allow the biscotti to cool on the baking sheet for 3-5 minutes. Transfer to wire cooling rack to finish cooling completely.
For the optional glaze, whisk the confectioner’s sugar and milk together until smooth. With all of the biscotti standing on end on a wire cooling rack with a catch tray underneath, use a spoon to spoon the glaze over the tops of the biscotti, allowing the glaze to trickle down the side. Allow the glaze to fully harden before packaging. Package biscotti for gift-giving or pile into a food-safe container. Leave at room temperature, or freeze until needed for up to 3 months.

STORING AND FREEZING
These biscotti will last in the freezer for three months. Be sure you have a good container with a tight seal. Whenever I’m freezing biscotti, I always double up on the seal action. Before I place the lid on, I always drape a sheet of plastic wrap on top. Then I push the lid on. I just feel that the lid fits more tightly. Any little thing I can do to keep the frost out, I’m going to do it! I like to use containers like this.
Like I always say, if you freeze any baked goods, remove only the amount you want when you decide to thaw them. Fetch the container from the freezer and remove only what you need. Put the lid back on and get the container back in the freezer.
To properly thaw baked goods, place them on a plate or a wire cooling rack. Don’t pile them. Spread them out and give them some space. Let them sit at room temperature for 10 to 15 minutes. They will taste fresh and perfect every single time!

QUESTIONS?
If I have not answered all of your questions in the text above, don’t hesitate to reach out to me! You can contact me by sending me a message in the comments section further down the page. I will try my best to answer as soon as possible! You might reach me even faster by following me on Facebook and sending me a private message. Scroll down below the recipe card to find my Follow Me on Social Media box and never miss another recipe!

Do You Like This Recipe?
You should consider trying these other delicious recipes too!


Walnut Crunch Biscotti
Ingredients
- 6 tablespoons butter, melted
- 2/3 cup sugar
- 1/2 teaspoon salt
- 3 teaspoons vanilla extract
- 1 1/2 teaspoons baking powder
- 2 large eggs
- 2 cups all purpose flour
- 1 cup walnut halves, toasted
For the Optional Glaze:
- 2 cups confectioner's sugar
- 2 tablespoons milk
Instructions
- Preheat your oven to 350°F. Line a baking sheet with parchment paper. Set aside.
- In a mixing bowl, beat together the butter, sugar, salt, vanilla extract, and baking powder until well combined and creamy.
- Beat in the eggs.
- Add the flour and beat until just mixed in.
- Lastly, stir in the walnuts.
- Turn the dough out onto a prepared baking sheet and form it into a log. (Dust your hands with cocoa; dough is a bit sticky!)
- Form the log into a rectangle shape that is roughly 4" wide and 12" long.
- Bake for 30 minutes. Remove from the oven and place the baking sheet on a wire cooling rack so that air can circulate. Allow to cool for 5 minutes.
- Using the parchment paper, slide the log onto a large cutting board. Slice into 1/2" slices across the width of the log.
- Place slices back onto a parchment-lined baking sheet, cut side down. Bake for 10 minutes. Flip the biscotti over and bake for 10 minutes more.
- Remove from the oven and allow the biscotti to cool on the baking sheet for 3-5 minutes. Transfer to wire cooling rack to finish cooling completely.
For the Optional Glaze:
- Whisk the confectioner's sugar and milk together until smooth. With all of the biscotti standing on end on a wire cooling rack with a catch tray underneath, use a spoon to spoon the glaze over the tops of the biscotti, allowing the glaze to trickle down the side. Allow the glaze to fully harden before packaging.
- Package biscotti for gift-giving or pile into a food-safe container. Leave at room temperature, or freeze until needed for up to 3 months.
Nutrition
Did you make this recipe?
Upload a photo and tag me so that I can see it!


Leave a Reply