
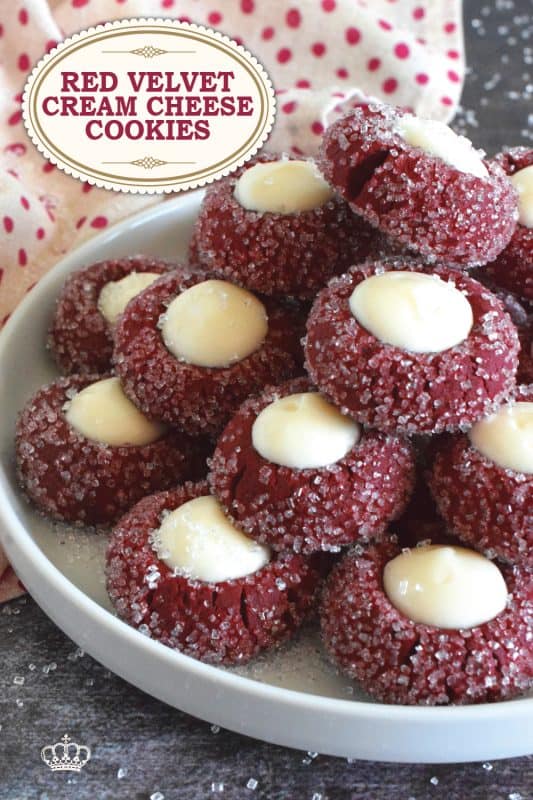
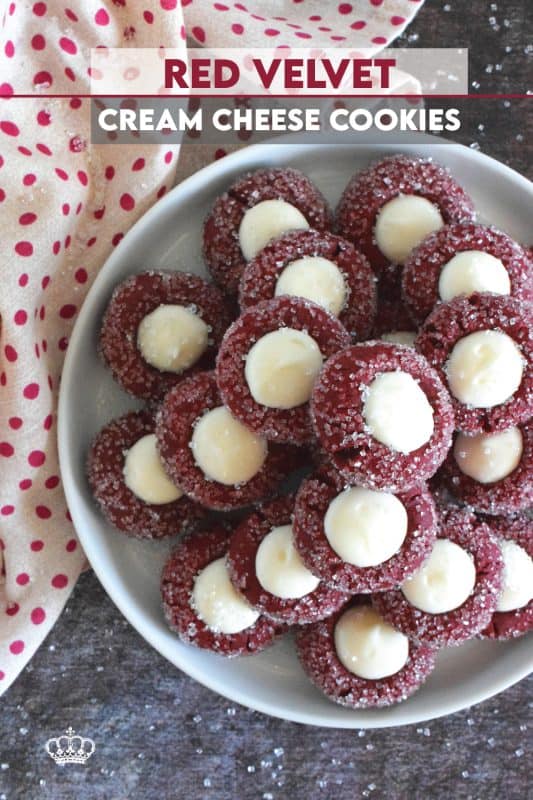
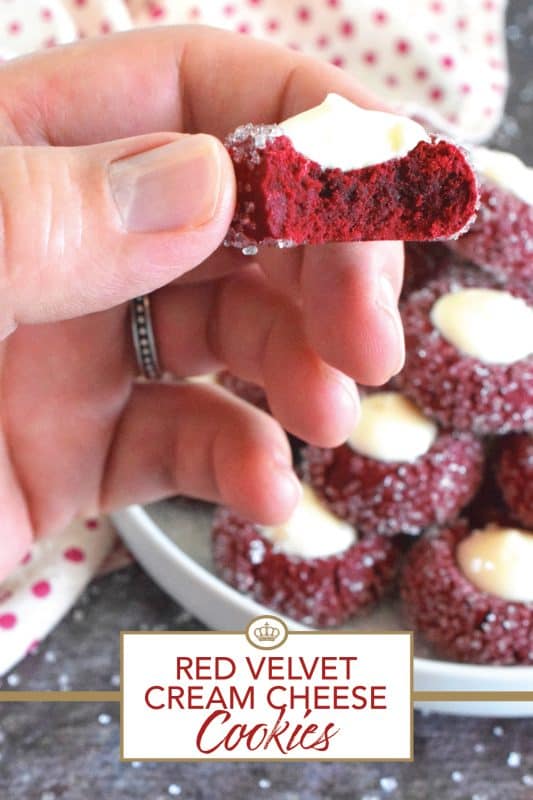
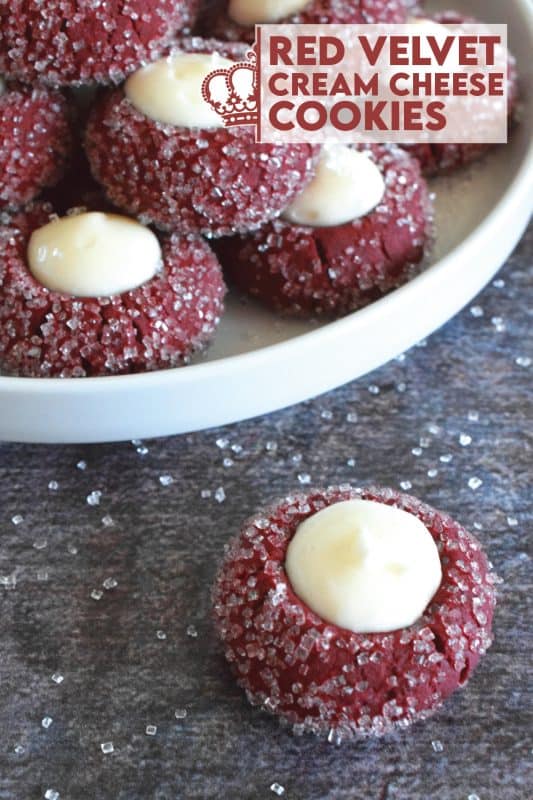
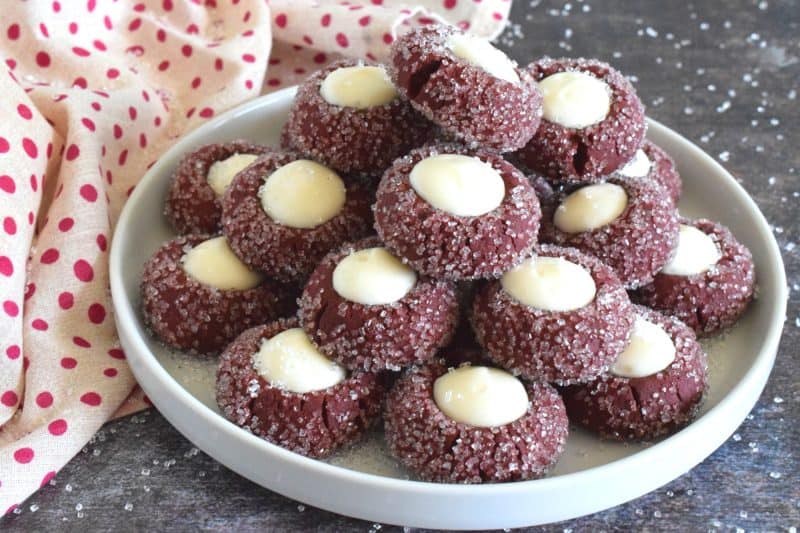
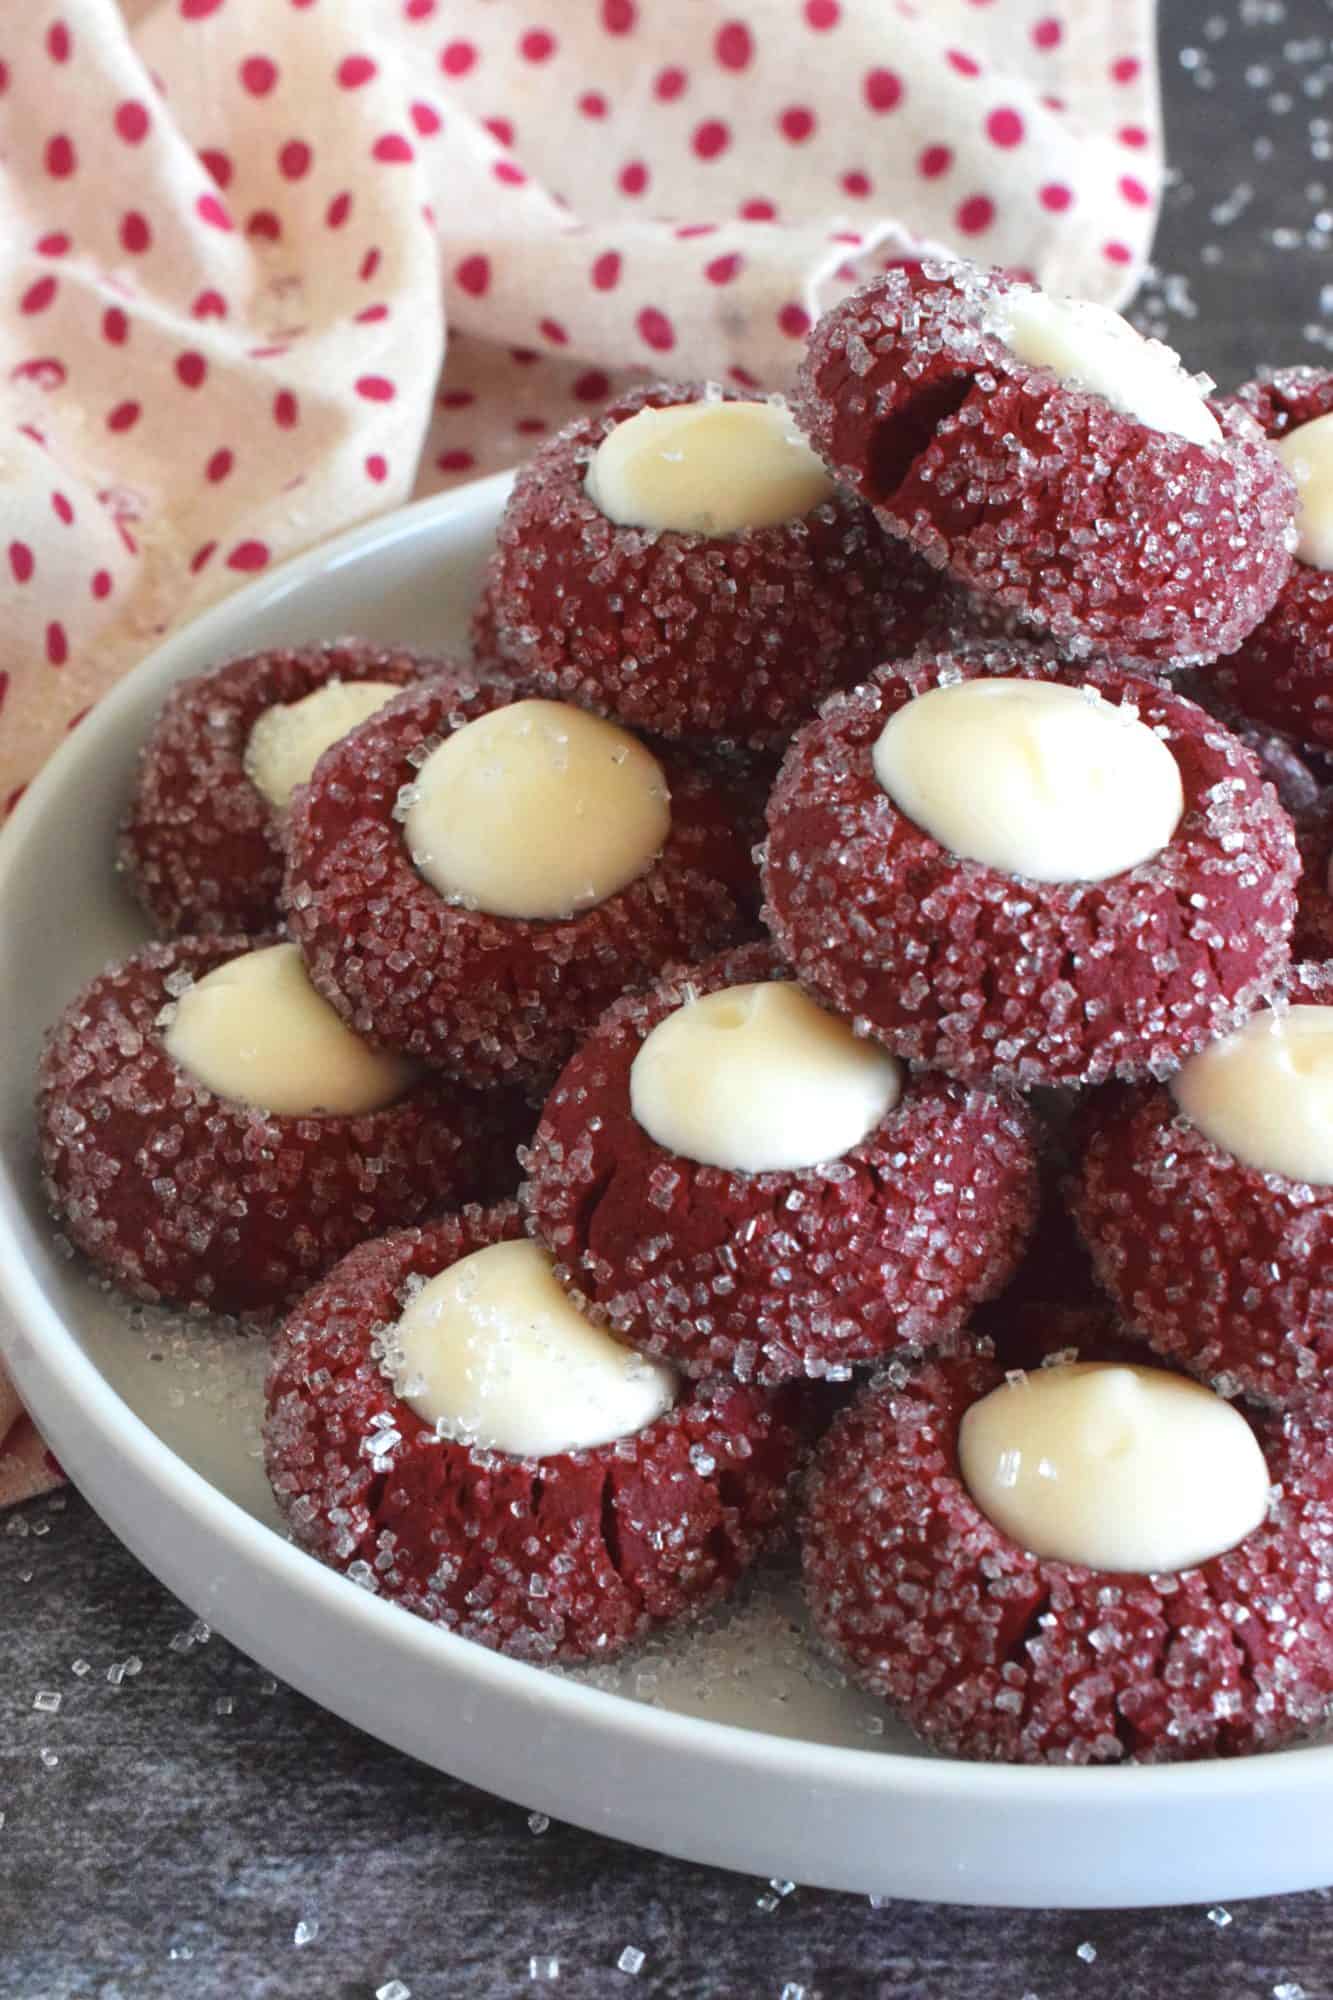
Soft and moist, chocolatey and sweet, the flavour of these Red Velvet Cream Cheese Cookies are well balanced with the slightly sour cream cheese filling. Deliciously simple, yet beautifully impressive, these would make a thoughtful and lovely treat for Valentine’s Day!
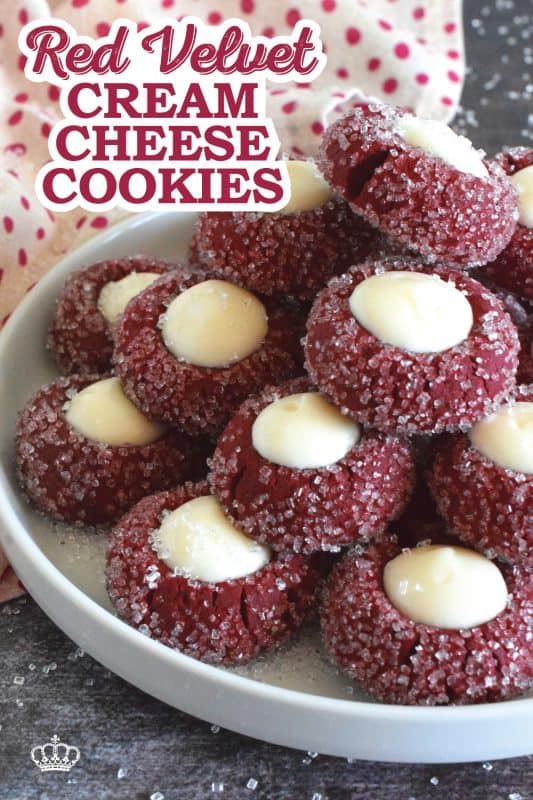
Christmastime is synonymous with thumbprint cookies, but I don’t think they have to be limited to just Christmas, so I have a really great one for you to try today! These Red Velvet Cream Cheese Cookies are chocolatey and moist with a sweet and tart cream cheese filling. These are great anytime, but I think they would be wonderful to share with your favourite valentine!
Yours truly loves red velvet. It’s probably my second favourite cake flavour on the planet. And, it’s certainly my favourite cupcake to eat – especially when the cream cheese frosting is piled sky high! Just in case you’re wondering, my absolute favourite cake flavour of all time is carrot cake. I think that might make me seem old-fashioned, but it is what it is – I just love it! But today, we are going to take all of that red velvet cake and cream cheese frosting flavour and pack it into a delicious thumbprint-style cookie!
Make your own online recipe box!
Click the in the lower right corner of your screen
& follow the quick and easy instructions!
WHERE DOES RED VELVET COME FROM?
Red Velvet Cream Cheese Cookies have the flavours you love in a red velvet cake. What is red velvet anyway? Well, red velvet cake is thought to have originated in the Victorian era when they served velvet cakes as a fancy dessert. The term velvet was a description used to let consumers know the dessert had a soft and velvety crumb texture.
During that same time, devil’s food cake was introduced, which is how some believe that red velvet cake came about. The difference between the two cakes is that devil’s food cake uses chocolate and red velvet cake uses cocoa. Traditionally, red velvet cake is iced with a French-style butter roux icing. This icing is sometimes called Ermine Frosting. It’s very light and fluffy, but also very time consuming to make. Cream cheese frosting or buttercream are mostly used today.

RED VELVET HISTORY – OR IT IS A FABLE?
Interestingly, here in Canada, the red velvet was a well-known dessert flavour in the restaurants and bakeries of the Eaton’s department store chain in the 1940s and 1950s. It was promoted as an exclusive recipe. Employees who knew the ingredients were sworn to silence. Many believed it was the invention of the department store matriarch, Lady Eaton. This, however, was not the case.
Whoever invented it, we have to be thankful to them. Because, the love of red velvet has found itself spread through the food industry, but also in cosmetics and home accents and décor. There are endless red velvet-flavored products, including protein powder, tea, lattes, Pop-Tarts, waffles, and alcoholic beverages. The scent is used for candles and air fresheners as well. As a consumer, I think I see red velvet products surface mostly a week or so before Valentine’s Day. It’s because the deep red colour is generally associated with those two particular times of the year.
INGREDIENTS NEEDED TO PREPARE THIS RECIPE
The following is a list of the ingredients needed to prepare this recipe. For exact amounts and measurements, refer to the printable recipe card located near the bottom of this post.
For the Cookies:
- Flour – No need for anything special. Just use regular all-purpose flour. I have not tried this recipe with any other type of flour.
- Cocoa Powder – Cocoa powder is an unsweetened chocolate product that adds deep chocolate flavor to desserts and beverages. Use a good quality cocoa powder, not the kind we used to stir into milk as kids! If you don’t have dark, you can use regular cocoa.
- Baking Powder
- Butter – Make sure your butter is softened and at room temperature.
- Vegetable Shortening
- Sugar – Sugar will caramelize when baked, which will help to brown cookies and cakes. In cookies, the sugar will help the dough to spread, and will create a crispness to the bottom of the cookie.
- Eggs – Whenever you set out to bake, make sure your eggs are at room temperature too – just like your butter!
- Vanilla Extract
- Red Food Colouring
- Sanding Sugar
For the Cream Cheese Filling:
- Cream Cheese – Use full fat, brick-style cream cheese rather than whipped or light for best results.
- Sugar
- Sour Cream
- Vanilla Extract
- Egg Yolk
- Cornstarch
HOW TO MAKE RED VELVET CREAM CHEESE COOKIES
Preheat your oven to 350 degrees F and prepare a baking sheet by lining it with a silicone baking mat or parchment paper. Set aside. Measure all of the cream cheese filling ingredients into a mixing bowl and beat well to combine. Set aside. In a separate mixing bowl, beat together the butter, vegetable shortening, and the sugar until well combined – about 2 minutes. Add the egg and the vanilla extract along with the red food colouring. Beat into the butter and sugar mixture until completely incorporated. Add the flour, cocoa, and baking powder. Beat until just combined.
Portion out two teaspoons of cookie dough and roll it into a balls. Roll the balls into the sanding sugar. Place the balls onto the prepared baking sheet, leaving 2 inches of space between each one. Using your index finger, push a hole into the center of each cookie but don’t go all the way through. Push your finger just half way deep into each ball to form a well. Fill each well with the cream cheese mixture.
Bake for 13 minutes. Remove the cookies from oven and allow them to cool for 3-5 minutes before transferring them to a wire cooling rack to finish cooling.
STORING, PACKAGING, & FREEZING
When it comes to most cookies, they taste best at room temperature, but they don’t hold up well to being left out on your countertop for long periods of time. Cookies will stay fresh in a cookie jar or food-safe container with a lid for 3-5 days if left to sit on your kitchen countertop. You can store them in a food-safe container in your fridge. When you want one, two, or half a dozen, take them out of the container and place them in a single layer on a plate. Let them sit at room temperature for 5 minutes and they’re ready!
If you plan to freeze your Red Velvet Cream Cheese Cookies, you certainly can! Once the cookies have fully cooled, pile them into a clean, food-safe container. The container must be freezer-friendly! You’ll want to ensure a very tight-fitting lid too. I use these quite often when freezing baked goods. I like to place a sheet of plastic wrap over the top of the container before pushing the lid on. This helps to create a better seal. The goal is to keep all of that freshness locked in! You can freeze these cookies for up to three months.
QUESTIONS?
If I have not answered all of your questions in the text above, don’t hesitate to reach out to me! You can contact me by sending me a message in the comments section further down the page. I will try my best to answer as soon as possible! You might reach me even faster by following me on Facebook and sending me a private message. Scroll down below the recipe card to find my Follow Me on Social Media box and never miss another recipe!

Do You Like This Recipe?
You should consider trying these other delicious recipes too!

Similar to a classic thumbprint cookie, these valentine’s cookies use candy melts instead of jam. They make a great valentine’s treat for that special someone or send a batch off to school with your kids to share with their friends!

Not all great cookies are soft and chewy. Valentine Cinnamon Heart Cookies are thin and crispy with a soft, sweet center. And, they’re packed full of everyone’s favourite cinnamon candy! Make a batch for your special someone today!

These biscotti are loaded with homemade strawberry shortcake crumbs and topped with a simple sugary glaze. Strawberry Shortcake Biscotti are light, airy, and delicious! Super easy to make, and with their cheerful inclination, no one could resist! Treat yourself to one of these with a hot tea on a lazy Sunday afternoon.

Red Velvet Cream Cheese Cookies
Ingredients
For the Cookies:
- 1 1/2 cups all-purpose flour
- 3 tablespoons cocoa powder
- 1 teaspoon baking powder
- 6 tablespoons salted butter, softened
- 4 tablespoons vegetable shortening
- 2/3 cup sugar
- 1 large egg, room temperature
- 1 teaspoon vanilla extract
- 6-7 drops red food colouring
- 1/4 cup sanding sugar (for rolling the balls into)
For the Cream Cheese Filling:
- 4 ounces cream cheese, softened
- 2 tablespoons sugar
- 1 tablespoon sour cream
- 1 teaspoon vanilla extract
- 1 large egg yolk
- 1 teaspoon cornstarch
Instructions
- Preheat your oven to 350 degrees F and prepare a baking sheet by lining it with a silicone baking mat or parchment paper. Set aside.
- Measure all of the cream cheese filling ingredients into a mixing bowl and beat well to combine. Set aside.
- In a separate mixing bowl, beat together the butter, vegetable shortening, and the sugar until well combined – about 2 minutes.
- Add the egg and the vanilla extract along with the red food colouring. Beat into the butter and sugar mixture until completely incorporated.
- Add the flour, cocoa, and baking powder. Beat until just combined.
- Portion out two teaspoons of cookie dough and roll it into a balls. Roll the balls into the sanding sugar.
- Place the balls onto the prepared baking sheet, leaving 2 inches of space between each one.
- Using your index finger, push a hole into the center of each cookie but don't go all the way through. Push your finger just half way deep into each ball to form a well.
- Fill each well with the cream cheese mixture.
- Bake for 13 minutes.
- Remove the cookies from oven and allow them to cool for 3-5 minutes before transferring them to a wire cooling rack to finish cooling.
Nutrition
Did you make this recipe?
Upload a photo and tag me so that I can see it!


Leave a Reply