
Mint Spritz Cookies are prepared with a classic spritz cookie dough that has been flavoured with mint extract and coloured with green food colouring. These bite-sized, whimsical cookies are a great addition to cookie platters and cookie boxes for gifting!

We all know that spritz cookies are one of the most popular and long-standing types of Christmas cookies. I’m in my 40s and I can remember them from when I was a kid. Although I have to say, I think the spritz cookie press has come a long way since the one that could be found in my mother’s 1970s kitchen drawer! Thankfully too, because these Mint Spritz Cookies need to be perfect to match their perfect taste!
The great thing about spritz cookies is that you can flavour them easily enough by changing up the extract. You can colour them too if you want by adding a bit of food colouring to the dough. Topping a spritz cookie is probably one of the most fun things to do. If you have kids in your home, get them involved in this. Kids love to help decorate cookies! If you find yourself a good spritz cookie recipe, like this one, hang on to it and use it over and over again.
Make your own online recipe box!
Click the in the lower right corner of your screen
& follow the quick and easy instructions!
WHY ARE THEY CALLED SPRITZ COOKIES?
Sprizgeback is the German name for spritz cookies. Like the popular spritz cookie, the cookies are crisp, fragile, somewhat dry, and buttery.
The German verb spritzen means to squirt in English. These cookies are made by squirting (or pushing) the dough through a press that has been fitted with patterned holes. These holes create a resemblance to an object when baked, such as Christmas trees!
In North America, the name Spritzgeback is shortened to spritz. In Germany, the cookie is prepared when parents bake with their children. Traditionally, the recipes that are used are passed down to the children.

SUBSCRIBE NOW AND NEVER MISS ANOTHER RECIPE!
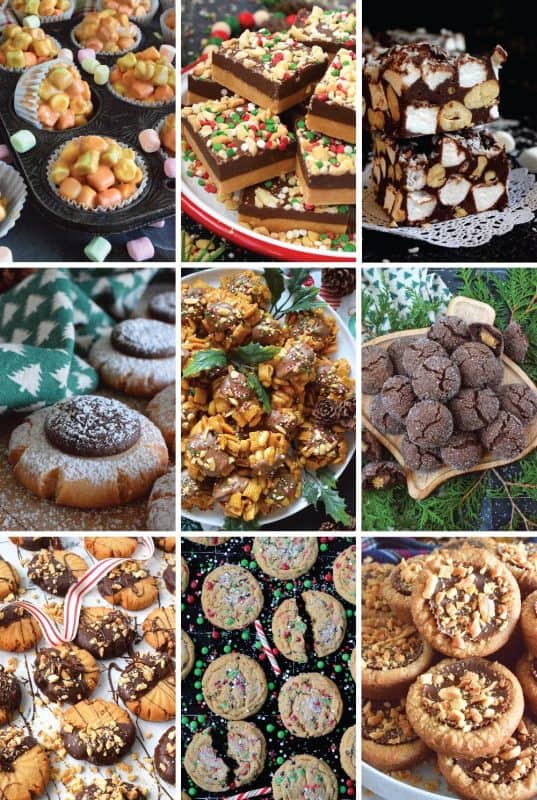
So, welcome, Dear Reader, to my annual holiday-themed recipes. Traditionally, every year I share a series of recipes that you might already be familiar with. For example, I’ve previously shared 12 Holiday Trifles, 12 Holiday Bars & Squares, and even these 12 Edible Holiday Wreath recipes! Also, some of my favourite recipe collections from previous years are my 75 Homemade Gifts from Your Kitchen, my 50 Make Ahead Freezer Friendly Christmas Recipes, and my 30 No-Bake Christmas Recipes post.
This year I’m doing it differently. Rather than sharing multiple back to back series, I’m sharing a new holiday-themed recipe almost every day from now until Christmas Eve. For those of you who have followed my annual Lord Byron’s 24 Cookies of Christmas series, don’t worry, you will still get lots of new cookie recipes this year too. I will not, however, be publishing the cookies back to back in a 24-day series. This would have been my 8th year running the series and it becomes very exhausting, so this year, I’m spreading the recipes out so that I’m not sharing the same type of recipe every day.
You really don’t want to miss one of these recipes, so if you have not yet subscribed to Lord Byron’s Kitchen, I encourage you to do so. That way, a new recipe will be emailed to you every day. You won’t have to bother to come looking for it! And, just in case you’re curious, you can see previous annual posts for my 24 Cookies of Christmas Series here!

INGREDIENTS NEEDED TO PREPARE THIS RECIPE
The following is a list of the ingredients needed to prepare this recipe. For exact amounts and measurements, refer to the printable recipe card located near the bottom of this post.
- Butter – Make sure your butter is at room temperature! To be perfectly honest, I have made these with both salted and unsalted butter and there’s no difference in taste or appearance once all is said and done. Use what you have on hand.
- Confectioner’s Sugar – This superfine sugar is sometimes called powdered sugar.
- Eggs – Whenever you set out to bake, make sure your eggs are at room temperature too – just like your butter!
- Mint Extract
- Flour – No need for anything special. Just use regular all-purpose flour. I have not tried this recipe with any other type of flour.
- Baking Powder – This is used to increase the volume of the batter and to add texture as well.
- Green Food Colouring – Optional.
- Holiday Sprinkles – Optional.
HOW TO MAKE MINT SPRITZ COOKIES
Preheat your oven to 350 degrees F and prepare a baking sheet by lining it with a silicone baking mat or parchment paper. Set aside. In a mixing bowl, beat together the butter and the sugar until well combined – about 2 minutes. Add the egg and the mint extract. Beat into the butter and sugar mixture until completely incorporated. Add the flour and baking powder. Add to the butter mixture and beat until just combined.
Load the cookie dough into a cookie press which has been fitted with the disc of your choosing. Press the dough onto the prepared baking sheet, leaving 1 inch of space between each cookie. Top with a spinkling of holiday sprinkles and bake for 8 minutes. Remove from the oven and allow the cookies to cool slightly on the baking sheet for 2 minutes. Transfer the cookies to a wire cooling rack to finish cooling.
In the photographs, you will note the cookies are green and white. I divided the dough in half and added a little bit of green food colouring to one half. The second half was left without colouring. Beat the green colouring into the dough until well incorporated.
When loading the dough into your cookie press, add a mixture of the green and white dough into the cavity and press it down to combine the two colours. Press the dough onto the prepared baking sheets. Top with sprinkles before baking if you wish. Otherwise, the spritz cookies can be baked as is. This is just an option. You don’t have to use food colouring at all or you can colour the dough all green or even red! Have fun with it!

RECOMMENDATION, NOT AN ENDORSEMENT
Kitchen gadgets are not something that I own much of, and they’re certainly not something that I promote here at Lord Byron’s Kitchen, but I’m going to make an excuse for the cookie press. The reason for this is simple – I think most of us bakers already have one readily available, and if you don’t, I encourage you to purchase one, because it makes baking cookies so easy and so pretty!
As badly as I’ve wanted one, I’ve often thought that it would be something I’d use once and never use it again. I’ve also thought that the images of pressed cookies looked top damn perfect, and was of the mind that there was no way a cookie press could get cookies to look that precise and uniform. I was wrong. I can’t speak for all cookie presses, but the brand that I have – Marcato – works brilliantly and I couldn’t wait to break it in!

MAKING THE BEST SPRITZ COOKIES
There are a couple of tips that I want to share with you to ensure you have the best spritz cookie experience. First and foremost, please be absolutely sure that your butter, egg, and even the extract is at room temperature. This will make the dough soft and pliable so that you can squeeze it out of the spritz easily and perfectly.
Secondly, the cookie dough will need something to stick to – let me explain. When you spritz out the cookie dough, the spritzer is flush against the baking sheet. In order for the dough to come off of the spritzer and stick to the pan, the right lining is needed.
You have two choices. First, you can do it right onto the pan. But, I have found that if I do not line my baking sheet first, then the cookies become too dark on the bottom. A sheet of parchment paper makes the job very frustrating. First, it moves around too easily. And, secondly, the dough doesn’t stick to it very well, meaning that when you lift the spritzer up, the dough usually comes with it.
The best results are achieved when using a silicone baking mat. Even when they are super clean, they still have a gel-like, almost sticky/gluey feel to them. It’s the perfect surface to stick the dough too, and they provide a great layer of heat protection between the baking sheet and the bottom of the cookie itself. Perfection every time!

STORING, PACKAGING, & FREEZING
When it comes to most cookies, they taste best at room temperature, but they don’t hold up well to being left out on your countertop for a long time. Cookies will stay fresh in a cookie jar or food-safe container with a lid for 3-5 days if left to sit on your kitchen countertop. You can store them in a food-safe container in your fridge. When you want one, two, or half a dozen, take them out of the container and place them in a single layer on a plate. Let them sit at room temperature for 5 minutes and they’re ready!
If you plan to freeze your Mint Spritz Cookies, you certainly can! Pile them into a clean, food-safe container. The container must be freezer-friendly! You’ll want to ensure a very tight-fitting lid too. I use these quite often when freezing baked goods. I like to place a sheet of plastic wrap over the top of the container before pushing the lid on. This helps to create a better seal. The goal is to keep all of that freshness locked in!
You can freeze these cookies for up to three months. If you plan to give previously frozen cookies as a gift, I would lay them out on a wire cooling rack to thaw completely. Once thawed, pile into cellophane bags and tie with a ribbon, or stack in a cookie tin/box.

QUESTIONS?
If I have not answered all of your questions in the text above, don’t hesitate to reach out to me! You can contact me by sending me a message in the comments section further down the page. I will try my best to answer as soon as possible! You might reach me even faster by following me on Facebook and sending me a private message. Scroll down below the recipe card to find my Follow Me on Social Media box and never miss another recipe!
Do You Like This Recipe?
You should consider trying these other delicious recipes too!


Mint Spritz Cookies
Ingredients
- 1 cup butter, softened
- 1 cup confectioner's sugar
- 1 large egg
- 1 teaspoon mint extract
- 2 1/4 cups all-purpose flour
- 1 teaspoon baking powder
- green food colouring, optional (see notes)
Instructions
- Preheat your oven to 350 degrees F and prepare a baking sheet by lining it with a silicone baking mat or parchment paper. Set aside.
- In a mixing bowl, beat together the butter and the sugar until well combined – about 2 minutes.
- Add the egg and the mint extract. Beat into the butter and sugar mixture until completely incorporated.
- Add the flour and baking powder. Add to the butter mixture and beat until just combined.
- Load the cookie dough into a cookie press which has been fitted with the disc of your choosing.
- Press the dough onto the prepared baking sheet, leaving 1 inch of space between each cookie.
- Top with a sprinkling of holiday sprinkles and bake for 8 minutes. Remove from the oven and allow the cookies to cool slightly on the baking sheet for 2 minutes. Transfer the cookies to a wire cooling rack to finish cooling.
Notes
Nutrition
Did you make this recipe?
Upload a photo and tag me so that I can see it!


Leave a Reply