
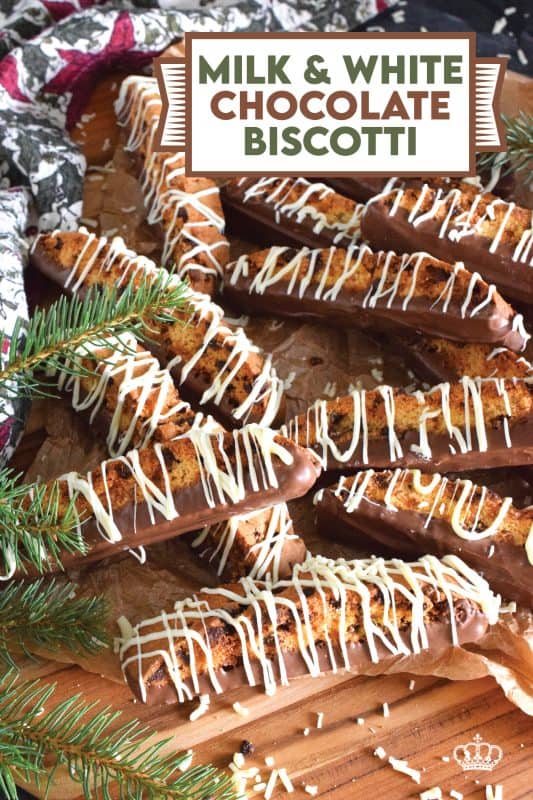
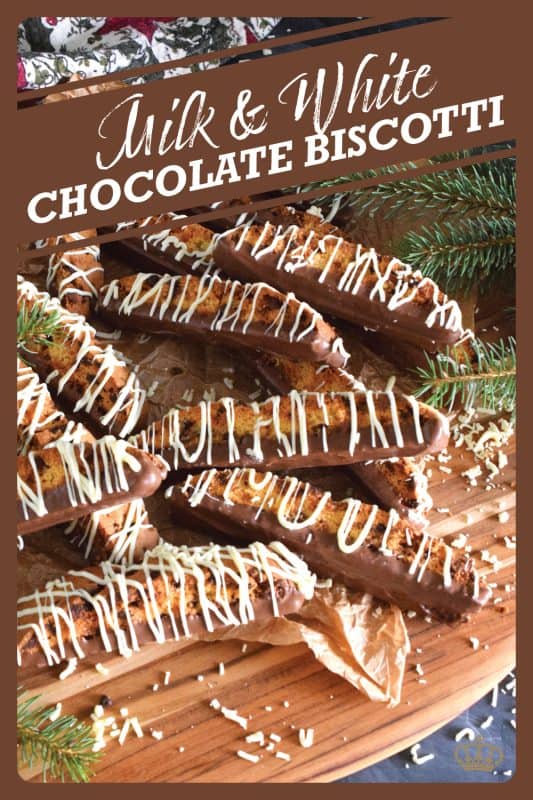
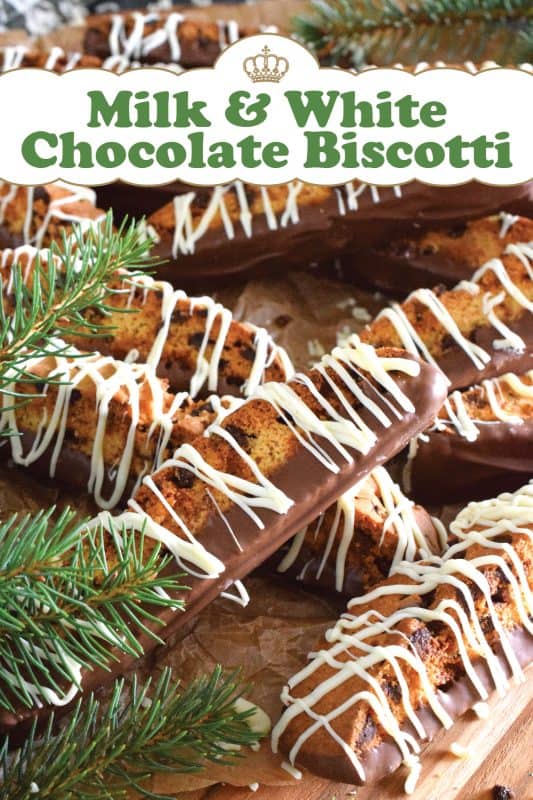
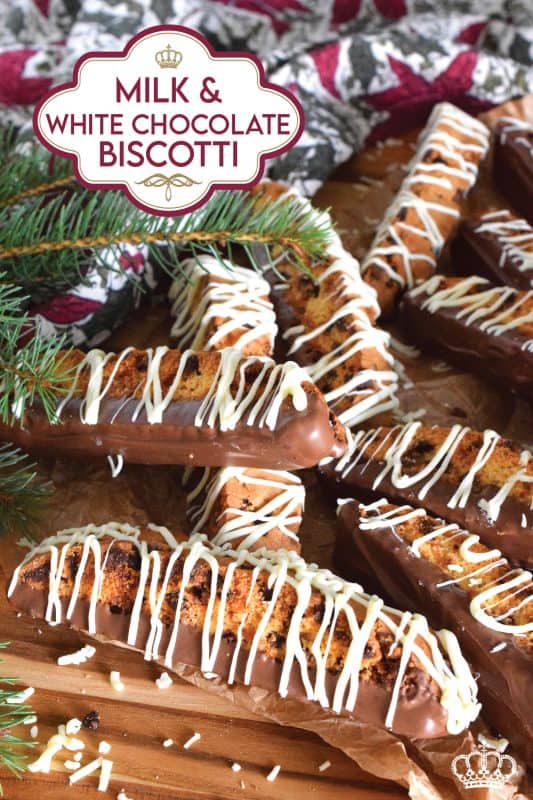
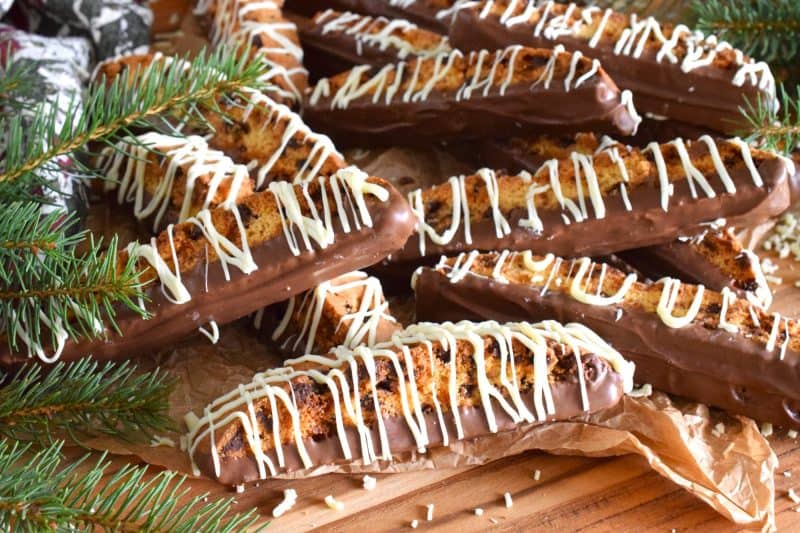
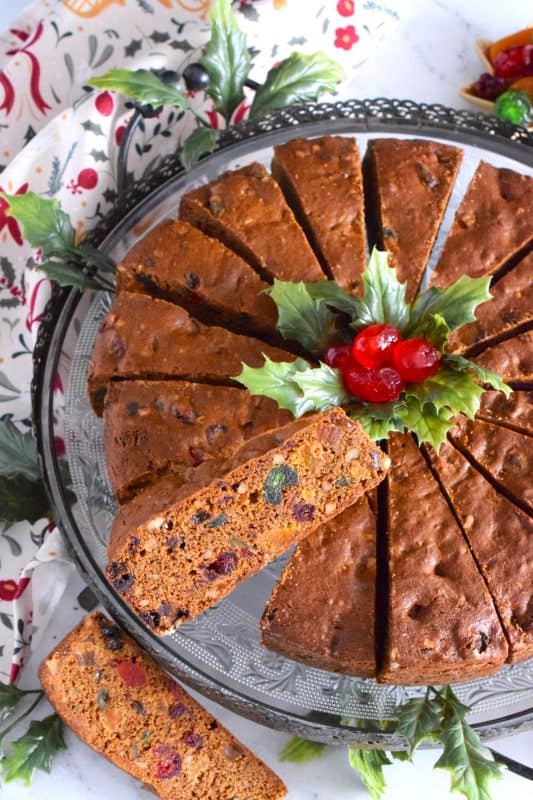
When it comes to sweet treats like biscotti, you cannot go wrong with chocolate! This recipe combines both milk and white chocolate chips into a sweet, vanilla-flavoured cookie dough. Dip and drizzle these Milk and White Chocolate Biscotti with even more chocolate to make them even better!
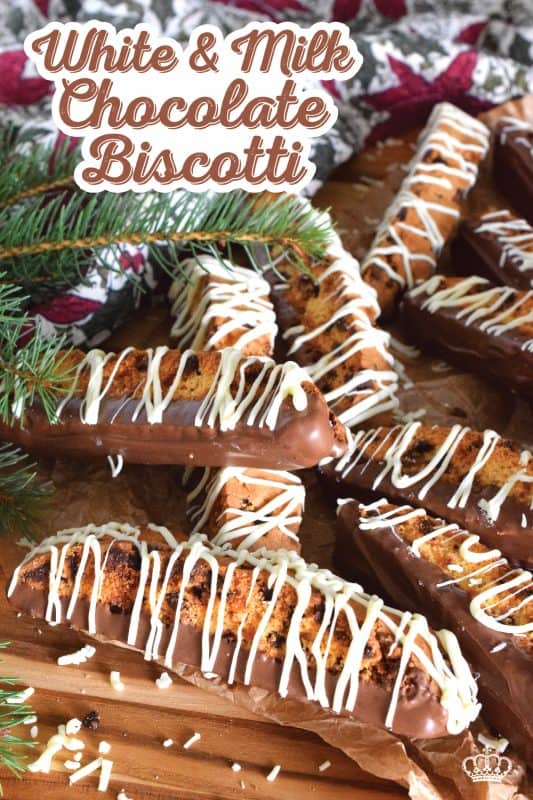
I’d like to tell you that this one is for the kids, but really, that would be a lie! Milk and White Chocolate Biscotti will most certainly be liked by kids, but truth be told, they’re for the kid in all of us! Biscotti does come in all types of flavours, but the combination of milk and white chocolate baked into the twice-baked cookie was a no-brainer. To make them even more delicious and tempting, I dipped the bottoms of the biscotti into melted milk chocolate and then drizzled them with melted white chocolate.
If you are not a lover of white chocolate, you can use all milk chocolate instead. In fact, I’m not a huge fan of white chocolate at all. I just don’t get any pleasure from the taste of it. Milk chocolate is my chocolate of choice, but I decided to use both white and milk chocolate here. The contrast works brilliantly.
Furthermore, if you’re not a fan of milk chocolate either, you can use dark chocolate too. And, if it just so happens that you fall somewhere in the middle, you can use semi-sweet chocolate. See – there is really no excuse not the bake these! Sometimes, you just need to have something simple. If you’re much like me, the best time to enjoy a biscotti is on a Saturday or Sunday afternoon.
Make your own online recipe box!
Click the in the lower right corner of your screen
& follow the quick and easy instructions!
LET ME PAINT THE SCENE FOR YOU!
This is how I imagine it. John.e is out in the backyard, puttering around like he usually does. The cats are sleeping on the couch. And, the house is fully decorated for Christmas. It might be lightly snowing outside, but it’s so warm and cozy inside.
We have an old fashioned radio in our kitchen that I like to use when I’m cooking and baking. But, right now, it’s tuned to a Christmas music station. I can hear Peggy Lee (love her!) singing about a Christmas Carousel. I’ve just made a fresh pot of coffee and I’m going to take a moment to sit down to take it all in.
From where I’m sitting, I can see two of our four Christmas trees. I don’t usually turn the Christmas lights on until later in the evening, but they’ve been on all day today. Between sips of my coffee and bites of my biscotti, I’m working feverishly on my latest cross stitch project in hopes that I can finish it before Christmas is over.
I’m not sure about everyone else, but I love those stolen moments of complete solitude. I have a very active mind and I can’t stand being idle for too long, so I’ll enjoy it for bit. Soon, I’ll get up and fix a decoration, fluff a pillow, or paint an accent wall!
SUBSCRIBE NOW AND NEVER MISS ANOTHER RECIPE!
So, welcome, Dear Reader, to my annual holiday-themed recipes. Traditionally, every year I share a series of recipes that you might already be familiar with. For example, I’ve previously shared 12 Holiday Trifles, 12 Holiday Bars & Squares, and even these 12 Edible Holiday Wreath recipes! Also, some of my favourite recipe collections from previous years are my 75 Homemade Gifts from Your Kitchen, my 50 Make Ahead Freezer Friendly Christmas Recipes, and my 30 No-Bake Christmas Recipes post.
This year I’m doing it differently. Rather than sharing multiple back to back series, I’m sharing a new holiday-themed recipe almost every day from now until Christmas Eve. For those of you who have followed my annual Lord Byron’s 24 Cookies of Christmas series, don’t worry, you will still get lots of new cookie recipes this year too. I will not, however, be publishing the cookies back to back in a 24-day series. This would have been my 8th year running the series and it becomes very exhausting. Also, we have a vacation booked in what would have been the middle of the series, so this year, I’m spreading the recipes out so that I’m not sharing the same type of recipe every day.
You really don’t want to miss one of these recipes, so if you have not yet subscribed to Lord Byron’s Kitchen, I encourage you to do so. That way, a new recipe will be emailed to you every day. You won’t have to bother to come looking for it! And, just in case you’re curious, you can see previous annual posts for my 24 Cookies of Christmas Series here!
INGREDIENTS NEEDED TO PREPARE THIS RECIPE
The following is a list of the ingredients needed to prepare this recipe. For exact amounts and measurements, refer to the printable recipe card located near the bottom of this post.
- Flour – No need for anything special. Just use regular all-purpose flour. I have not tried this recipe with any other type of flour.
- Baking Powder – This is used to increase the volume of the batter and to add texture as well.
- Salt
- Butter – Make sure your butter is at room temperature!
- Sugar
- Eggs – Whenever you set out to bake, make sure your eggs are at room temperature too – just like your butter!
- Vanilla Extract
- Milk Chocolate Chips
- White Chocolate Chips
- Vegetable Oil

HOW TO MAKE MILK AND WHITE CHOCOLATE BISCOTTI
Preheat your oven to 350°F. Line a baking sheet with parchment paper. Set aside. In a mixing bowl, beat together the butter, sugar, salt, vanilla extract, and baking powder until well combined and creamy. Next, add the eggs and beat them into the batter until well mixed. Now, add the flour and mini white and milk chocolate chips. Beat in until just combined. The dough will be sticky.
Turn the dough out onto the prepared baking sheet and form it into a log. (Dust your hands with flour; dough is a bit sticky!) Form it log into a rectangle shape that is roughly 4″ wide and 12″ long. Bake for 25 minutes. Remove from the oven and place the baking sheet on a wire cooling rack so that air can circulate around the baking sheet. Allow to cool for 5 minutes. In the meantime, reduce the heat to 325°F.
Using the parchment paper, slide the log onto a large cutting board. Slice into 3/4″ slices across the width of the log. Place slices back onto the baking sheet which has been lined with more parchment paper. Slices are cut side down. Bake for 12 minutes. Remove from oven. Carefully turn the cookies over and bake for another 12 minutes. Remove from oven and allow to cool on the baking sheet for 3-5 minutes. Transfer to wire cooling rack to finish cooling completely.
Once cooled, transfer the milk chocolate chips to a microwave-safe bowl. At half power, microwave in increments of 30 seconds, stirring well after each increment until the chocolate is melted and smooth. Working with one biscotti at a time, dip the bottoms into the melted chocolate and set them chocolate-dipped side up on a baking sheet. Continue to do this until all of the biscotti have been dipped. Allow the chocolate to cool and firm up. Once the milk chocolate is firm to the touch, turn the biscotti right side up onto a baking sheet lined with a wire cooling rack.
Next, repeat the melting step with the white chocolate chips with the vegetable oil. Transfer the melted white chocolate to a resealable sandwich bag. Cut a small hole in one lower corner. Drizzle the chocolate over the biscotti. Allow the chocolate to firm and harden. Package biscotti for gift-giving or pile into a food-safe container. Leave at room temperature, or freeze until needed for up to 3 months.
STORING AND FREEZING
These biscotti will last in the freezer for three months. Be sure you have a good container with a tight seal. Whenever I’m freezing biscotti, I always double up on the seal action. Before I place the lid on, I always drape a sheet of plastic wrap on top. Then I push the lid on. I just feel that the lid fits more tightly. Any little thing I can do to keep the frost out, I’m going to do it! I like to use containers like this.
Like I always say, if you freeze any baked goods, remove only the amount you want when you decide to thaw them. Fetch the container from the freezer and remove only what you need. Put the lid back on and get the container back in the freezer.
To properly thaw baked goods, place them on a plate or a wire cooling rack. Don’t pile them. Spread them out and give them some space. Let them sit at room temperature for 10 to 15 minutes. They will taste fresh and perfect every single time!
QUESTIONS?
If I have not answered all of your questions in the text above, don’t hesitate to reach out to me! You can contact me by sending me a message in the comments section further down the page. I will try my best to answer as soon as possible! You might reach me even faster by following me on Facebook and sending me a private message. Scroll down below the recipe card to find my Follow Me on Social Media box and never miss another recipe!

Do You Like This Recipe?
You should consider trying these other delicious recipes too!


Milk and White Chocolate Biscotti
Ingredients
- 6 tablespoons butter, melted
- 2/3 cup sugar
- 1/2 teaspoon salt
- 3 teaspoons vanilla extract
- 1 1/2 teaspoons baking powder
- 2 large eggs
- 2 cups all purpose flour
- 1/2 cup mini milk chocolate chips
- 1/2 cup mini white chocolate chips
For the Dip and Drizzle:
- 2 cups milk chocolate chips
- 3/4 cup white chocolate chips
- 1 teaspoon vegetable oil
Instructions
- Preheat your oven to 350°F. Line a baking sheet with parchment paper. Set aside.
- In a mixing bowl, beat together the butter, sugar, salt, vanilla extract, and baking powder until well combined and creamy.
- Next, add the eggs and beat them into the batter until well mixed.
- Now, add the flour and mini white and milk chocolate chips. Beat in until just combined. The dough will be sticky.
- Turn the dough out onto the prepared baking sheet and form it into a log. (Dust your hands with flour; dough is a bit sticky!)
- Form it log into a rectangle shape that is roughly 4" wide and 12" long.
- Bake for 25 minutes. Remove from the oven and place the baking sheet on a wire cooling rack so that air can circulate around the baking sheet. Allow to cool for 5 minutes.
- In the meantime, reduce the heat to 325°F.
- Using the parchment paper, slide the log onto a large cutting board. Slice into 3/4" slices across the width of the log.
- Place slices back onto the baking sheet which has been lined with more parchment paper. Slices are cut side down. Bake for 12 minutes.
- Remove from oven. Carefully turn the cookies over and bake for another 12 minutes.
- Remove from oven and allow to cool on the baking sheet for 3-5 minutes. Transfer to wire cooling rack to finish cooling completely.
- Once cooled, transfer the milk chocolate chips to a microwave-safe bowl. At half power, microwave in increments of 30 seconds, stirring well after each increment until the chocolate is melted and smooth.
- Working with one biscotti at a time, dip the bottoms into the melted chocolate and set them chocolate-dipped side up on a baking sheet. Continue to do this until all of the biscotti have been dipped. Allow the chocolate to cool and firm up.
- Once the milk chocolate is firm to the touch, turn the biscotti right side up onto a baking sheet lined with a wire cooling rack.
- Next, repeat the melting step with the white chocolate chips with the vegetable oil.
- Transfer the melted white chocolate to a resealable sandwich bag. Cut a small hole in one lower corner. Drizzle the chocolate over the biscotti. Allow the chocolate to firm and harden.
- Package biscotti for gift-giving or pile into a food-safe container. Leave at room temperature, or freeze until needed for up to 3 months.
Nutrition
Did you make this recipe?
Upload a photo and tag me so that I can see it!


Leave a Reply