
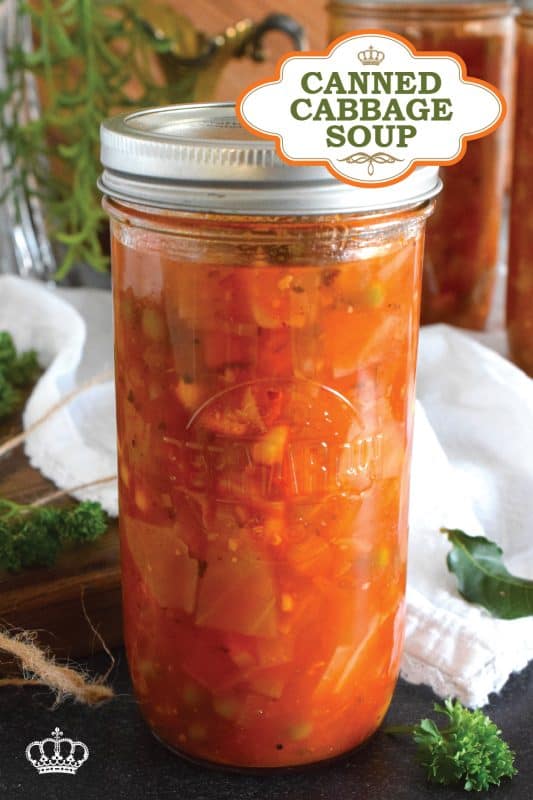
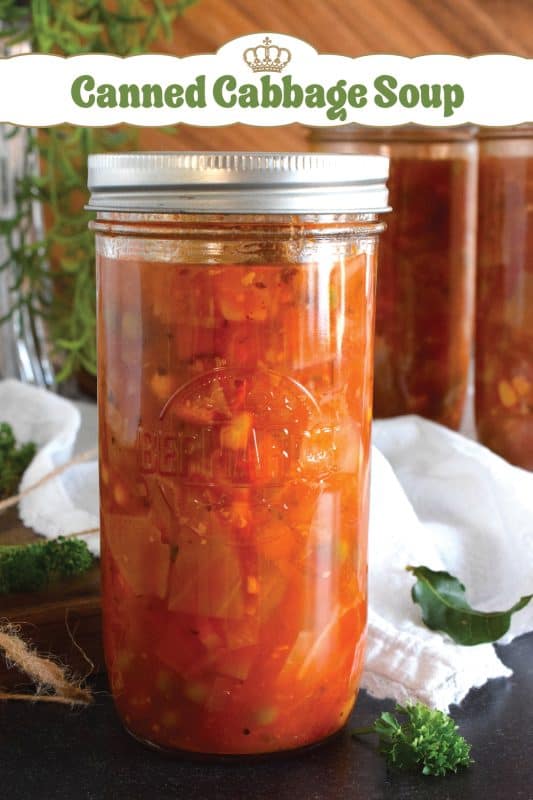
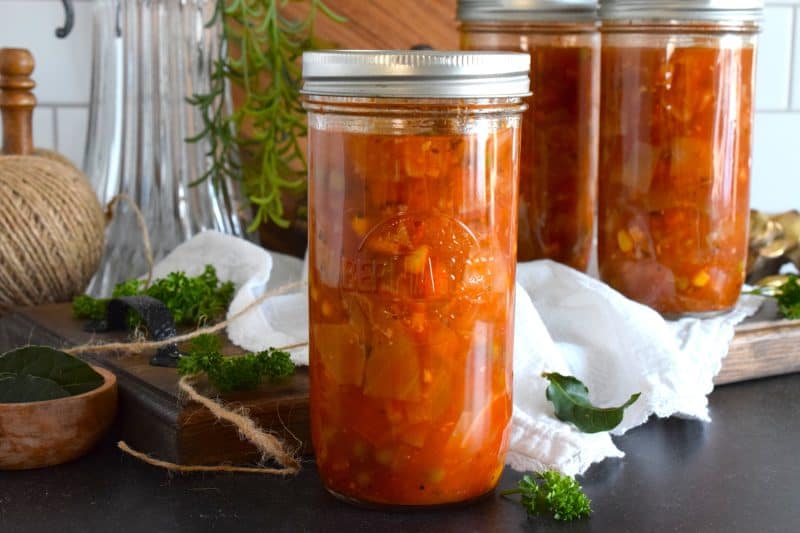
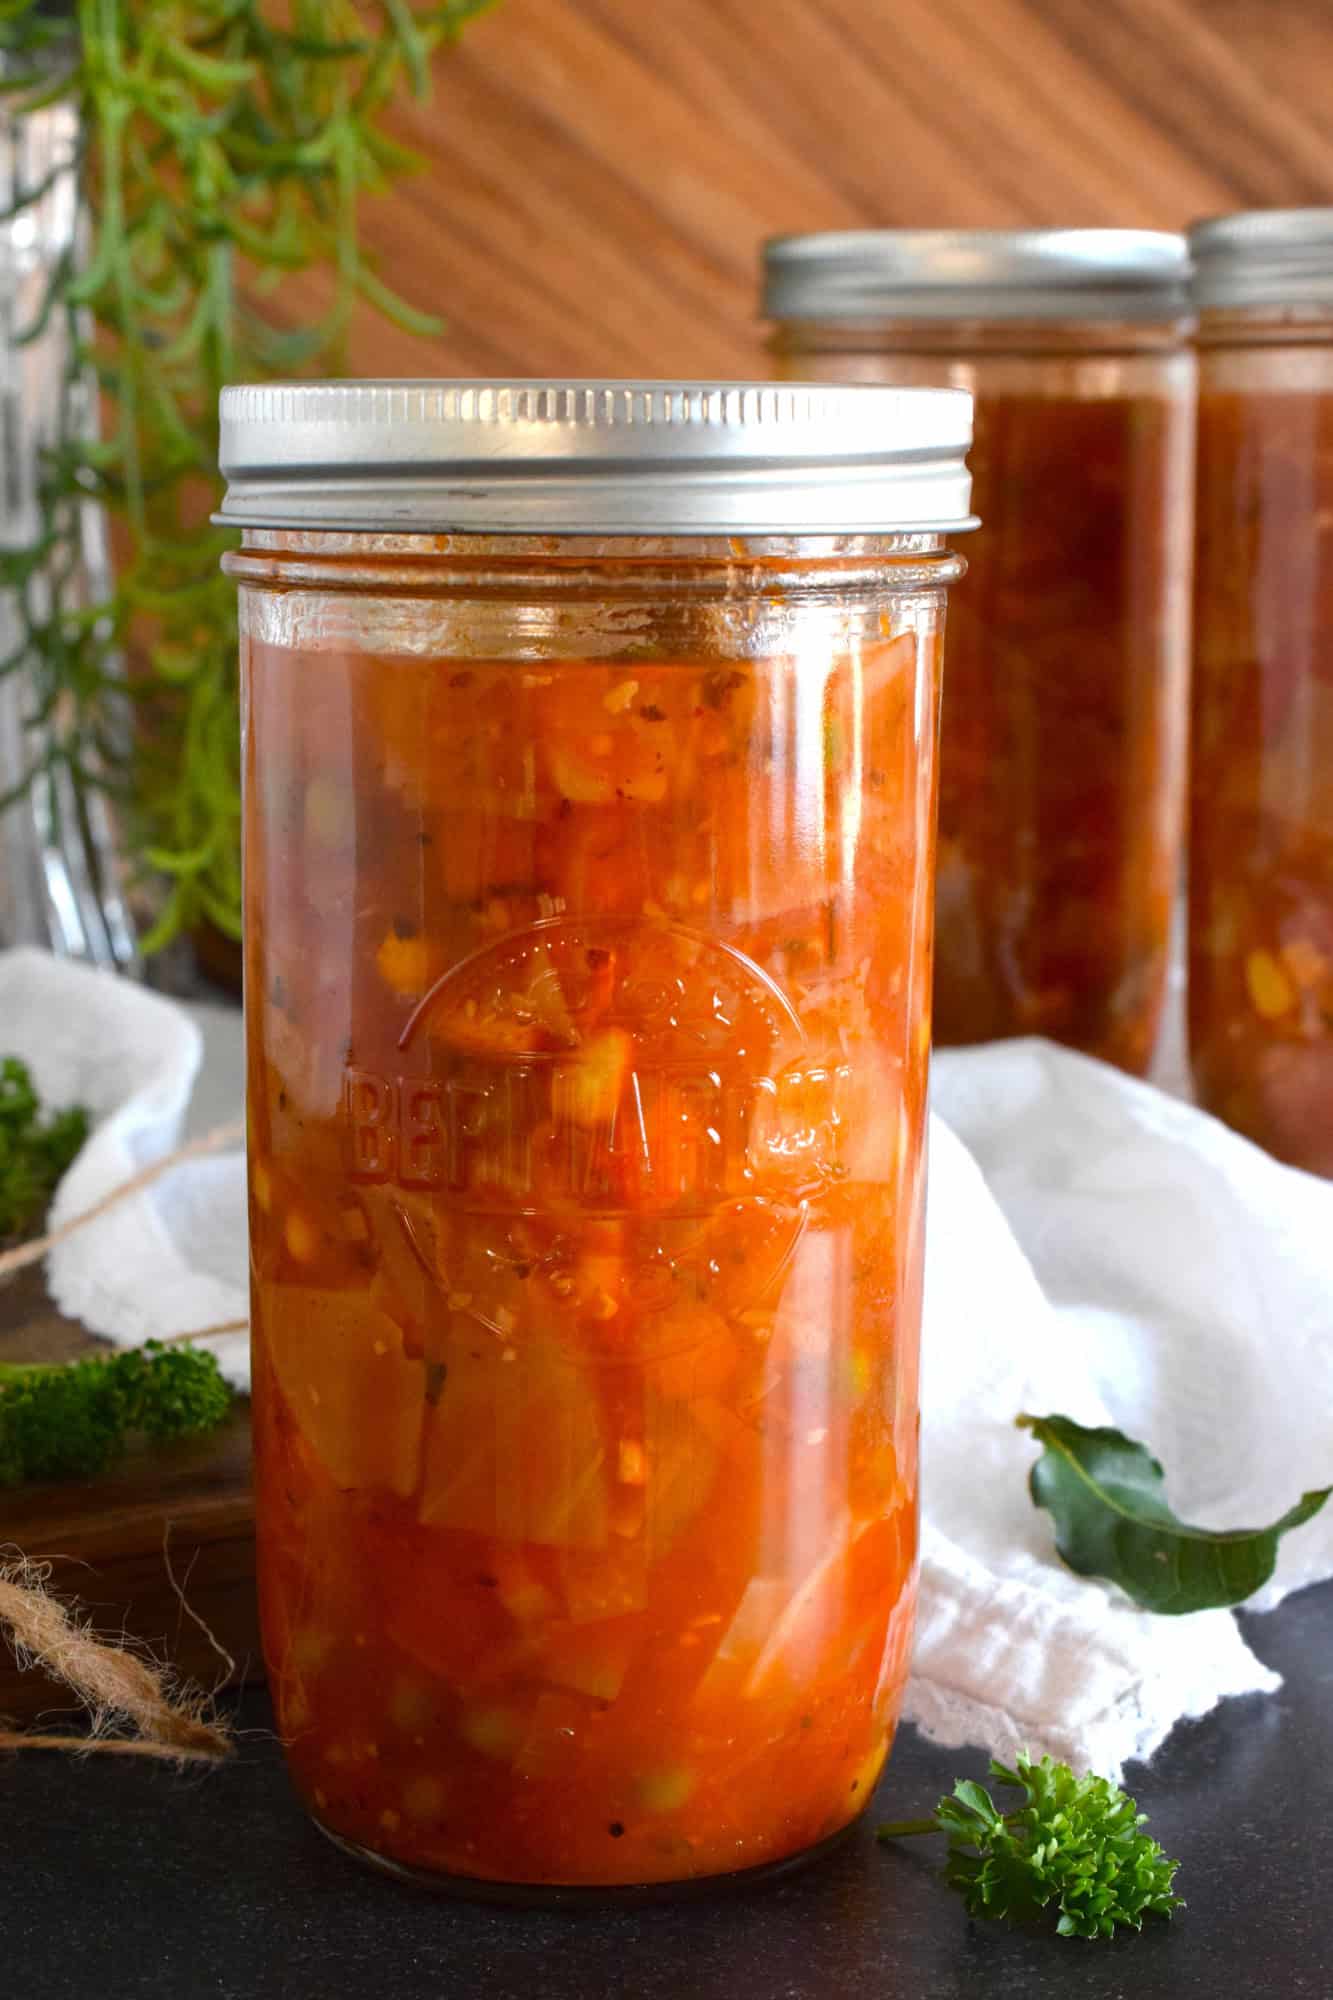
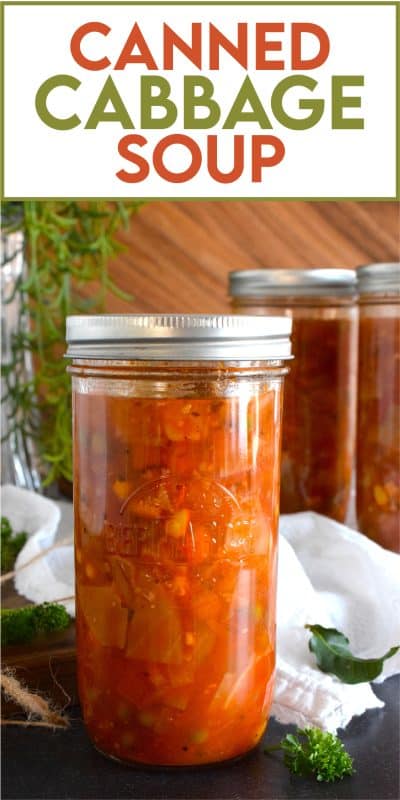
Once upon a time, there was a very popular diet called The Cabbage Soup diet. If you participated in that diet, I want you to know right away that this healthy Canned Cabbage Soup – even though it’s really good for you – tastes so much better than that diet version! Loaded with veggies and prepared with a delicious broth, this soup is cozy, filling, and nutritious! Canning is completely optional!
It’s still soup season – which is what I call January and February – and it’s one of my favourite times of the year! I love it when the weather turns cold and the days get shorter. I still get overly excited about piping hot soups, like this Canned Cabbage Soup, and I still love to wear socks and slippers around the house all day long. But, I have to say, Dear Reader, I’m so tired of winter! We have had so much snow this winter and I’m over it! Every single day, I stare out at the backyard wishing the snow and cold away so that I can start gardening once again.
I used to love winter with such passion. There could never be enough snow and it could never be cold enough. I was miserable when summer rolled around! But, now that I’m 50 years old, winter just does not have the same appeal. Some of the reason is because I have found a love for gardening, but this winter specifically, it’s the snow. To make myself feel better, I’m eating soup for dinner tonight.
You will note that this particular recipe is for Canned Cabbage Soup, but you can easily prepare this soup without canning it for long-term storage. We have a canning pantry that I like to keep well stocked and I love to can, so if that’s you too, then you have to try this soup. And, please do not be deterred and associate this soup with that nasty Cabbage Soup Diet – this one is so much better!
INGREDIENTS NEEDED TO PREPARE THIS RECIPE
The following is a list of the ingredients needed to prepare this recipe. For exact amounts and measurements, refer to the printable recipe card located near the bottom of this post.
- Olive Oil
- Onion – I use yellow, white, and sweet onions interchangeably. Either of them will do just fine.
- Celery – I know many people who don’t care for celery in soup, but the flavour is needed here.
- Pickling Salt – If you use regular table salt or sea salt, you run the risk of the broth becoming super cloudy. (If you do not plan to can this soup, regular salt will do.)
- Ground Black Pepper
- Garlic – Use fresh garlic whenever possible.
- Ginger – Use fresh grated ginger.
- Cabbage – I’m using regular green cabbage. One small cabbage will do.
- Frozen Veggies – A combination of carrots, peas, corn, and green beans.
- Low Sodium Vegetable Stock – You can use chicken stock too if you don’t care to keep this soup vegetarian.
- Canned Diced Tomatoes – Use the juice too.
- Tomato Paste
- Italian Seasoning – There are many differing Italian seasoning blends out there. Use the one you’re most comfortable with. I have a great homemade Italian Seasoning Blend if you want to make up your own.
- Parsley – For garnish, colour, and freshness.
HOW TO MAKE CANNED CABBAGE SOUP
Add the olive oil, onion, celery, salt, and ground black pepper to a large, heavy-bottomed stock pot. Over medium heat, cook the vegetables for 5 minutes, stirring often. Add the garlic and ginger. Cook for 2 minutes. Add the cabbage and stir well into the onions and garlic. Cook for 7 minutes, allowing the cabbage to wilt, stirring often. Next, add the frozen veggies, vegetable stock, diced tomatoes, tomato paste, and Italian seasoning. Stir well to combine. Allow the soup to come to a low boil and boil for 10 minutes. Reduce heat to a simmer and simmer for 20 minutes.
In the meantime, prepare your pressure canner as per the instructions that are particular to your individual canner. Wash the jars, sealing lids, and screw lids in hot soapy water and rinse the soap off well under running hot water. Place the clean jars upright on a baking sheet and place them in the oven preheated to 200 degrees F. Set screw bands aside. Next, boil a kettle of water and pour it into a clean glass bowl. Carefully submerge the sealing discs or lids in the bowl of hot water and set them aside.
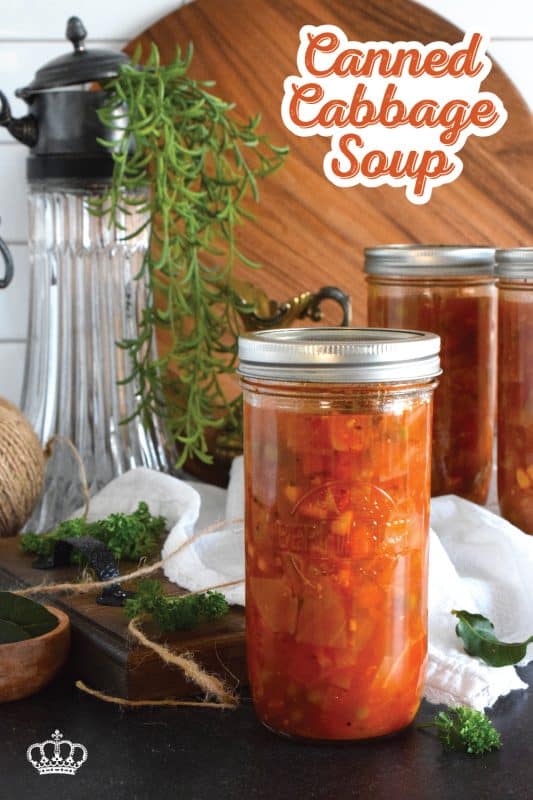
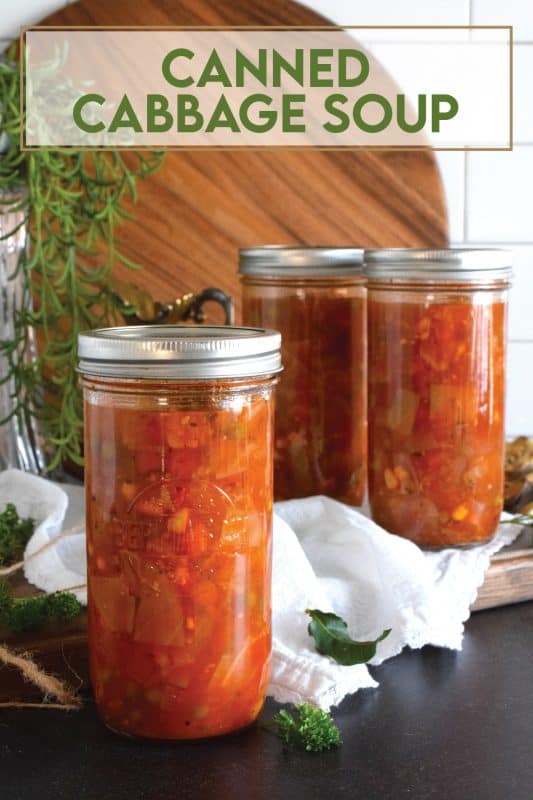
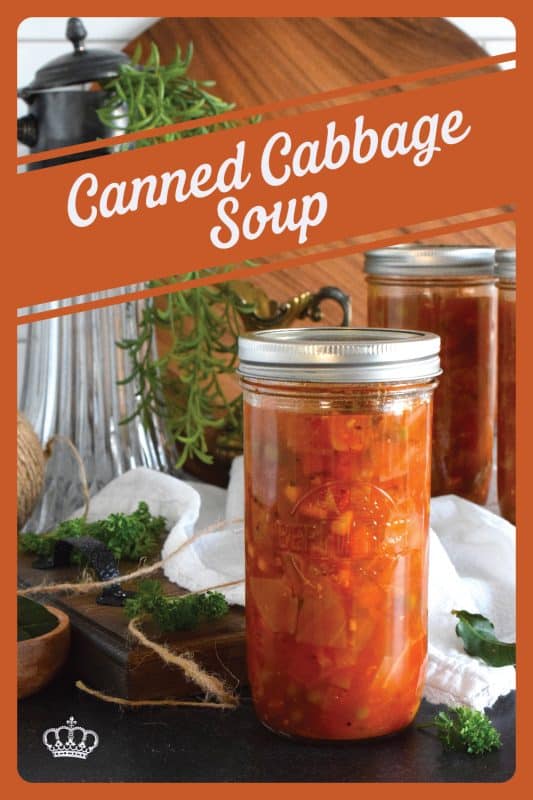
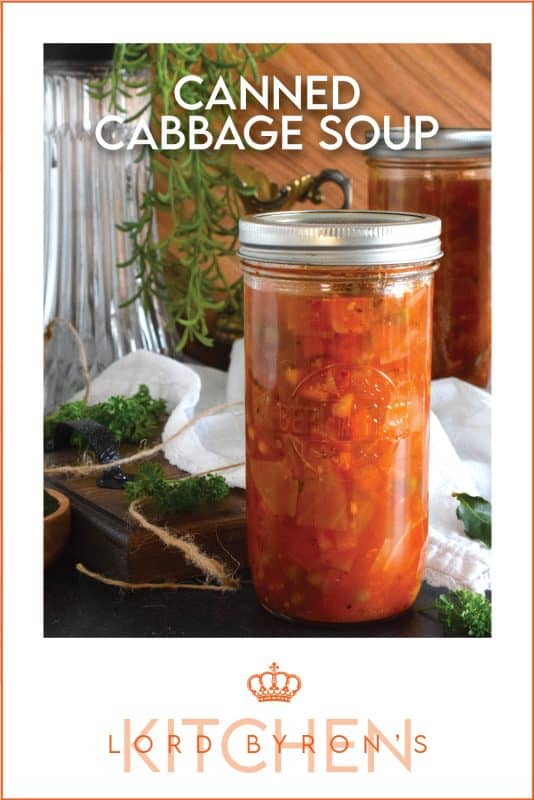
Once the soup has simmered for 20 minutes, turn off the heat and stir in the parsley. To fill the jars, use a canning funnel to prevent spilling and to make job easier. Using a slotted spoon, ladle enough veggies into each prepared jar so that the jar is half filled with veggies. (I’m using 24 ounce jars which yielded 8 jars of soup. You can use 16 ounce or 32 ounce jars as well. Obviously, the yield will change accordingly.) Next, use a soup ladle to top up the jars with the broth, leaving 1 inch of headspace. Remove any air bubbles and top up the jars with more broth if needed. Use a clean, damp kitchen towel to wipe the rims of the jars. Use a magnetic lid lifter to remove the lids from the bowl of boiled kettle water and position each one centered on the rim of each jar. Screw a band onto each jar, tightening only with your fingertips – do not overtighten!
Do you have a question or comment?
Would you like to leave a review?
Scroll down to the comment section and write me a message.
I will personally respond as soon as possible!
This is optional, but at this point, I like to pour a splash of white vinegar into the canner. This will a cloudy buildup on the outside of jars if you have hard water. Next, transfer the jars to your prepared pressure canner. Place the lid on your canner and tighten. Allow the canner to steam vent for ten minutes. Next, process using a 10 pound (69 kPa) weighted gauge for the following times: 60 minutes for 16 ounce jars, 70 minutes for 24 ounce jars, and 85 minutes for 32 ounce jars. Be sure to adjust pressure for your altitude if over 1000 feet. Time the processing from the time the canner has reached full pressure. Once done, turn off the heat and allow canner to decompress naturally.. (Ten pounds is recommended for those of you who are 0-2000 feet above sealevel.) Once your canner has decompressed, remove the lid and transfer the jars to a wooden cutting board using a jar lifter. Allow the jars to cool undisturbed for 24 hours. Check to ensure the lids have sealed. Label and store in a cool, dark cupboard for up to one year. To serve, simply transfer the contents of a jar to a saucepan and reheat over medium heat until the soup is completely reheated. Enjoy!

HOW TO PRESSURE CAN
STEP 1: PREPARING THE JARS
Some canners say that if you need to boil the jars longer than 10 minutes, then you don’t need to sterilize the jars. I say no! Canning is not as simple and cheap as frying an egg. It takes time, and an investment if you don’t already have the equipment. Eliminate any risk whatsoever by always sterilizing your jars. It’s easy to do! Wash the jars in hot, soapy water. Rinse the jars well under running water to get rid of any soap residue.
Transfer the jars to a large pot of water. Bring to a boil and boil for 2-3 minutes. Using a jar wrench/lifter, lift the jars out of the water, tilting to pour out the water. Be careful; it’s hot! Stand the jar up onto a baking sheet. Once all of the jars are on the baking sheet, place them into your preheated oven at 200 degrees F. This will keep them hot and away from any contamination.
STEP 2: PREPARING THE SEALS AND RINGS
Mason jars are equipped with three parts. The first is the jar. The second and third parts combine to form the lid. The flat disc with the rubber ring on the bottom is the seal. Finally, the circular part that screws onto the jar is called a screw band. Depending on the brand or the recipe you’re reading, the names of these things can vary. But they all do the same thing.
The screw bands never come in contact with the food, so they do not need to be washed or sterilized. But, because I want to eliminate any risk of contamination, I make sure they’re clean. After all, they have been sitting in a warehouse before they got to the store, and then finally, to me. That’s too many germs for my comfort level! I wash them in hot, soapy water, rinse them well, and transfer them to a bowl until I need them. The sealing disk/sealing ring needs a little more consideration.
If you look at the bottom of the lid, you will see a reddish-brown rubber ring. It’s attached to the lid. This ring has a huge job! It is pretty much in charge of keeping your food safe for long-term storage. Wash them in hot, soapy water and rinse them well under running hot water. Place the lids into a glass bowl. I like to separate them so that they are not all stacked. When I’m ready to ladle the food into the jars, I pour a kettle of boiling water over the lids so that they are sterile, and the rubber band softens. That’s it. You have now prepared your jars. Next, we need to get the canner ready!
STEP 3: PREPARING THE CANNER
Pressure canning takes a little more finesse than water bath canning, but it’s very easy to do – just follow the instructions for your particular canner. In most cases, they are all the same, so you can compare your canner’s instructions with the instructions I’m about to give you here. You will need to start by adding about 3 inches of water to your canner. Unlike water bath canning, pressure canning does not require that the jars be completely submerged in water to can properly. All canners no matter the type will have a rack at the bottom. Be sure to insert a canning rack or mat into the bottom of your pot. If you buy a canning pot it will come with one. Otherwise, you can buy them for any pot size. Never let your jars touch the bottom of the pot when canning. They could easily break.
In most cases, if you’re new to canning, you might notice some white residue on the jars. This can be cleaned off once the jars are cool. A few tablespoons of white vinegar in the boiling water helps to eliminate most of it. I use it every single time. You can go ahead and add a splash of white vinegar when you add the 3 inches of water.
Finally, when you are about 20 minutes out from filling your jars, turn the heat to medium and begin to warm up your pressure canner. (Only do this if you are hot-packing. If you are cold-packing, you would not want to set your cold-packed jars directly into a canning pot with boiling water at the bottom.)
STEP 4: FILLING THE JARS
Depending on the recipe, filling the jars is quite easy. Having some inexpensive equipment on hand can make this process much easier. Invest in a canning funnel. It will help you ladle the food into the jars without making a mess. Remember to pay attention to the recipe’s recommended headspace. This is the amount of empty space from the top of the food to the very top of the jar. Also, it’s imperative to keep the rim of the jar clean to ensure a good seal. You will also need a bubble remove. You can buy these, but I’m not a fan of them. A clean wooden chopstick does the same thing. Removing bubbles will prevent mold from growing.
Lastly, you will need a magnetic lid lifter. Remember how I said the flat sealing lids will be submerged into a bowl of boiling water? Well, you can’t just pick them up with your hands. First of all, it’s hot! Secondly, you will want to eliminate the risk of any contamination. Do not touch the underside of the lid. Period! Using a magnetic lid lifter will allow you to pick up the lid and position it right onto the rim of the jar without ever touching it.
Finally, you will need to screw on the metal screw bands. In most cases, the food in the jars is scalding hot, so you can’t touch the jars to tighten the lids. But, that’s a good thing! You should never over tighten the lids. Place the screw band over the jar and tighten it with one hand. It should be snug, not tight. Now, that’s it! You’re ready to boil these jars!
STEP 5: BOILING THE JARS OF FOOD
Carefully lift the jars straight up using a jar wrench/lifter. Lower the jar into the pressure canner. Fill the canning pot with jars in this manner. Don’t jam the jars in; leave a little bit of space between the jars. I aim for about a centimeter or a finger’s width. Remember, you can process the jars in batches.
Once the canning pot is loaded, place a lid on the pot and seal it as per your canner’s instructions. Increase your heat to medium-high. Note that the top of the canner will have a pressure plug. When you place the lid on, this plug should be closed or lowered into the lid of the pot, but will eventually pop up as the temperature increases inside the pot. Once the plug pops up, steam will start to escape from the vent located in the center of the lid. Allow the steam to escape for 10 minutes. This process is referred to as venting.
Once your canner has vented for 10 minutes, you will want to carefully place the weighted gauge onto that vent. I like to do this while wearing a silicone oven mitt to avoid any steam burns. Once the gauge is on, the pressure will increase in the pot. You can watch this happening by taking note of the changes on the pressure gauge dial. Once the dial reaches the desired pound measurement, you will need to keep a close eye on the pot and lower the heat if the pound measurement rises too much. Try to keep it as close as you can to the pressure amount outlined in the recipe you are following. Start your timer and allow the jars to fully process.
STEP 6: COOLING AND STORE YOUR FOOD
When the time is up, turn off the heat and allow the pressure canner to decompress naturally. As the pressure decreases, the pressure plug will eventually collapse back into the lid. At this point, it is safe to remove the weighed gauge and the lid. Use oven mitts when removing the lid!
Once the lid is off, you can safely remove the jars using a jar wrench to lift the jars straight up out of the water. Transfer the jars to a wooden cutting board that has been lined with a few layers of kitchen towels. Allow the jars to fully cool – at least 24 hours! Finally, wipe the jars down, label them with contents and date, and store them into a cool, dark cupboard or pantry.
If you notice that a jar has not sealed, you can either discard it, or refrigerate it for immediate consumption. Only do so if you are 100% sure the food has not been compromised and that it is safe to eat.
CANNING FREE OPTION
Add the olive oil, onion, celery, salt, and ground black pepper to a large, heavy-bottomed stock pot. Over medium heat, cook the vegetables for 5 minutes, stirring often. Add the garlic and ginger. Cook for 2 additional minutes. Add the cabbage and stir well into the onions and garlic. Cook for 10 minutes, allowing the cabbage to wilt, stirring often. Next, add the frozen veggies, vegetable stock, diced tomatoes, tomato paste, and Italian seasoning. Stir well to combine. Allow the soup to come to a low boil and boil for 20 minutes. Reduce heat to a simmer and simmer for 10 minutes. Once the soup has simmered for 10 minutes, turn off the heat and stir in the parsley. Serve and enjoy!
QUESTIONS?
If I have not answered all of your questions in the text above, don’t hesitate to reach out to me! You can contact me by sending me a message in the comments section further down the page. I will try my best to answer as soon as possible! You might reach me even faster by following me on Facebook and sending me a private message. Scroll down below the recipe card to find my Follow Me on Social Media box and never miss another recipe!

Do You Like This Recipe?
You should consider trying these other delicious recipes too!

The bleak gloom that comes with February can be pushed to one side – at least temporarily! – with a hearty, filling, meaty soup. I’m talking about this Chicken and Bacon Soup! It’s so comforting and cozy and will certainly help to eliminate those winter chills and blues!
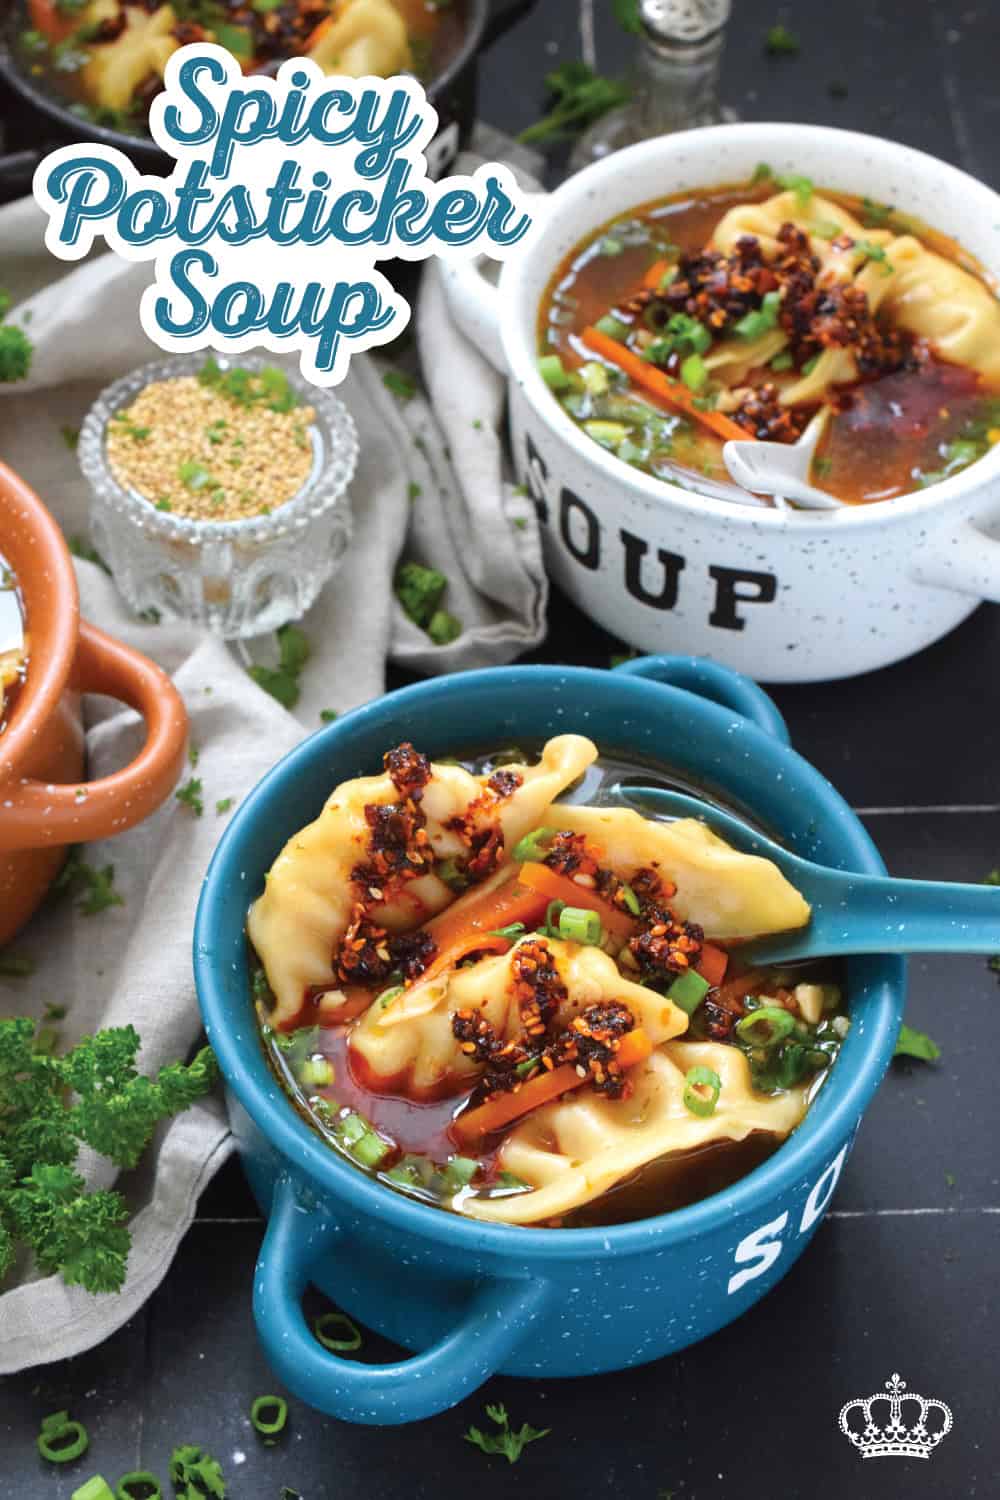
Pick up a package of frozen potstickers, wontons, or dumplings from your local grocery store and cook them in a savoury broth to make the most deliciously wonderful Spicy Potsticker Soup. Loaded with green onions, garlic, ginger, and carrots, this soup is good for you too!
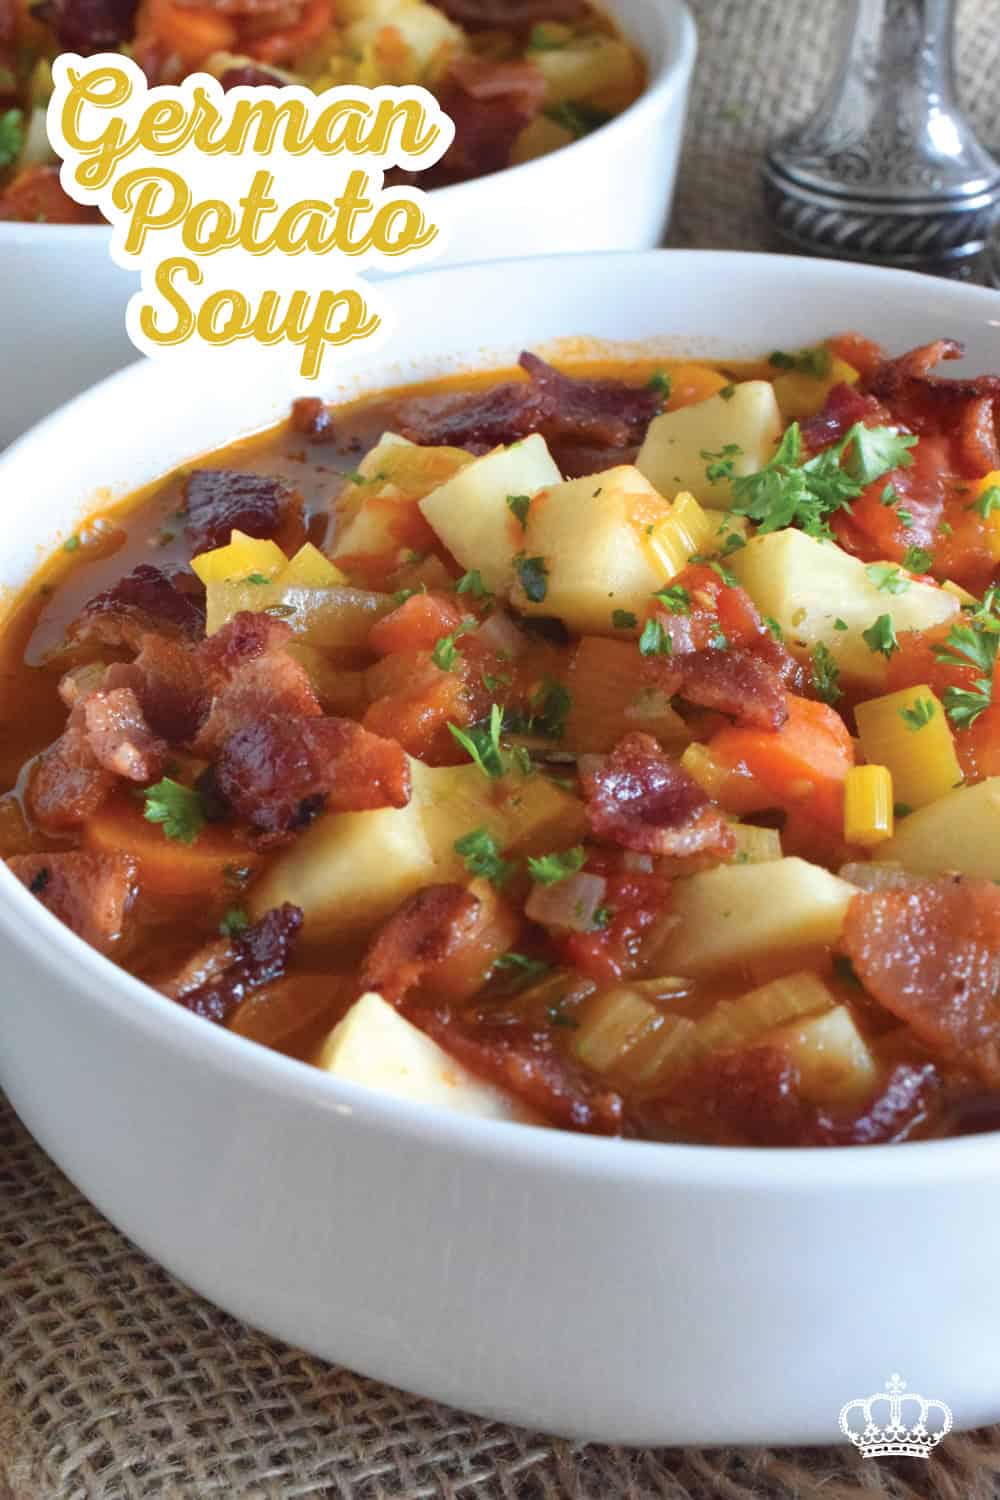
German Potato Soup starts off with bacon, which is a great start to any recipe! Loaded with lots of root vegetables like onions, potatoes, celery root, and carrots, this soup also has leeks, which is a wonderful addition to any soup! Hearty and filling, this soup recipe is certainly a keeper!

Canned Cabbage Soup
Ingredients
- 2 tablespoons olive oil
- 1 large onion, diced
- 1/2 cup celery, diced
- 1 teaspoon pickling salt
- 1/2 teaspoon ground black pepper
- 4 cloves garlic, minced
- 1 tablespoon fresh ginger, grated
- 1 small green cabbage, cut into 1-inch cubes/squares
- 750 grams frozen mixed vegetables (peas, corn, carrots, and green beans)
- 10 cups low sodium vegetable stock
- 4 cups canned diced tomatoes
- 4 tablespoons tomato paste
- 1 tablespoon Italian Seasoning
- 1/4 cup fresh parsley, finely chopped
Instructions
- Add the olive oil, onion, celery, salt, and ground black pepper to a large, heavy-bottomed stock pot. Over medium heat, cook the vegetables for 5 minutes, stirring often.
- Add the garlic and ginger. Cook for 2 minutes.
- Add the cabbage and stir well into the onions and garlic. Cook for 7 minutes, allowing the cabbage to wilt, stirring often.
- Next, add the frozen veggies, vegetable stock, diced tomatoes, tomato paste, and Italian seasoning. Stir well to combine. Allow the soup to come to a low boil and boil for 10 minutes.
- Reduce heat to a simmer and simmer for 20 minutes.
- In the meantime, prepare your pressure canner as per the instructions that are particular to your individual canner. Wash the jars, sealing lids, and screw lids in hot soapy water and rinse the soap off well under running hot water. Place the clean jars upright on a baking sheet and place them in the oven preheated to 200 degrees F. Set screw bands aside. Next, boil a kettle of water and pour it into a clean glass bowl. Carefully submerge the sealing discs or lids in the bowl of hot water and set them aside.
- Once the soup has simmered for 20 minutes, turn off the heat and stir in the parsley.
- To fill the jars, use a canning funnel to prevent spilling and to make job easier. Using a slotted spoon, ladle enough veggies into each prepared jar so that the jar is half filled with veggies. (I'm using 24 ounce jars which yielded 8 jars of soup. You can use 16 ounce or 32 ounce jars as well. Obviously, the yield will change accordingly.)
- Next, use a soup ladle to top up the jars with the broth, leaving 1 inch of headspace.
- Remove any air bubbles and top up the jars with more broth if needed. Use a clean, damp kitchen towel to wipe the rims of the jars. Use a magnetic lid lifter to remove the lids from the bowl of boiled kettle water and position each one centered on the rim of each jar. Screw a band onto each jar, tightening only with your fingertips – do not overtighten!
- This is optional, but at this point, I like to pour a splash of white vinegar into the canner. This will a cloudy buildup on the outside of jars if you have hard water.
- Next, transfer the jars to your prepared pressure canner. Place the lid on your canner and tighten.
- Allow the canner to steam vent for ten minutes. Next, process using a 10 pound (69 kPa) weighted gauge for the following times: 60 minutes for 16 ounce jars, 70 minutes for 24 ounce jars, and 85 minutes for 32 ounce jars. Be sure to adjust pressure for your altitude if over 1000 feet. Time the processing from the time the canner has reached full pressure. Once done, turn off the heat and allow canner to decompress naturally.. (Ten pounds is recommended for those of you who are 0-2000 feet above sealevel.)
- Once your canner has decompressed, remove the lid and transfer the jars to a wooden cutting board using a jar lifter. Allow the jars to cool undisturbed for 24 hours. Check to ensure the lids have sealed. Label and store in a cool, dark cupboard for up to one year.
- To serve, simply transfer the contents of a jar to a saucepan and reheat over medium heat until the soup is completely reheated. Enjoy!
Notes
Nutrition
Did you make this recipe?
Upload a photo and tag me so that I can see it!


Leave a Reply