
Slightly sweet, with a good splash of vanilla, and crunchy sliced almonds, Vanilla Almond Scones are an absolute delight. Scones quickly become everyone’s favourite, so keep this recipe close. You’ll make them over and over again.
VANILLA ALMOND SCONES
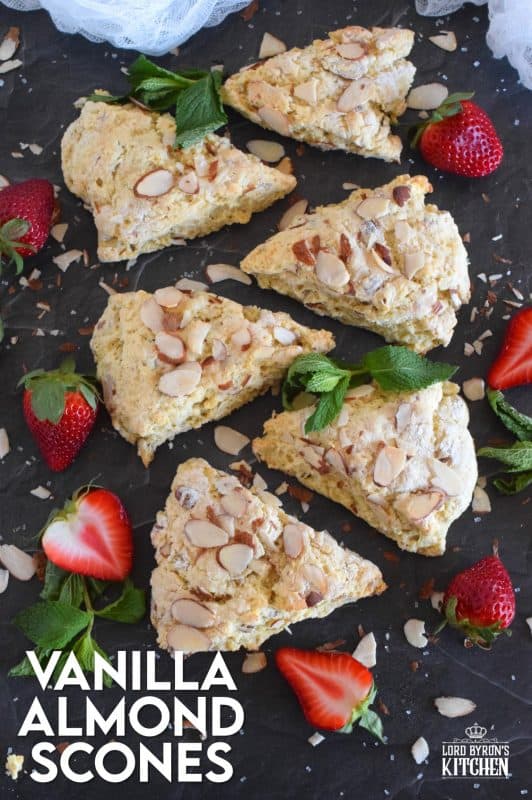
I begin to crave scones as soon as the weather starts to warm up. There is nothing I enjoy more than a hot coffee, and a freshly baked Vanilla Almond Scone. I always have my scones with some fresh fruit. Today, it was strawberries!
This past weekend, the temperature outside was so mild and the sun was shining so brightly. We had just purchased some new patio furniture and decided to start assembling and setting it up. After all, I needed a place to sit with my coffee and my scone.
Make your own online recipe box!
Click the in the lower right corner of your screen
& follow the quick and easy instructions!
Before we bought out house, we lived primarily in the city. We were as close to downtown as one can be without being in the core. Our balcony was our personal summer oasis. Sitting out there with my coffee and scone, I loved to watch the world go about its business while I relaxed in the warmth of spring, shaded by a large tree that towers well above our fourth floor balcony.
Now, it’s going to be on our newly built deck. I’m going to watch the occasional bunny or chipmunk scurry about, while listening to the cows and ducks from the farmer up the street. It’s my new happy place, and my Vanilla Almond Scones make it complete!

A SCONE RECIPE WITH VERSATILITY
For this basis of this scone, I used my Basic Scone Recipe. I wanted to make a few versions of that recipe so that I could show you how easy it is. My Basic Scone Recipe is perfect just the way it is, especially if you are looking for a simple scone that can be slathered with butter and jam.
Actually, I put butter on all of my scones before I eat them! It’s the way I was raised. Butter goes on bread, scones, and also cinnamon rolls! (But, not the cinnamon rolls with icing!)
If I’m being completely honest, I think jam belongs on almost every scone as well. I love to slice the scone in half and smear on a bit of salted butter. Next, I add a good layer of my homemade jam, and fetch that hot coffee. Depending on the time of day, I might have a little bit of sharp cheddar cheese with it. I think all of that makes for a great lunch or an afternoon snack.

INGREDIENTS NEEDED TO MAKE THIS RECIPE:
The following is a list of the ingredients needed to prepare this recipe. For exact amounts and measurements, refer to the printable recipe card located near the bottom of this post.
- Flour – Any all-purpose flour will do just fine. I have not tested this recipe with any other types of flour.
- Butter – I used salted butter. If you’re using unsalted butter, add 1/4 teaspoon of salt to your flour and whisk it through.
- Sugar – Can you believe there’s only three tablespoons of sugar in this recipe? It’s just the right amount of sweetness.
- Baking Powder – Quite a lot, like in most scones, to get that rise.
- Egg – Just one egg, but if you want a more golden, brown top, whisk one egg yolk with a tablespoon of water. Brush the tops with a pastry brush before baking.
- Milk – This is the liquid that binds it all together.
- Vanilla Extract – One whole tablespoon, which is a lot, but it works perfectly!
- Sliced Almonds – One cup is all you need. 3/4 cup for the batter and 1/4 cup for the topping.

HOW TO MAKE VANILLA ALMOND SCONES:
This really couldn’t be easier! Preheat oven to 400 degrees. Prepare a baking sheet with a silicone baking mat or parchment paper. Starting with the dry ingredients and butter first, add the flour, sugar, baking powder, and butter, to a mixing bowl. Use a hand-held mixer to beat the butter into the dry ingredients until the combined ingredients resemble course sand. Add 3/4 cup of almonds and mix them through with a spatula.
Next, in a separate bowl, whisk together the egg, milk, and vanilla extract. Pour into the butter and flour mixture and fold together. Don’t overmix – the dough will form quite quickly and shouldn’t be one complete, perfectly round ball of dough.
Turn the dough out onto a lightly floured surface. Use your hands to push the dough together, gathering up the bits into a mound. Sprinkle the top lightly with flour and push the dough into a round shape about 1 inch thick. Use a knife to cut the dough into 8 wedges. Transfer those to the baking sheet.

Use a pastry brush to dust off any excess flour. Top scones with sanding sugar, if using. (I did not for this particular scone.) And you can brush with the egg mixture if you want a deep golden colour. (Again, I did not.) Doing so will help the sliced almonds stick better though. Sprinkle over the remaining almonds.
Bake for 10-12 minutes depending on your oven, until the top is just slightly golden in colour. Remove from oven and transfer to a wire cooling rack immediately. Now, wasn’t that easy? You can dig in while they’re still warm too!

QUESTIONS?
If I have not answered all of your questions in the text above, don’t hesitate to reach out to me! You can contact me by sending me a message in the comments section further down the page. I will try my best to answer as soon as possible! You might reach me even faster by following me on Facebook and sending me a private message. Scroll down below the recipe card to find my Follow Me on Social Media box and never miss another recipe!
Do You Like This Recipe?
You should consider trying these other delicious recipes too!

Glazed Lilac Scones are packed with fresh lilac petals and lots of lilac infused flavour too! If you didn’t know lilacs were edible, you’ve been missing out this whole time! With a gentle lemon-like taste, and powerful and pungent floral overtones, these scones are great for any warm-weather breakfast or brunch. Lilac season is short, so get started right away!

A scone for both the little kids in your life, and the adults that live their lives like a kid, Chocolate Chip Scones are sweeter than regular scones. With a good splash of vanilla, loads of milk chocolate chips, and a sprinkling of coarse sugar on top, these scones are an absolute treat.

Glazed Strawberry Shortcake Scones have triple the strawberry flavour for the absolute most strawberry-esque scone ever! Packed with real strawberries, strawberry shortcake crumble, and strawberry extract, these are a tasty and delightful sweet treat!


Vanilla Almond Scones
Ingredients
- 1 2/3 cups all purpose flour
- 3 tablespoons salted butter, softened
- 3 tablespoons sugar
- 3 teaspoons baking powder
- 1 large egg
- 1/2 cup milk
- 1 tablespoon vanilla extract
- 1 cup sliced almonds
Instructions
- Preheat oven to 400 degrees. Prepare a baking sheet by lining it with a silicone baking mat or parchment paper. Set aside.
- Add the flour, sugar, baking powder, and butter, to a mixing bowl. Use a hand-held mixer to beat the butter into the dry ingredients until the combined ingredients resemble course sand. Set aside.
- Add 3/4 cup of the almonds and stir into the mixture with a spatula.
- Next, in a separate bowl, whisk together the egg, milk, and vanilla extract.
- Pour in the milk and egg mixture into the butter and flour mixture. Use a spatula to fold ingredients together. Don't overmix – the dough will form quite quickly and shouldn't be one complete, perfectly round ball of dough.
- Turn the dough out onto a lightly floured surface. Use your hands to push the dough together, gathering up the bits into a mound. Next, sprinkle the top lightly with a little flour and push the dough down into a round shape about 1 inch thick.
- Use a large knife to cut the dough into 8 wedges and transfer the wedges to the baking sheet with about an inch of space in between each wedge.
- Use a pastry brush to lightly dust off any excess flour. Top with remaining almonds.
- Bake for 10-12 minutes depending on your oven, until the top is just slightly golden in colour.
- Remove from oven and transfer to a wire cooling rack immediately.
Nutrition
Did you make this recipe?
Upload a photo and tag me so that I can see it!


MaryAnn says
Greetings to you from Florence Montana., in the US. We live in a rural area on 1 .5 acres. We garden, raise chickens and love all things , food, yard, gardening, and ways to be more self sufficient. We definitely wish we were Canadian citizens right now, this is a crazy frightening place to be.
I recently discovered your website and LOVE all things about it. Your home is magnificent and thank you for sharing it. You both have talent beyond talent for decorating and creativity. Ideas abound.
This is the third time I have made these scones. They taste magnificent. The issue I am encountering and wonder how to remedy is that the dough is so sticky. I know this is typical of scones however, I am never able to mold it into a mound suitable to cut the wedges. I of course add flour but am cautious as to how much flour to keep adding to make it workable?
Your thoughts and tips would be appreciated. I will be subscribing as well.
Thank you kindly.
MaryAnn