
When it comes to serving up a scoop of ice cream at home, nothing beats doing so in one of these delicious drumstick sugar cones. Using store-bought cones, the inside is coated with melted white chocolate, which prevents ice cream from dripping out of the bottom, and rolled in strawberry shortcake crumbs!

It’s summertime, so that means it’s time for ice cream too! We all love homemade ice cream, but today’s recipe is not about that. Today’s recipe is about how to transform a regular store-bought sugar cone into the most delicious treat with homemade strawberry shortcake crumbs. With the help of melted white chocolate, let’s make a copycat version of the popular frozen treat – Strawberry Shortcake Drumsticks!
Whenever I post a recipe like this, I’m always concerned about whether or not I should post it at all. I have this idea in my head that a food blogger should only share recipes that require a certain number of ingredients and a list of instructions that the reader must follow to get the recipe just right.
Make your own online recipe box!
Click the in the lower right corner of your screen
& follow the quick and easy instructions!
And, each and every time, I have to convince myself that not every recipe needs to be complicated; not every recipe needs to be an actual recipe. Sometimes, Dear Reader, a recipe isn’t a recipe at all. Instead, it’s more like a do-it-yourself project or a craft. In the case of these cones, it’s an assembly-type recipe. But, nevertheless, it’s a recipe, so I’m sharing it – much like I did with my Stroopwafel Ice Cream Sandwiches!
Besides, if you know how to make these cones, you have so many options at your fingertips. So rather than discuss whether or not this is a recipe, let’s focus on how easy these are to make and what you can do with them once you’ve mastered the art of coating a cone with melted chocolate and strawberry shortcake crumbs!

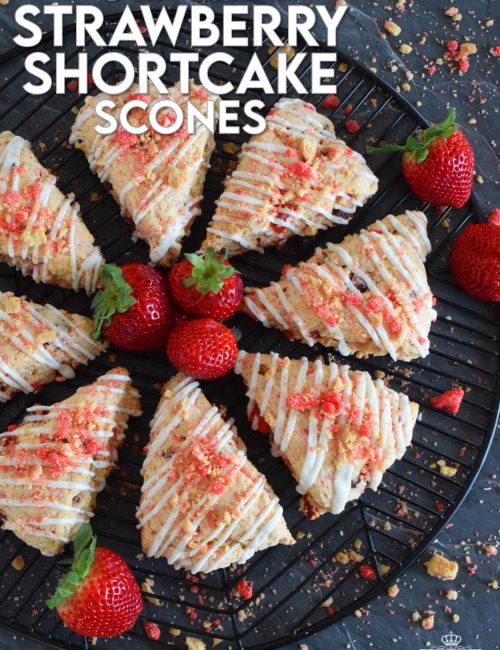
STRAWBERRY SHORTCAKE CRUMBS
Remember those pink and white ice cream bars with the strawberry-flavoured crumb coating? I do! In fact, they were my favourite ice cream bar when I was growing up. Now that I’m older, I don’t care much for ice cream, because it doesn’t seem to agree with me. I’m not lactose intolerant, but ice cream makes me feel bloated and blah, so I stay away from it as much as possible.
Now, in the instance that the ice cream in question is strawberry, I can’t pass it up. Because of the fact that I’m not a fan of ice cream, it is safe to assume that I am not an ice cream connoisseur. So, go easy on me when I tell you that my favourite ice cream is cheap ice cream, and the more artificial the strawberry flavour, the more I love it! I won’t name the brands that I like, but they package their ice cream in boxes. That’s all I’m going to say!
The number of Strawberry Shortcake Ice Cream Bars I ate when I was a kid is too high to count. I can’t tell you what the brand was, but the closest I can find are these by Good Humor. (I had to re-type ‘humor’ about five times before I could get my brain to let go of the O that should be in there – humour – it’s the Canadian in me!) Something tells me that in the 80s, the go-to brand was Nestle. Anyway, I digress!

INGREDIENTS NEEDED FOR THIS RECIPE
You might have guessed by now that you need a batch of Strawberry Shortcake Crumbs. Go ahead, and click on the link. It will open and new page so you won’t lose this one. The following is a list of the ingredients needed to prepare this recipe. For exact amounts and measurements, refer to the printable recipe card located near the bottom of this post.
To Make the Crumbs:
- Vanilla Pudding – Just a plain box of powdered mix is all you need. There’s no need to mix it according to the instructions on the package.
- Strawberry Jello – Again, this is just the powder. You will use the powder as it is – no need to mix it and let it set.
- Flour – Regular all-purpose flour is good.
- Butter – I used salted butter to offset some of the sweetness. Unsalted butter is certainly okay too.
- Golden Oreos – These are vanilla-flavoured Oreos. You’ll use one full package of Golden Oreos.
To Prepare the Remainder of the Recipe:
- Sugar Cones – You can easily find these in most grocery stores. Waffle cones can be used instead of sugar cones.
- White Chocolate Chips
- Vegetable Oil – This is added to the white chocolate to help thin it.
- Ice Cream – To keep my Strawberry Shortcake Drumsticks as strawberry-y as possible, I’m using strawberry ice cream. You could also use vanilla.
It just so happens that I have a very easy and delicious No Churn Strawberry Shortcake Ice Cream recipe here too if you want to take your cones a step further. Strawberry Shortcake Ice Cream the easy way – no churn! Simple ingredients and an even simpler preparation process, this ice cream can stock your freezer in no time at all! Made with cream, real strawberries, and a good helping of shortcake crumbs, who’s up for a big bowl of this delicious frozen treat?

HOW TO MAKE STRAWBERRY SHORTCAKE DRUMSTICKS
Start by setting up a workstation. If using short drinking glasses to keep the cones standing up, place 6 drinking glasses onto a platter or baking tray. This will make it easy to transport to the fridge. Add the white chocolate chips and vegetable oil to a microwave-safe bowl. On 50% power, and in 30-second increments, melt the chocolate until smooth.
Working with one cone at a time, hold the cone upright and spoon a couple of tablespoons of the melted chocolate into the cavity of the cone. Turn the cone slowly, allowing the chocolate to cover the entire interior surface of the cone. Turn the cone upside down and allow the excess chocolate to drip back into the bowl. Next, holding the bottom of the cone, dip the top portion straight down into the bowl of chocolate. Very gently shake the cone in an up-and-down fashion. This will force the excess chocolate to drip off and back into the bowl.

Next, hold the cone over the bowl of strawberry shortcake crumbs. Use a spoon to spoon the crumbs over the still-wet, melted chocolate. Turn the cone, spooning more crumbs over it, until the dipped portion of the cone is covered in crumbs. Place the cone in an upright position in a drinking glass or an ice cream cone stand. Repeat until all of the cones are prepared. Transfer the cones to your fridge for 30 minutes to harden. Save the remaining chocolate!
Once hard, re-melt the remaining chocolate in the same fashion as before and transfer the melted, smooth chocolate to a sandwich bag, cutting a small tip from one of the lower corners. Again, working with one cone at a time, hold the bottom of the cone and drizzle the melted chocolate over the top half of the cone, drizzling from side to side while turning the cone in your hand. Place the cone back into the drinking glass or ice cream cone stand. Once all of the cones are complete, refrigerate the cones once again for another 30 minutes.
Once the chocolate has set, the cones are ready to fill with ice cream. Once the scoop of ice cream is secured in the cone, sprinkle the top with more crumbs, if desired.

QUESTIONS?
If I have not answered all of your questions in the text above, don’t hesitate to reach out to me! You can contact me by sending me a message in the comments section further down the page. I will try my best to answer as soon as possible! You might reach me even faster by following me on Facebook and sending me a private message. Scroll down below the recipe card to find my Follow Me on Social Media box and never miss another recipe!

Do You Like This Recipe?
You should consider trying these other delicious recipes too!


Strawberry Shortcake Drumsticks
Ingredients
- 6 sugar cones
- 2 cups white chocolate chips
- 1 teaspoon vegetable oil
- 1 cup Strawberry Shortcake Crumbs https://www.lordbyronskitchen.com/strawberry-shortcake-crumbs/
- 2-3 cups strawberry ice cream
Instructions
- Start by setting up a workstation. If using short drinking glasses to keep the cones standing up, place 6 drinking glasses onto a platter or baking tray. This will make it easy to transport to the fridge.
- Add the white chocolate chips and vegetable oil to a microwave-safe bowl. On 50% power, and in 30-second increments, melt the chocolate until smooth.
- Working with one cone at a time, hold the cone upright and spoon a couple of tablespoons of the melted chocolate into the cavity of the cone. Turn the cone slowly, allowing the chocolate to cover the entire interior surface of the cone. Turn the cone upside down and allow the excess chocolate to drip back into the bowl.
- Next, holding the bottom of the cone, dip the top portion straight down into the bowl of chocolate. Very gently shake the cone in an up and down fashion. This will force the excess chocolate to drip off and back into the bowl.
- Next, hold the cone over the bowl of strawberry shortcake crumbs. Use a spoon to spoon the crumbs over the still wet, melted chocolate. Turn the cone, spooning more crumbs over it, until the dipped portion of the cone is covered in crumbs. Place the cone in an upright position in a drinking glass or an ice cream cone stand.
- Repeat until all of the cones are prepared. Transfer the cones to your fridge for 30 minutes to harden. Save the remaining chocolate!
- Once hard, re-melt the remaining chocolate in the same fashion as before and transfer the melted, smooth chocolate to a sandwich bag, cutting a small tip from one of the lower corners.
- Again, working with one cone at a time, hold the bottom of the cone and drizzle the melted chocolate over the top half of the cone, drizzling from side to side while turning the cone in your hand. Place the cone back into the drinking glass or ice cream cone stand. Once all of the cones are complete, refrigerate the cones once again for another 30 minutes.
- Once the chocolate has set, the cones are ready to fill with ice cream. Once the scoop of ice cream is secured in the cone, sprinkle the top of the scoop with more crumbs, if desired.
Nutrition
Did you make this recipe?
Upload a photo and tag me so that I can see it!


Leave a Reply