
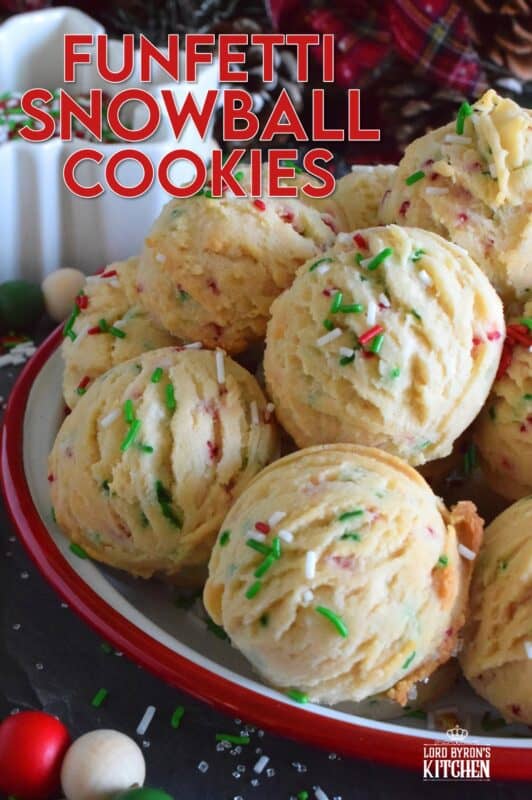
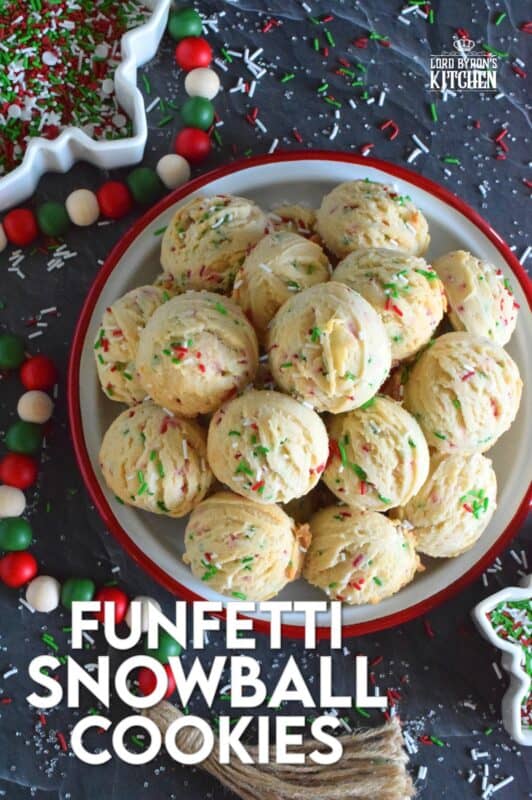
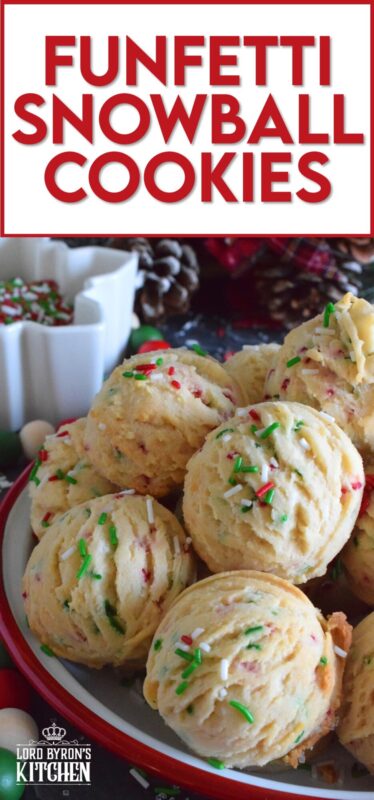
A holiday cookie platter must always have a cookie that is packed with sprinkles and these Funfetti Snowball Cookies fit the bill quite nicely! These are puffy, rounded cookies that require only a few of the most basic pantry ingredients, yet they look and taste amazing!
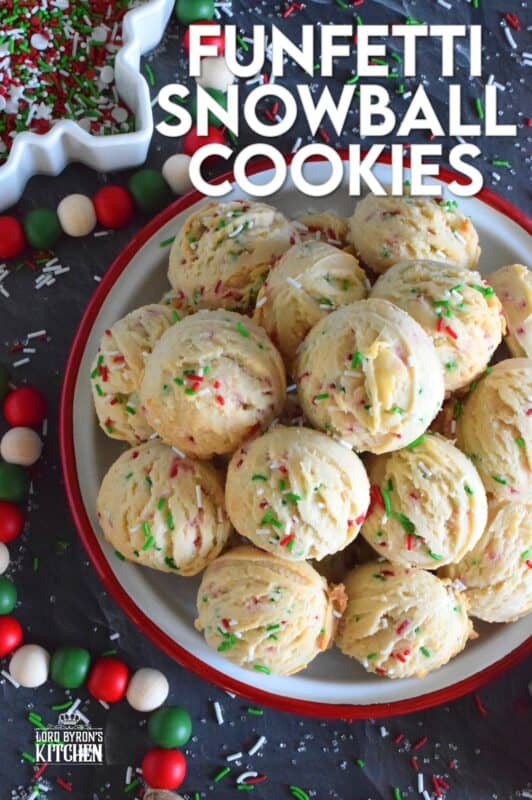
I absolutely love to make these Funfetti Snowball Cookies. They’re just so easy to make! Not only do you get to mix everything together in just one bowl, but there’s no need to roll the dough into balls or use a rolling pin. Just use a cookie scoop to portion out the cookie dough, and set them right onto your prepared baking sheet. They hold their shape in the oven and bake up light and airy.
There are probably a million Christmas cookies that have the word “snowballs” in the title. In fact, I have a few of them right here at Lord Byron’s Kitchen. The most popular of the snowball recipes that I have are my Traditional Newfoundland Snowballs. I prepare a batch of those every year. They make a great addition to a cookie platter or a cookie tin that you prepare for friends and neighbours. Another really great snowball recipe of mine comes in the form of a truffle. Check out one of my favourite recipes from my 12 Truffles of Christmas series, my Cherry Snowball Truffles.
Make your own online recipe box!
Click the in the lower right corner of your screen
& follow the quick and easy instructions!
I’m going to tell you all about this cookie recipe and how you can make it in your home this holiday season, but first, I want to tell you about what you can expect from Lord Byron’s Kitchen this Christmas. I know we’re just kicking off the holiday season, but I have a lot of Christmas-themed recipes to share with you this year, so I’ve had to get started early.
Back in October, I kicked off the holiday season with a holiday recipe series called Lord Byron’s 12 Christmas Donuts and followed that up with a second series called Lord Byron’s 12 Christmas Appetizers. And now, I’m starting out on this new series, which is the sixth annual instalment! I cannot believe that this is the sixth year in a row that I’ve shared Lord Byron’s 24 Cookies of Christmas! But, before we get to a list of ingredients and instructions for today’s recipe, let me tell you about this series and more!

LORD BYRON’S 24 COOKIES OF CHRISTMAS SERIES
Another holiday series, Lord Byron? Yes – why not!? Welcome, Dear Reader, to the fourth of my annual holiday recipe series for this season! This one is called Lord Byron’s 24 Cookies of Christmas – Volume 6! I will try to keep the recipes in this series quick and easy, just like in previous years. Even if a recipe looks complex, I promise you that it is not! My goal, as always, is to share recipes with you that are not too complex to whip up as a holiday treat for your family.
Like every other holiday series I’ve shared over the years, this series will share a new recipe every day for the next 24 days – even on Saturday and Sunday! You might be asking yourself, how many Christmas recipes could one possibly have or need? Well, I say you can never have too much of a good thing. And, I love having lots of choices. Who wants to prepare the same holiday recipes year after year?
Looking For More Christmas Confections?
Lord Byron’s Kitchen has more than enough to satisfy your sweet tooth! Click on the links below to see a countdown series of holiday recipes from that category!
SUBSCRIBE NOW SO THAT YOU NEVER MISS OUT ON NEW RECIPES!
So, welcome, Dear Reader, to Lord Byron’s 24 Cookies of Christmas series! Even though this is the fourth series for this holiday season, you can always look back at previous years if you just cannot wait until the next recipe is published. Also, some of my favourite recipe collections from previous years are my 75 Homemade Gifts from Your Kitchen, my 50 Make Ahead Freezer Friendly Christmas Recipes, and my 30 No-Bake Christmas Recipes post.
You really don’t want to miss one of these recipes, so if you have not yet subscribed to Lord Byron’s Kitchen, I encourage you to do so. That way, a new recipe will be emailed to you every day. You won’t have to bother to come looking for it! Like in previous holiday recipe countdowns, I like to mix up the recipes in the series so that there is something for everyone. Are you ready!!??
Lord Byron’s Annual Christmas Cookie Series
Did you know that Lord Byron’s Kitchen has been sharing a 24 Cookies of Christmas Series for the past several years? Click on the links below to see all of the recipes from each series on one page!
INGREDIENTS NEEDED TO PREPARE THIS RECIPE
The following is a list of the ingredients needed to prepare this recipe. For exact amounts and measurements, refer to the printable recipe card located near the bottom of this post.
- Butter – Make sure your butter is at room temperature! Let me say that again – make sure your butter is at room temperature. I cannot stress this enough!!
- Canned Sweetened Condensed Milk – This recipe has not been tested with low-fat condensed milk. Depending on where you live, the size of the can may differ. Be sure to have at least 1/2 cup!
- Vanilla Extract – If you don’t have any, you can use other extracts to change up the flavour.
- Flour – No need for anything special. Just use regular all-purpose flour. I have not tried this recipe with any other type of flour.
- Baking Powder – This is used to increase the volume of the batter and to add texture as well.
- Sprinkles
HOW TO MAKE FUNFETTI SNOWBALL COOKIES
Preheat your oven to 320 degrees F. Line a baking sheet with parchment paper and set aside. Add the softened butter to a mixing bowl and beat until light and creamy – about three minutes. Next, pour in the sweetened condensed milk and beat into the butter for two minutes. Beat in the vanilla extract. Scrape down the sides of the bowl and beat again for another minute or two. Finally, add the flour and baking powder. Beat into the butter and milk mixture until mixed through. Add the sprinkles and beat lightly just to combine.
Using a 2 tablespoon-sized cookie scoop, portion the dough into mounds onto the prepared baking sheet. Be sure to leave at least two inches between each mound of cookie dough. Bake for 12 minutes. Remove from the oven and leave them to cool slightly on the pan for five minutes. Finally, remove from the baking sheet and transfer to a wire cooling rack to finish cooling.
SWEETENED CONDENSED MILK
I have a lot of recipes here at Lord Byron’s Kitchen with sweetened condensed milk as one of the ingredients. (Click here to see them!) Growing up in Newfoundland, it was always something I’ve been aware of. But, that’s not the case for everyone. I get many questions from readers about it. For someone not familiar with the gooey, sticky canned milk, it might be easily confused with canned Carnation condensed milk, for instance. Let me explain what it is here.
So, first of all, it’s condensed. The milk is condensed by removing water. This can be accomplished by applying heat. The water will evaporate causing the milk to condense, which thickens the milk. Sugar is added to sweeten the condensed milk. The main purpose of adding sugar is to prolong the shelf life of condensed milk, which can sit on room-temperature shelves for years. Sugar prevents microorganisms from growing in the milk and helps to thicken it even further—it’s added after the milk has been boiled, reduced, and pasteurized.
If you find unsweetened condensed milk, it’s most likely that it’s simply evaporated milk or condensed milk, which is thick, but not gooey and sticky. Evaporated milk is often used as a cream added to tea or coffee. If you are unfamiliar with it, please read the can carefully. Also, shake it – can you feel the liquid splashing about inside the can? If so, it’s not sweetened condensed milk; it’s evaporated or condensed milk only!
STORING, PACKAGING, & FREEZING
When it comes to most cookies, they taste best at room temperature, but they don’t hold up well to being left out on your countertop for long periods of time. Cookies will stay fresh in a cookie jar or food-safe container with a lid for 3-5 days if left to sit on your kitchen countertop. You can store them in a food-safe container in your fridge. When you want one, two, or half a dozen, take them out of the container and place them in a single layer on a plate. Let them sit at room temperature for 5 minutes and they’re ready!
If you plan to freeze your Funfetti Snowball Cookies, you certainly can! Pile them into a clean, food-safe container. The container must be freezer friendly! You’ll want to ensure a very tight-fitting lid too. I use these quite often when freezing baked goods. I like to place a sheet of plastic wrap over the top of the container before pushing the lid on. This helps to create a better seal. The goal is to keep all of that freshness locked in!
You can freeze these cookies for up to three months. If you plan to give previously frozen cookies as a gift, I would lay them out on a wire cooling rack to thaw completely. If packaging, wait until the condensation has evaporated. Once thawed, pile into cellophane bags and tie with a ribbon, or stack in a cookie tin/box.

QUESTIONS?
If I have not answered all of your questions in the text above, don’t hesitate to reach out to me! You can contact me by sending me a message in the comments section further down the page. I will try my best to answer as soon as possible! You might reach me even faster by following me on Facebook and sending me a private message. Scroll down below the recipe card to find my Follow Me on Social Media box and never miss another recipe!
Finally, as I stated previously, every day I will be posting a new recipe. If you miss one, don’t fret. You can find my entire collection of Christmas Recipes right here! There are over 200 Christmas recipes and counting. There’s something for everyone! Cheers!

Do You Like This Recipe?
You should consider trying these other delicious recipes too!


Funfetti Snowball Cookies
Ingredients
- 1 cup butter, softened
- 1/2 cup sweetened condensed milk
- 2 teaspoons vanilla extract
- 2 cups all-purpose flour
- 3 teaspoons baking powder
- 1/4 cup sprinkles
Instructions
- Preheat your oven to 320 degrees F. Line a baking sheet with parchment paper and set aside.
- Add the softened butter to a mixing bowl and beat until light and creamy – about three minutes.
- Next, pour in the sweetened condensed milk and beat into the butter for two minutes.
- Beat in the vanilla extract.
- Scrape down the sides of the bowl and beat again for another minute or two.
- Finally, add the flour and baking powder. Beat into the butter and milk mixture until mixed through.
- Add the sprinkles and beat lightly just to combine.
- Using a 2 tablespoon sized cookie scoop, portion the dough into mounds onto the prepared baking sheet. Be sure to leave at least two inches between each mound of cookie dough.
- Bake for 12 minutes.
- Remove from the oven and leave them to cool slightly on the pan for five minutes.
- Finally, remove from the baking sheet and transfer to a wire cooling rack to finish cooling.
Notes
Nutrition
Did you make this recipe?
Upload a photo and tag me so that I can see it!


Susan says
You refer to chocolate in the section about storing, freezing:” …plan to freeze your Funfetti Snowball Cookies, you certainly can! Once the chocolate has hardened, pile them…” Do you dip them in chocolate? I didn’t see any mention of this in the recipe.
byronethomas@gmail.com says
Hi Susan – that paragraph is a copy and paste paragraph that I used quite often when speaking of freezing cookies. I have updated that particular section to remove any reference to chocolate. Thank you! 🙂
Sherri says
These were so easy and taste wonderful. I added a touch of almond for flavor. My only disappointment was that mine were smooth and did not have the ice cream scoop look as yours does. Did I over mix my dough? I did use my kitchen aid mixer.