
No fancy kneading skills, machinery, or gadgets needed to make this Dutch Oven Artisan Crusty Bread; just good old fashioned patience and a desire for a home style, easy to make bread!

We’ve been enjoying a lot of homemade soups lately. We tend to like soups and stews quite often when the weather is still cold. And, at this time of year when it’s a little on the gloomy side, soups just make everything feel better.
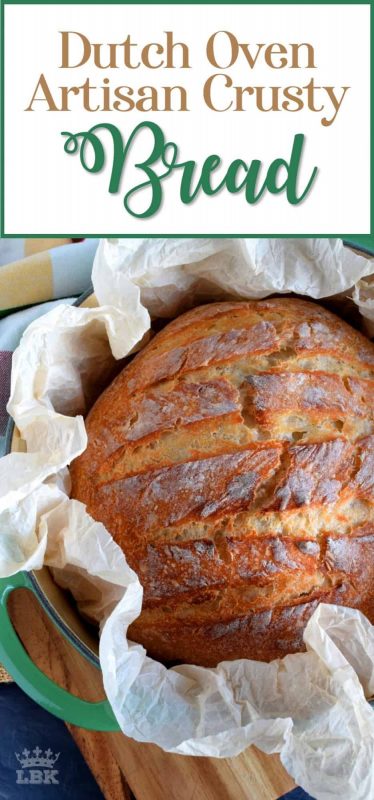
But, in our home, soup without bread is just not happening! We love to have a big slice or two of good, fresh, crusty bread to dunk into the broth. And, that’s just what we did with this Dutch Oven Artisan Crusty Bread!

I’m going to assume that since you’re reading this recipe, two things are true. First, you like to bake or cook. Which, in turn, leads me to my second assumption – you are the proud owner of a Dutch oven. How were my guesses? Off the mark or accurate?
Dutch Ovens – how important are they?
A proper Dutch oven is needed to get this bread just right. I have several to choose from. But, that’s because I have purchased them over the years and not all at once. And, because I cook and bake all the time. Dutch ovens are a huge investment, but they are very much worth it if you use it often enough.

For this particular recipe, I used my 4.2 litre round Le Creuset. You can most certainly use a larger pot, but I wouldn’t use anything smaller. You may run into an issue with the bread hitting the sides if you use a smaller pot.
(Spellcheck is suggesting that I change litre to liter, but I cannot bring myself to do it! I may be wrong, but I think the United States is the only place where it’s spelled liter. Here in Canada, it’s litre!)

You most certainly can use an oval Dutch oven if that’s what you have! And, it does not need to be a Le Creuset brand either! In fact, I have a cheaper version that I often use. It’s a Pioneer Woman brand. I think I paid less than $50 for it!
If all you have is cast iron pot with a heavy cast iron lid, then it will work perfectly as well. The key is to keep the heat into the pot, which will ensure that the bread rises and bakes properly. If all else fails, use a good heavy pot with a heavy lid.
Bread variations:
This is a recipe that I have used time and time again. It never fails, and I have thrown just about everything at it! I once added cinnamon and raisins. Just look at my Cinnamon Raisin Bread to see how that turned out!

More recently, I added sun dried tomatoes, finely chopped jalapenos, and a bunch of finely shredded cheddar cheese. That bread was so delicious! I ate it just as it was, but it paired great with a potato-based soup.
If you plan to add in a few ingredients, just be sure to keep the amounts low. For example, for the jalapeno bread, I added 1/4 cup each of sun dried tomatoes and chopped jalapenos. Then, I added a scant cup of cheddar cheese. Too many ingredients might throw off the levels and may ruin your bread baking efforts.
How to Keep your Bread Fresh!
If you really want fresh Dutch Oven Artisan Crusty Bread, it’s best to bake this bread the day you plan to eat it. It’s best when it’s still warm from the oven. That will take some planning, of course, because this bread needs a minimum of 12 hours to proof.
If you bake the bread ahead of time, let it cool completely. Wrap it well in two layers of plastic wrap and then place it into a large freezer bag. Freeze the bread for up to two weeks. (After that, it loses its freshness and can be used for breadcrumbs or a french toast!)

When you’re ready to enjoy your bread, remove it from the freezer. Take it out of the bag and remove the plastic wrap. Wrap it in a clean kitchen towel and let it sit for an hour. Next, remove the towel and microwave in 30 second increments until bread is as warm as you want it.
That’s it! It will still be really fresh and will taste great. However, there is one big change in the bread. If you decide to bake and freeze it, once you thaw it out, you will lose that crusty factor. Enjoy!


Dutch Oven Artisan Crusty Bread
Ingredients
- 3 cups all-purpose flour, plus extra for shaping and baking
- 1/2 teaspoon dry active yeast
- 1 1/2 teaspoons salt
- 3 tablespoons sugar
- 1 1/2 cups water, room temperature
Instructions
- In a glass bowl, add all of the ingredients, with the exception of the water, and stir together until well combined.
- Add the water and stir into the dry ingredients until a dough forms. (You may need to add a tablespoon or so of flour if the dough is too wet, or a tablespoon or so of water if the dough is too dry.)
- Form the dough into a ball. Cover the bowl with plastic wrap and place the bowl in a warm part of your kitchen. (I placed mine in the oven to escape any breeze from an open window.)
- Let the dough rise for a minimum of 12 hours. You can leave the dough to rise up to 18 hours, but no less than 12!
- When ready to bake, place your Dutch oven, along with the lid, into your oven and preheat to 450 degrees.
- Next, lay a large sheet of parchment paper on your counter top and lightly dust with flour.
- With floured hands, remove the dough from the bowl and form it into a ball on the parchment paper. Cover with a clean kitchen towel and allow the dough to rise for 25 minutes.
- Remove the Dutch oven and lift the dough ball, using the parchment paper, into the bottom of the pot. Keep the parchment paper under the dough. This will allow you to lift the bread out easily when baked. Using a sharp knife, gently score the dough with any pattern you like.
- Place a lid on the Dutch oven and bake for 30 minutes.
- Remove the lid and bake for another 10 minutes.
- Remove from oven. Use the parchment paper to lift the bread out of the pot. Place onto a wire cooling rack to cool completely before slicing.
Nutrition


Tina yoder says
Thank you for a wonderful site. We enjoy your comments and stories as much as your recipes – even if I do not need your recipe. Do you have a similar recipe to the Dutch Oven Crusty Bread without the Dutch Oven? In these times getting a Dutch oven is impossible.
byronethomas@gmail.com says
Thank you, Tina. I do have a molasses bread recipe on my website.
Frances says
I’ve got a Dutch oven. What better time to bake now that those 65+ are confined to home for the next 3 months!!
loretta says
Mentions nothing about yeast do we proof it first with sugar and water?………. BTW , I’m using my temptation wear ….? Thanks
byronethomas@gmail.com says
You do not need to proof the yeast with water and sugar first. All of the dry ingredients are mixed together and the water is added.
Ghulam Mohyudin says
It was perfect the first time. I learn so much from you as well! Keep it up great post.
byronethomas@gmail.com says
Thank you! 🙂
Marjory says
Finally have extra time to try this wonderful bread recipe. I have everything I need except a dutch oven! Do you know if a crock from a slow cooker would work?
byronethomas@gmail.com says
Yes, it would as long as the crock and lid are oven safe.
Maureen says
I can’t wait to try making this bread. I noticed a typographical error in the microwave instructions for reheating frozen bread. I don’t think you want to microwave it for 30 minute increments. I think it needs to read “30 second increments “ . 😀
byronethomas@gmail.com says
Maureen – thank you so much! Yes, 30 minutes was a bit extreme. I have updated the post. 🙂
Marissa says
Your dutch oven bread turned out beautifully! Love the crackly crust and the crumb looks bakery perfect!
Philip says
Have you ever tried this without preheating the Dutch oven?
byronethomas@gmail.com says
No.
Brenda says
Best loaf of bread I have ever made! Turned out great! Thanks!
Elaine Watson says
Love this recipe. I’ve made it many times now. Is there a way to add sourdough starter to it?
Brenda says
Why all the sugar? Don’t see it in other recipes?
Byron Thomas says
Hi Brenda! I don’t think 3 tablespoons of sugar is a lot for a large loaf of bread. I like to add a bit of sugar to feed the yeast. Yeast can be activated without sugar, but feeding the yeast with sugar will result in a better rise.
Brenda says
Just out of the oven! Added cheese, sun-dried tomatoes, sprinkle of All Dressed seasoning! Looks fabulous!!
Wish I could add a picture!! lol thanks again!!
Byron Thomas says
That sounds wonderful, Brenda!