
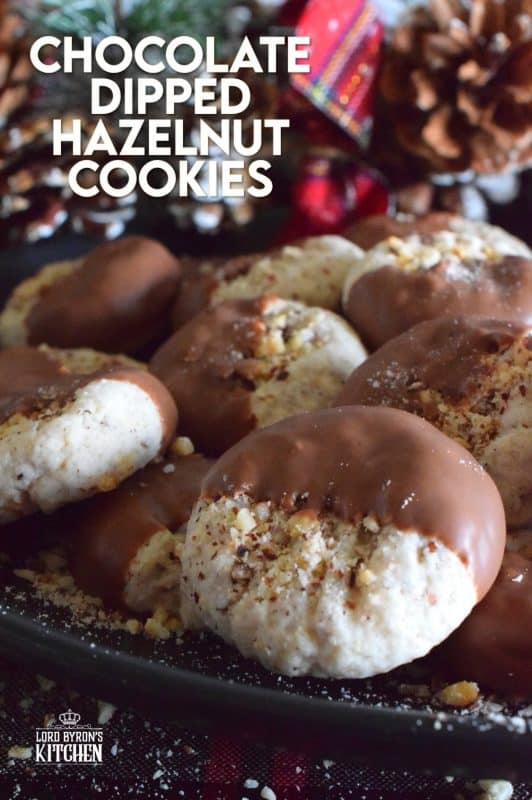
Ground hazelnuts, butter, sugar, and chocolate – what more is there to say? Chocolate Dipped Hazelnut Cookies have deep nutty flavour, a great texture, and bit of indulgence. One batch will never do!

The first time I saw this Chocolate Dipped Hazelnut Cookies recipe, it was on an episode of Martha Bakes. Of course, Martha Stewart is the Queen of the kitchen, and it’s hard to top whatever she does. But, damnit, I’m a Lord! My version is bigger and better. Checkmate, Martha; checkmate!
Now, it might come as no surprise to my readers that I’m back with a third installment of Lord Byron’s 24 Cookies of Christmas. Should you be new here, let me tell you a bit about how this works. This is my third annual Christmas cookie extravaganza. Like the previous two years, I will post a brand new Christmas cookie recipe for 24 consecutive days. Yes, that means Saturdays and Sundays too! For your reference, you can find links to the first two years further down the page.
Fresh off of my 12 Biscotti of Christmas series, I’m excited to get this new series started. Last year, I also did 12 Bundt Cakes of Christmas. Now, who’s ready to get started on this journey with me? Do you have enough hazelnuts? Is your chocolate stash topped up? Is your apron on and your oven preheated? Good! Let’s get to it!

TO TOAST YOUR NUTS OR NOT
The first thing Martha recommends in her version is to toast your hazelnuts. I have made them with toasted nuts, and I have made them with nuts right out of the bag. How does the two compare? They’re both delicious, but the one with the toasted hazelnuts tastes more nutty. Now, you have a choice. You can toast them or you can use the just as they are.
To toast the hazelnuts, use a stainless steel pan. It’s the best. See the frying pan in this picture? That’s the exact one that I use all the time. I’m not suggesting you run out and buy this same cookware set, but I wanted you to see the pan. Do not use non-stick if possible. You’ll get better results will plain stainless steel.
So, unlike most cooking where you’re required to preheat first, you don’t want to apply that same rule to toasting nuts. Add the hazelnuts to a cold pan. Place the pan on the burner and turn the heat on – no higher than medium and probably even less if using a gas burner.
Keep the nuts moving about. I use a rubber spatula. Once you start to smell that warm and toasty aromatic smell, pay close attention. The nuts will begin to get darker in colour. Don’t let them get too dark. Once you’re satisfied, immediately remove them from the hot pan and transfer them to a dinner plate where they can be spread out to cool.
MORE CHRISTMAS COOKIE RECIPES!
Did you know that I’ve been posting a 24 Cookies of Christmas series for a few years now? There are over 100 Christmas cookie recipes that you can find right here at Lord Byron’s Kitchen! To make it easier to find, I have created a page for each series. Just click on the image below and you’ll find the full series for that volume all one page!


HOW TO GET PERFECTLY GROUND HAZELNUTS
Now that your nuts are toasted and completely cooled, it’s time to ground them. You must make sure they are completely cooled before you move on to this step. If the nuts are warm, they are more likely to become pasty in the food processor. Cooled toasted nuts have firmed up and the natural oil has once again hardened.
Place the hazelnuts into a food processor. We do not want nut flour or butter here! Literally, pulse them two to three times maximum. Want you want is a coarse sand-like consistency with quite visible chunks in it. Don’t worry about the consistency too much. The key here is to keep the nuts from becoming mushy or moist.
The same consistency inside the cookies is exactly the same as what you see sprinkled over the top. Take a close look at the pictures to see what I mean. If you pulse two or three times, they should be perfect.

PERFECT DIPPING CHOCOLATE
When it comes to having cookies dipped in chocolate, I love lots and lots of chocolate. However, the star of Chocolate Dipped Hazelnut Cookies is the hazelnuts. And, I wanted that flavour to be the first thing to register when one bites into the cookie. For that reason, I opted for less chocolate rather than lots and lots of it!
Here’s how to get the chocolate just right. Place the chocolate into a microwave-safe bowl. Whenever you microwave chocolate, you should microwave on medium power for 30 seconds. Then, if it’s still not silky smooth, microwave in increments of 5 or 10 seconds, depending on your microwave.
If you want a thick chocolate coating, skip the addition of the coconut oil. A thinner chocolate can be achieved with a little bit of coconut oil. If you want a thinner chocolate, add the coconut oil. If you’re unfamiliar with how the addition of the coconut oil will change the viscosity of the chocolate, stick to my suggestion in the recipe card below. Otherwise, you can add more or less, or none at all.
Again, I wanted the flavour to be full-on hazelnut. The chocolate is just a little bit of added sweetness and smoothness. Plus, chocolate makes everything better! A little bit of the coconut oil will not change the flavour of the chocolate, so don’t worry about that too much. If you don’t have coconut oil, you can use vegetable shortening or vegetable oil. WARNING: Just make sure they are at room temperature first!

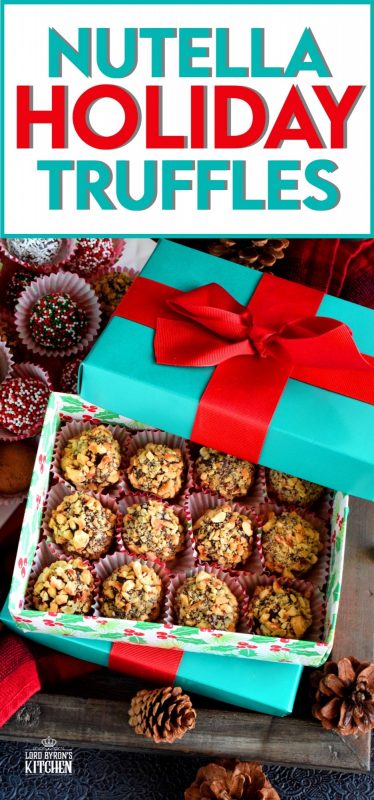
MORE CHRISTMAS CONFECTIONS!
In some cases, we want more than a cookie. That’s why I have two more Christmas-themed collections you might want to consider. The first, is my 12 Bundt Cakes of Christmas, and the second is my 12 Biscotti of Christmas. Click on the image below to see each collection all on one page with links to each recipe!


STORING, PACKAGING, AND FREEZING
If you plan to freeze these Chocolate Dipped Hazelnut Cookies, you certainly can! Once they are completely cooled, pile them into a clean, food-safe container. The container must be freezer friendly! You’ll want to ensure a very tight fitting lid too. (I use these quite often when freezing baked goods.) I like to place a sheet of plastic wrap over the top of the container before pushing the lid on. This helps to create a better seal. The goal is to keep all of that cookie freshness locked in!
You can freeze these cookies for up to three months. If you plan to give the frozen cookies as a gift, I would lay them out onto a wire cooling rack to thaw. Once thawed, pile into cellophane bags and tie with a ribbon, or stack in a cookie tin/box.

CONCLUSION:
As I said, every day I will be posting a new recipe. If you miss one, don’t fret. You can find my entire collection of Christmas Recipes right here! There are over 100 Christmas recipes and counting. There’s something for everyone! Cheers!


Chocolate Dipped Hazelnut Cookies
Ingredients
- 3/4 cup toasted, ground hazelnuts
- 1/2 cup salted butter, softened
- 1/2 cup sugar
- 1 1/2 cups all purpose flour
- 3 tablespoons lukewarm water
- 1 cup semi sweet or milk chocolate chips
- 1/2 teaspoon coconut oil
Instructions
- Place the hazelnuts into a stainless steel skillet. Over medium heat, toast the hazelnuts until fragrant and browned. (Keep the nuts moving around the pan with a spatula. Do not leave nuts unattended; they will burn quickly.)
- Once done, transfer toasted nuts to a dinner plate. Spread out and allow to fully cool for about 5 minutes.
- Next, preheat oven to 375°F. Line a baking sheet with parchment paper or a silicone baking mat. Set aside.
- Once the nuts are fully cooled, transfer to a food processor. Pulse the nuts two or three times until a grainy, sand-like consistency with small chunks are visible. Do not ground too much, or the nuts may release their natural oil and began to turn to nut butter. See pictures in post of how nuts should look.
- In a mixing bowl, beat together the butter and sugar until light and fluffy.
- Add the flour and 1/2 cup of the hazelnuts. Beat until just combined.
- Add one tablespoon of lukewarm water at a time, beating well after each addition. Once a dough is formed, do not add any more water.
- Working with one tablespoon of dough at a time, roll into a ball and place onto the prepared baking sheet. Leave 2 inches of space between each cookie.
- Using a fork, press a crisscross pattern into the top of the cookie. Top each cookie with a sprinkling of the remaining ground hazelnuts.
- Bake for 12 minutes. Remove from oven and allow to cool for 3 minutes before transferring to a wire cooling rack to finish cooling.
- Place the chocolate into a microwave-safe bowl. (If you want a thick chocolate coating, skip the addition of the coconut oil. If you want a thinner chocolate, add the coconut oil now.) On medium power, microwave the chocolate for 30 seconds. Remove and stir until smooth. You may need to microwave for another 5-10 seconds, depending on your microwave.
- Dip each cookie halfway into the chocolate by lowering the cookie straight down into the chocolate and lifting straight up. Gently shake off the excess and lay cookie onto parchment-lined baking sheet.
- Allow the chocolate to fully set and harden before storing. You can speed this up by placing them in the fridge for an hour or so.


Leave a Reply