
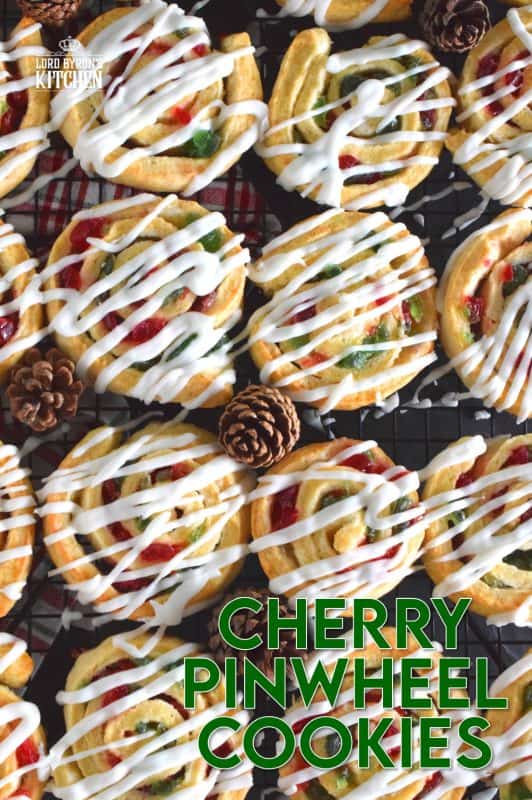
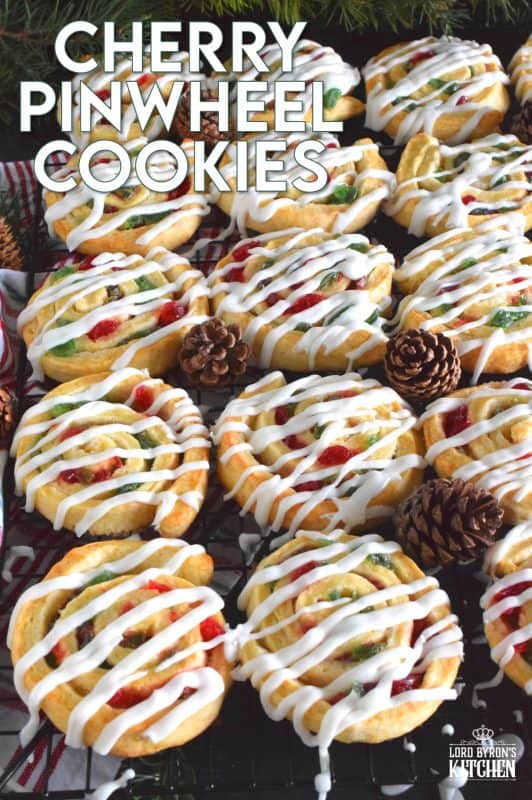
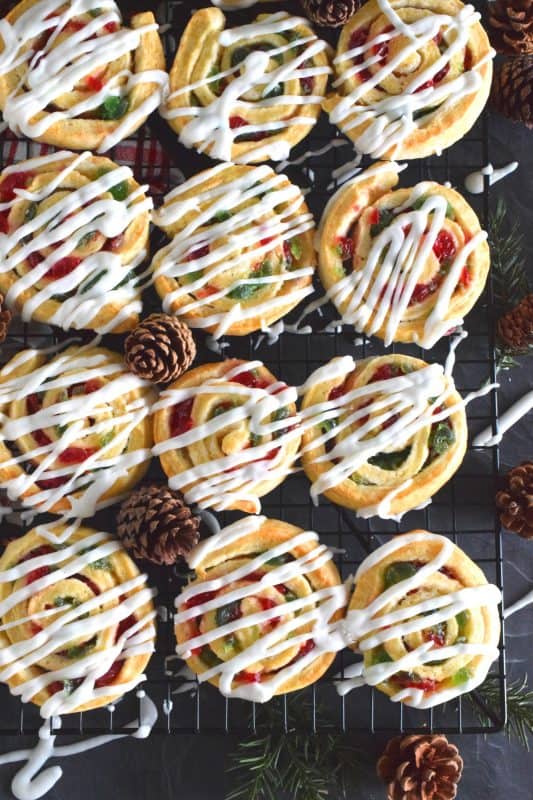
One of my favourite Christmas ingredients is being put to great use today! Cherry Pinwheel Cookies are made with a light, biscuit-like dough and rolled with red and green candied cherries. Drizzled with a basic sweet icing, these are absolutely delicious and very festive too!
If you have been reading Lord Byron’s Kitchen for some time, you will have read numerous times that most of the cooking and baking you see here is packaged up and shared with neighbours. That could not be more true than when it comes to Christmas cookies. But, that was not the case at all with these Cherry Pinwheel Cookies. We didn’t share them at all!
Despite the fact that not only is it always a good idea to share things with family, friends, and neighbours, it rings even more true at Christmastime! But, just this once, we were totally greedy and kept these all for us. Believe it or not, based on how they looked, I was not completely convinced that they would make an appearance in this series. After some convincing by John.e, I decided to include them. Of all the cookies in this series – so far, anyway! – this one was my favourite.
In order for you to love this one as much as we did, you will need to like cookies that are more like a biscuit than a soft, chewy cookie. And, you must love candied cherries – there are a lot of them in this recipe! But, the dough is not sweet at all, so the sweetness of the cherries is quite mellow overall.
Make your own online recipe box!
Click the in the lower right corner of your screen
& follow the quick and easy instructions!
INGREDIENTS NEEDED FOR THIS RECIPE:
There are three parts to this recipe, and each one of them requires a few ingredients. First, there is the dough, followed by the filling, and finally, there is the assembly/rolling itself. I’ll break down the ingredients in those three sections.
DOUGH INGREDIENTS:
- Butter – The butter must be softened and completely at room temperature. You can use salted or unsalted butter. If you use salted butter, halve the amount of added salt further down this list.
- Sugar – Not much sugar is needed for the dough. Most of the sweetness is in the filling.
- Egg – This is used to bind the dough.
- Milk – Like the egg, this is used to bind and moisten the dough.
- Vanilla Extract – For flavouring.
- All Purpose Flour
- Baking Powder – There seems like a lot of this, and there is, but it is needed and it works!
- Salt

FILLING INGREDIENTS:
- Butter – Yes, more butter! In this case, the butter is the glue that holds the other filling ingredients in place. When it melts in the oven, it melts the sugar and creates a sticky, sweet center.
- Sugar – This is where the sweetness comes from.
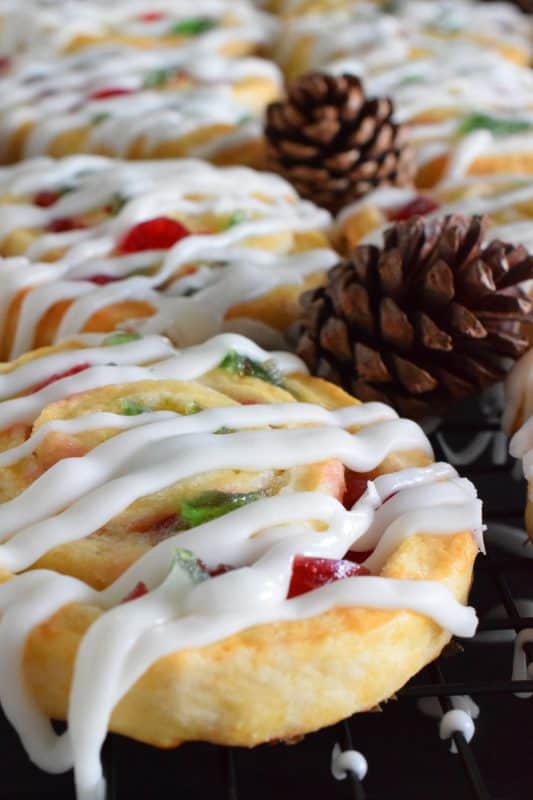
- Candied Cherries – Lots of them! I’m using both red and green cherries.
ASSEMBLY INGREDIENTS:
- Egg – You will need one large egg. It is used to brush the top of the rolls just before you bake them. It will help to brown them, making them look even prettier.
- Water – This will thin the egg wash.
Looking For More Christmas Confections?
Lord Byron’s Kitchen has more than enough to satisfy your sweet tooth! Click on the links below to see a countdown series of holiday recipes from that category!
HOW TO MAKE CHERRY PINWHEEL COOKIES:
As previously mentioned, there are three steps to this recipe. I’ve broken each step down into its own section so that the instructions are clear and concise.
PREPARING THE DOUGH
The first thing you will want to do is to prepare the dough. To do this, using only the amounts found in the dough ingredient list, add the butter and sugar to a large mixing bowl and beat with a mixer until well combined. Add the egg and beat into the butter and sugar. Next, add the milk and vanilla extract and beat those in too.
Sift together the flour, baking powder, and salt. Add the dry ingredients into the wet mixture and beat well to combine. When a dough is formed, pat it into a ball and place the dough into the fridge to cool for 15 minutes. In the meantime, preheat your oven to 400 degrees F. Line a baking sheet with parchment paper or a silicone baking mat and set aside. While the dough is cooling, measure out the butter and sugar. Also, chop the candied cherries so that they are ready to go. Set those aside for now.
ROLLING AND SLICING – THE FUN PART!
Once the dough has cooled, roll it out on a lightly floured surface to 1/16th of an inch thick. Try to get the dough into a square shape – it won’t be perfect! Use a pastry brush to brush the butter over the surface of the rolled dough. Sprinkle over the sugar and top that with the candied cherries. Carefully lift the dough slightly from one end and begin rolling the dough into a long cylinder, working your way down the side of the rolled dough. Try to roll as tightly as possible without breaking or tearing the dough.
Once rolled, use a sharp knife to slice the rolled dough into 1/3 inch slices. Place onto the prepared baking sheet, leaving two inches of space between each roll. Next, whisk together the egg and the water. Use a pastry brush to lightly brush the top and side of each roll. Bake for 10 minutes. Remove from the oven and allow to cool on the baking sheet for 2-3 minutes. Transfer to a wire cooling rack to finish cooling.

CANDIED CHERRIES – WHAT ARE THEY AND WHERE TO GET THEM!
Some people call them candied cherries; other people call them glace cherries. Guess what, Dear Reader!? They’re the same thing! I was always led to believe that glace cherries were the smaller diced cherries that you would find in a fruitcake, but that’s not the case. Glace cherries (as well as candied cherries) are indeed real cherries contrary to popular belief!
Candied cherries are basically maraschino cherries that have been processed in a thick, sugary syrup. They become intensely sweet and take on a chewy texture, which works very well in baked goods. You can find candied cherries anywhere, but I always get mine from Paradise Inc., out of Florida. They are the brightest and plumpest cherries I’ve ever used. They will ship them right to your door too. You can find Paradise cherries here.
In this particular version, I added two whole cups of candied cherries. I love candied cherries and I love how the red and green colours pop when you bite into them. They’re perfect for Christmas! When I’m looking to use candied cherries, Paradise Fruit Company is my go-to source. They have the brightest, most plump, most perfectly round red and green cherries. You can get all of their products online. Be sure to check out the website!
Lord Byron’s Annual Christmas Cookie Series
Did you know that Lord Byron’s Kitchen has been sharing a 24 Cookies of Christmas Series for the past several years? Click on the links below to see all of the recipes from each series on one page!
ICING DRIZZLE
The icing drizzle that you see on top of these Cherry Pinwheel Cookies is completely optional. When it comes to icing drizzle on cookies, I’m a huge fan of it. I know that there are some others who are not. So, you do whatever suits your personal tastes. One thing is for sure, these pinwheel cookies are not overly sweet at all, so the icing drizzle adds just enough sweetness.
Preparing icing drizzle is quite easy. All you need is confectioner’s sugar and milk. You want to make it so that the icing is not too thick or too thin. If it’s too thick, it’s hard to get a nice consistent drizzle and the end result will look rather messy. If you make it too thin, it just basically spreads out all over the cookie. It will still taste great, but it won’t look great.
When you prepare the icing, scoop some up with a spoon and let it pour back down into the bowl. The ribbon-like pour should cascade onto the bowl of icing and the ribbons should be visible for at least 8-10 seconds before they start to disappear back into the bowl of icing. That’s what you know it’s ready! Alternatively, you can use lemon juice rather than milk for a pop of fresh flavour!
STORING, PACKAGING, & FREEZING
When it comes to most cookies, they taste best at room temperature, but they don’t hold up well to being left out on your countertop for long periods of time. Cookies will stay fresh in a cookie jar or food-safe container with a lid for 3-5 days if left to sit on your kitchen countertop. You can store them in a food-safe container in your fridge. When you want one, two, or half a dozen, take them out of the container and place them in a single layer on a plate. Let them sit at room temperature for 5 minutes and they’re ready!
If you plan to freeze your Cherry Pinwheel Cookies, you certainly can! Once they are completely cooled, pile them into a clean, food-safe container. The container must be freezer friendly! You’ll want to ensure a very tight fitting lid too. I use these quite often when freezing baked goods. I like to place a sheet of plastic wrap over the top of the container before pushing the lid on. This helps to create a better seal. The goal is to keep all of that freshness locked in!
If you iced the cookies, and you need to stack them in your container, lay a sheet of parchment between each layer to prevent sticking. Also, the icing should be completely hardened before you pile them into the container. You can freeze these cookies for up to three months. If you plan to give previously frozen cookies as a gift, I would lay them out onto a wire cooling rack to thaw completely. Once thawed, pile into cellophane bags and tie with a ribbon, or stack in a cookie tin/box.

QUESTIONS?
If I have not answered all of your questions in the text above, don’t hesitate to reach out to me! You can contact me by sending me a message in the comments section further down the page. I will try my best to answer as soon as possible! You might reach me even faster by following me on Facebook and sending me a private message. Scroll down to follow me and never miss another recipe!
Finally, as I stated previously, every day I will be posting a new recipe. If you miss one, don’t fret. You can find my entire collection of Christmas Recipes right here! There are over 100 Christmas recipes and counting. There’s something for everyone! Cheers!
Do You Like This Recipe?
You should consider trying these other delicious recipes too!


Cherry Pinwheel Cookies
Ingredients
For the Dough:
- 1/4 cup butter, softened
- 1/4 cup sugar
- 1 large egg
- 3/4 cup milk
- 1 teaspoon vanilla extract
- 2 1/2 cups all-purpose flour
- 4 teaspoons baking powder
- 1/2 teaspoon salt
For the Filling:
- 1/2 cup butter, softened
- 3/4 cup sugar
- 2 cups candied cherries, chopped
Assembly:
- 1 large egg
- 1 tablespoon water
Optional Icing Drizzle:
- 2 cups confectioner's sugar
- 3-4 tablespoons milk
Instructions
For the Dough:
- Preheat oven to 400 degrees F. Line a baking sheet with parchment paper or a silicone baking mat and set aside.
- In a large mixing bowl, use a hand-held mixer to beat together the butter and the sugar until well incorporated.
- Add the egg and beat into the butter and sugar.
- Next, add the milk and vanilla extract. Beat to combine.
- Sift together the flour, baking powder, and salt.
- Add the dry ingredients into the wet mixture and beat well to combine.
- When a dough is formed, pat into a ball and place the dough into the fridge to cool for 15 minutes.
Assembly:
- Once the dough has cooled, roll dough on a lightly floured surface to 1/16th of an inch thick. Try to get the dough into a square shape – it won't be perfect!
- Use a pastry brush to brush the butter over the surface of the rolled dough.
- Sprinkle the sugar over the buttered dough. And, evenly distribute the chopped candied cherries on top of the sugar.
- Carefully lift the dough slightly from one end and begin rolling the dough into a long cylinder, working your way down the side of the rolled dough. Try to roll as tightly as possible without breaking or tearing the dough.
- Once rolled, use a sharp knife to slice the rolled dough into 1/3 inch slices. Place onto the prepared baking sheet, leaving two inches of space between each roll.
- Next, whisk together the egg and the water. Use a pastry brush to lightly brush the top and side of each cinnamon roll.
- Bake for 10 minutes. Remove from oven and allow to cool on the baking sheet for 2-3 minutes. Transfer to a wire cooling rack to finish cooling.
- Once completely cooled, whisk together the confectioner's sugar and milk. Transfer to a Ziploc bag and cut the tip off the bottom of one corner. Gently squeeze the bag, allowing the icing to drizzle out over the rolls. Before packaging for storing, allow icing to completely harden.
Notes
Nutrition
Did you make this recipe?
Upload a photo and tag me so that I can see it!


Mary Lou O'Bertos says
My new favourite Christmas cookie recipe!! I switched the filling sugar to brown sugar, halved the amount of cherries, and omitted the drizzle, and they are still absolutely delectable! The dough is mmmmelt-in-your-mouth, and the whole recipe is easy. Looking forward to trying it out a few more times with different fillings ☺️